> ## Documentation Index
> Fetch the complete documentation index at: https://www.anything.com/docs/llms.txt
> Use this file to discover all available pages before exploring further.
# Login with X (Twitter)
> Let users sign in to your app with their X/Twitter account
Let users sign in to your app with their X/Twitter accounts. They'll share their username, name, profile picture, and email.
You'll need to set up a few things in X first, then add those settings to Anything.
## Before you start
Make sure you have:
An Anything project with [User Accounts](/apps/auth) turned on
Your app running on a custom domain through [Anything's domain setup](/launch/domains)
## Overview
Create an app in X
Add credentials to Anything
Customize the login button
Make sure login works
## X Setup
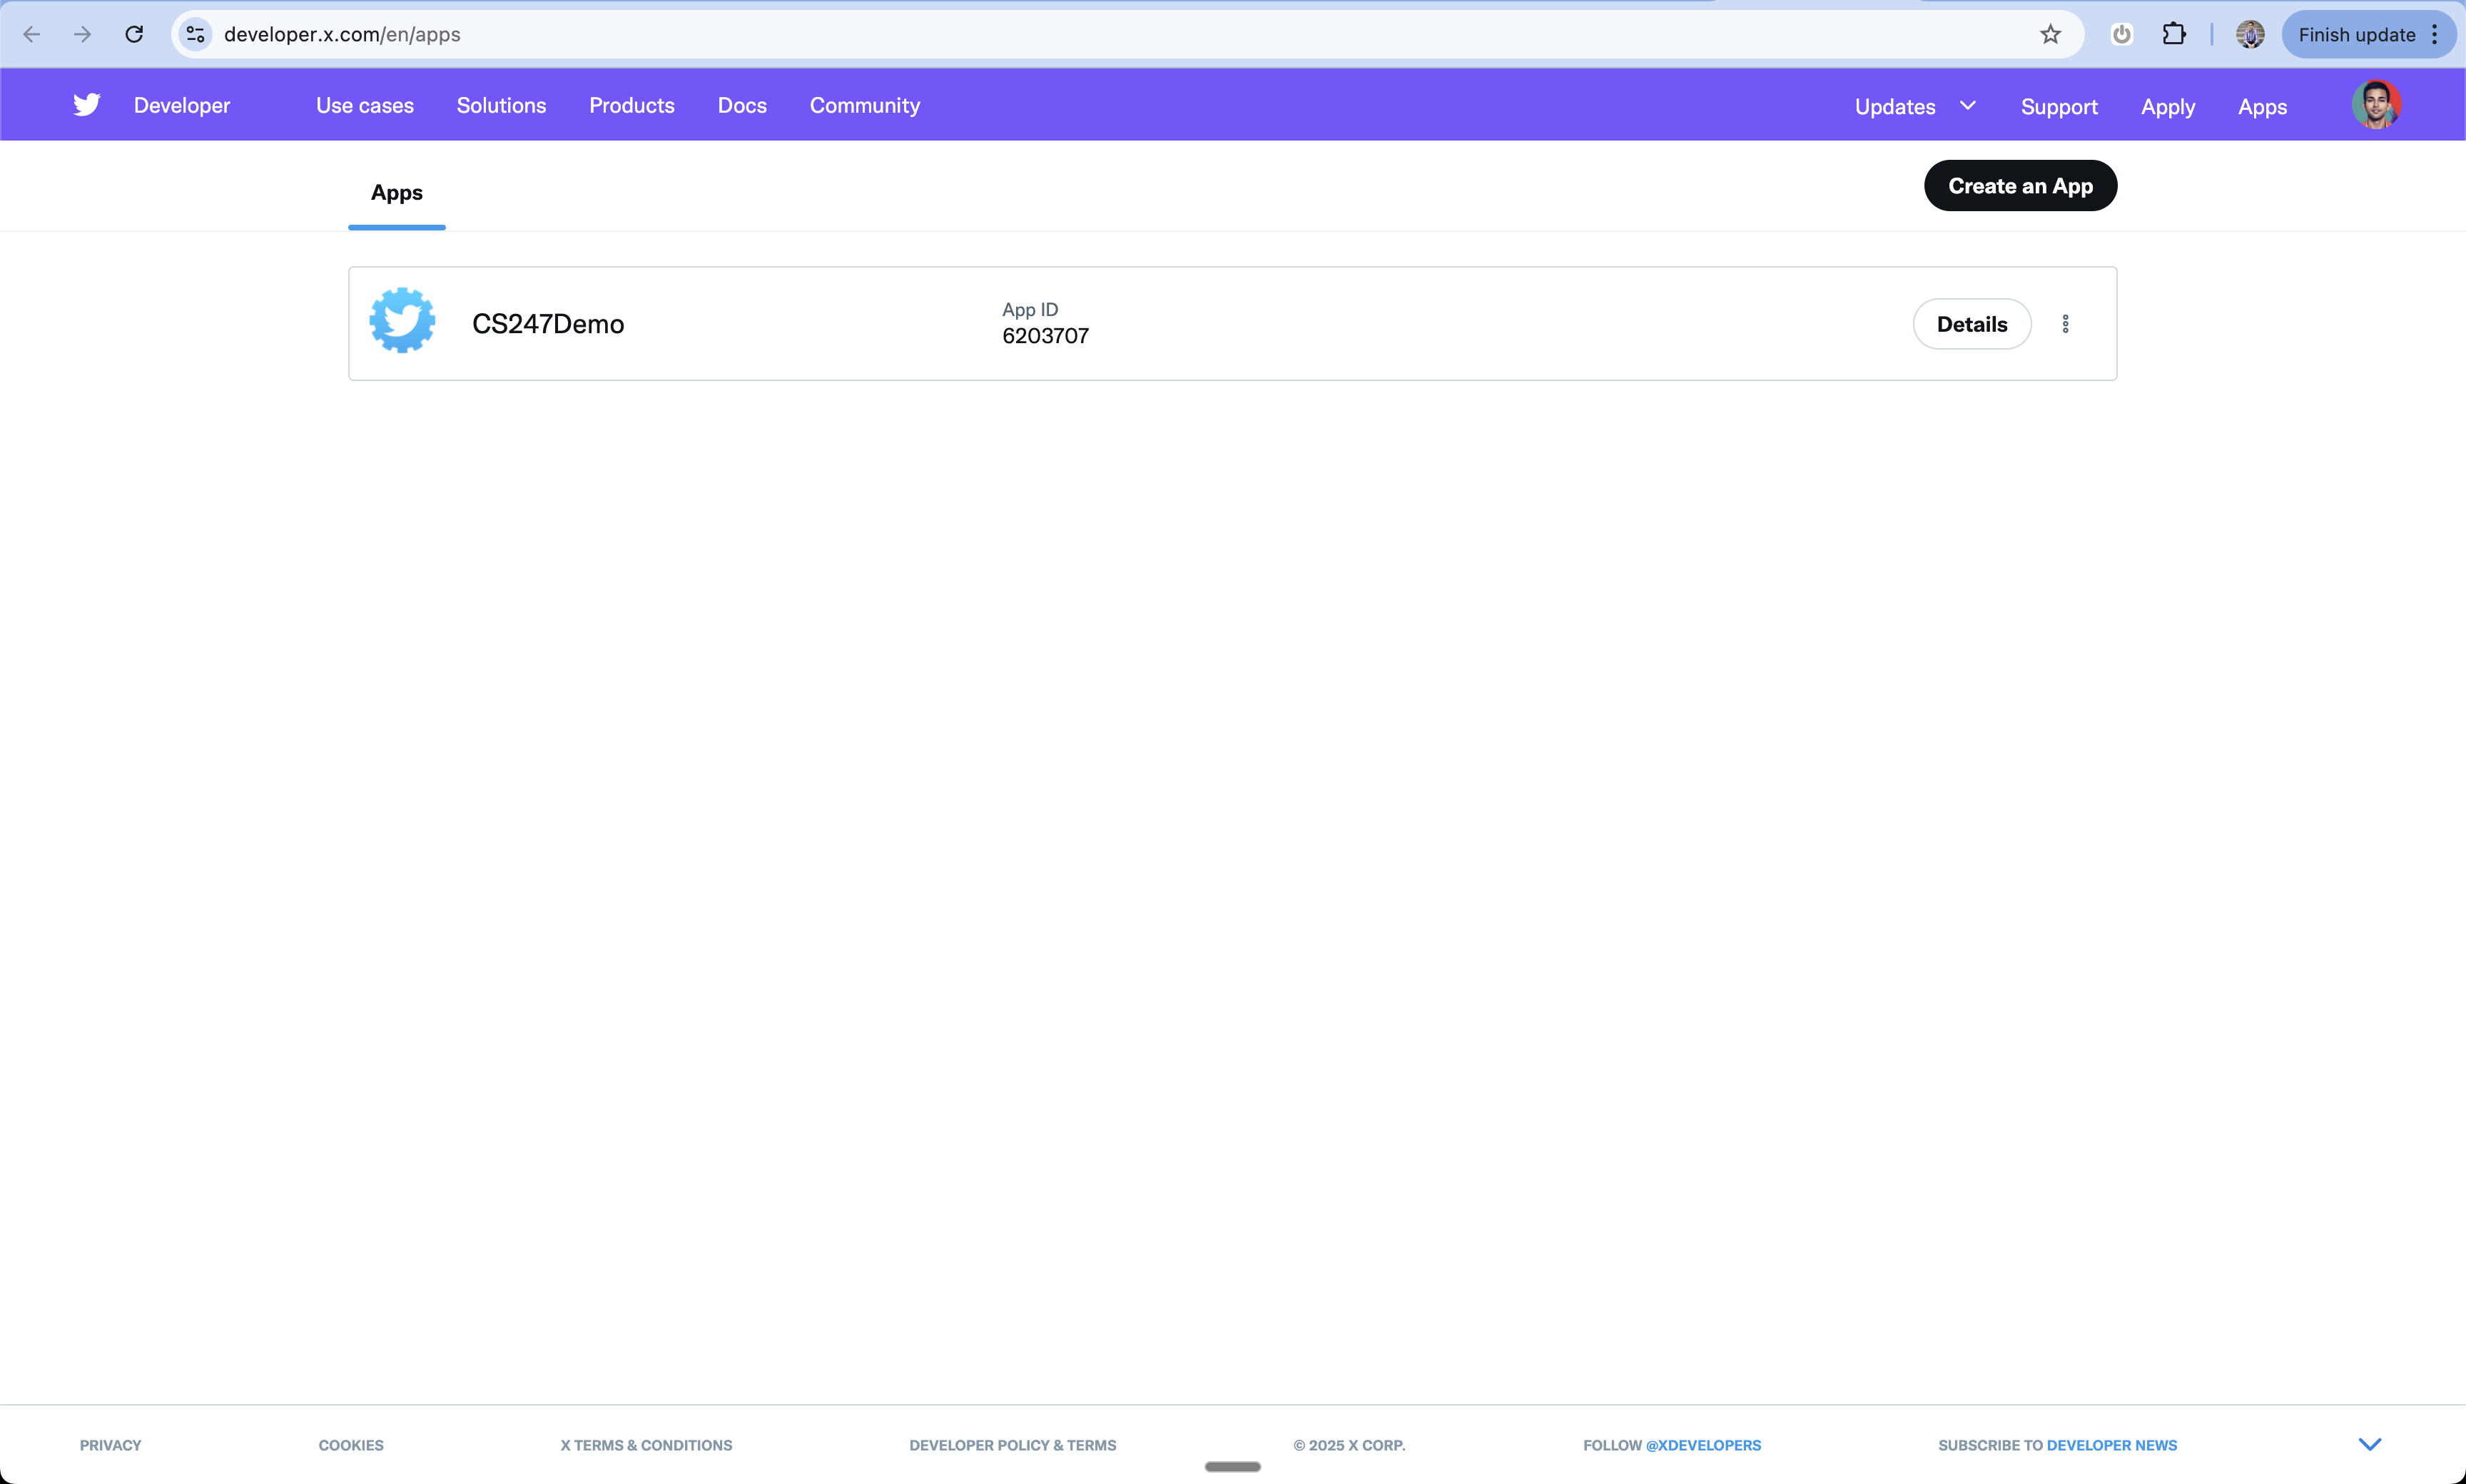
1. Go to [X Developer Portal](https://developer.x.com/en/apps)
2. Sign in with your X account
3. Click "Create an App"
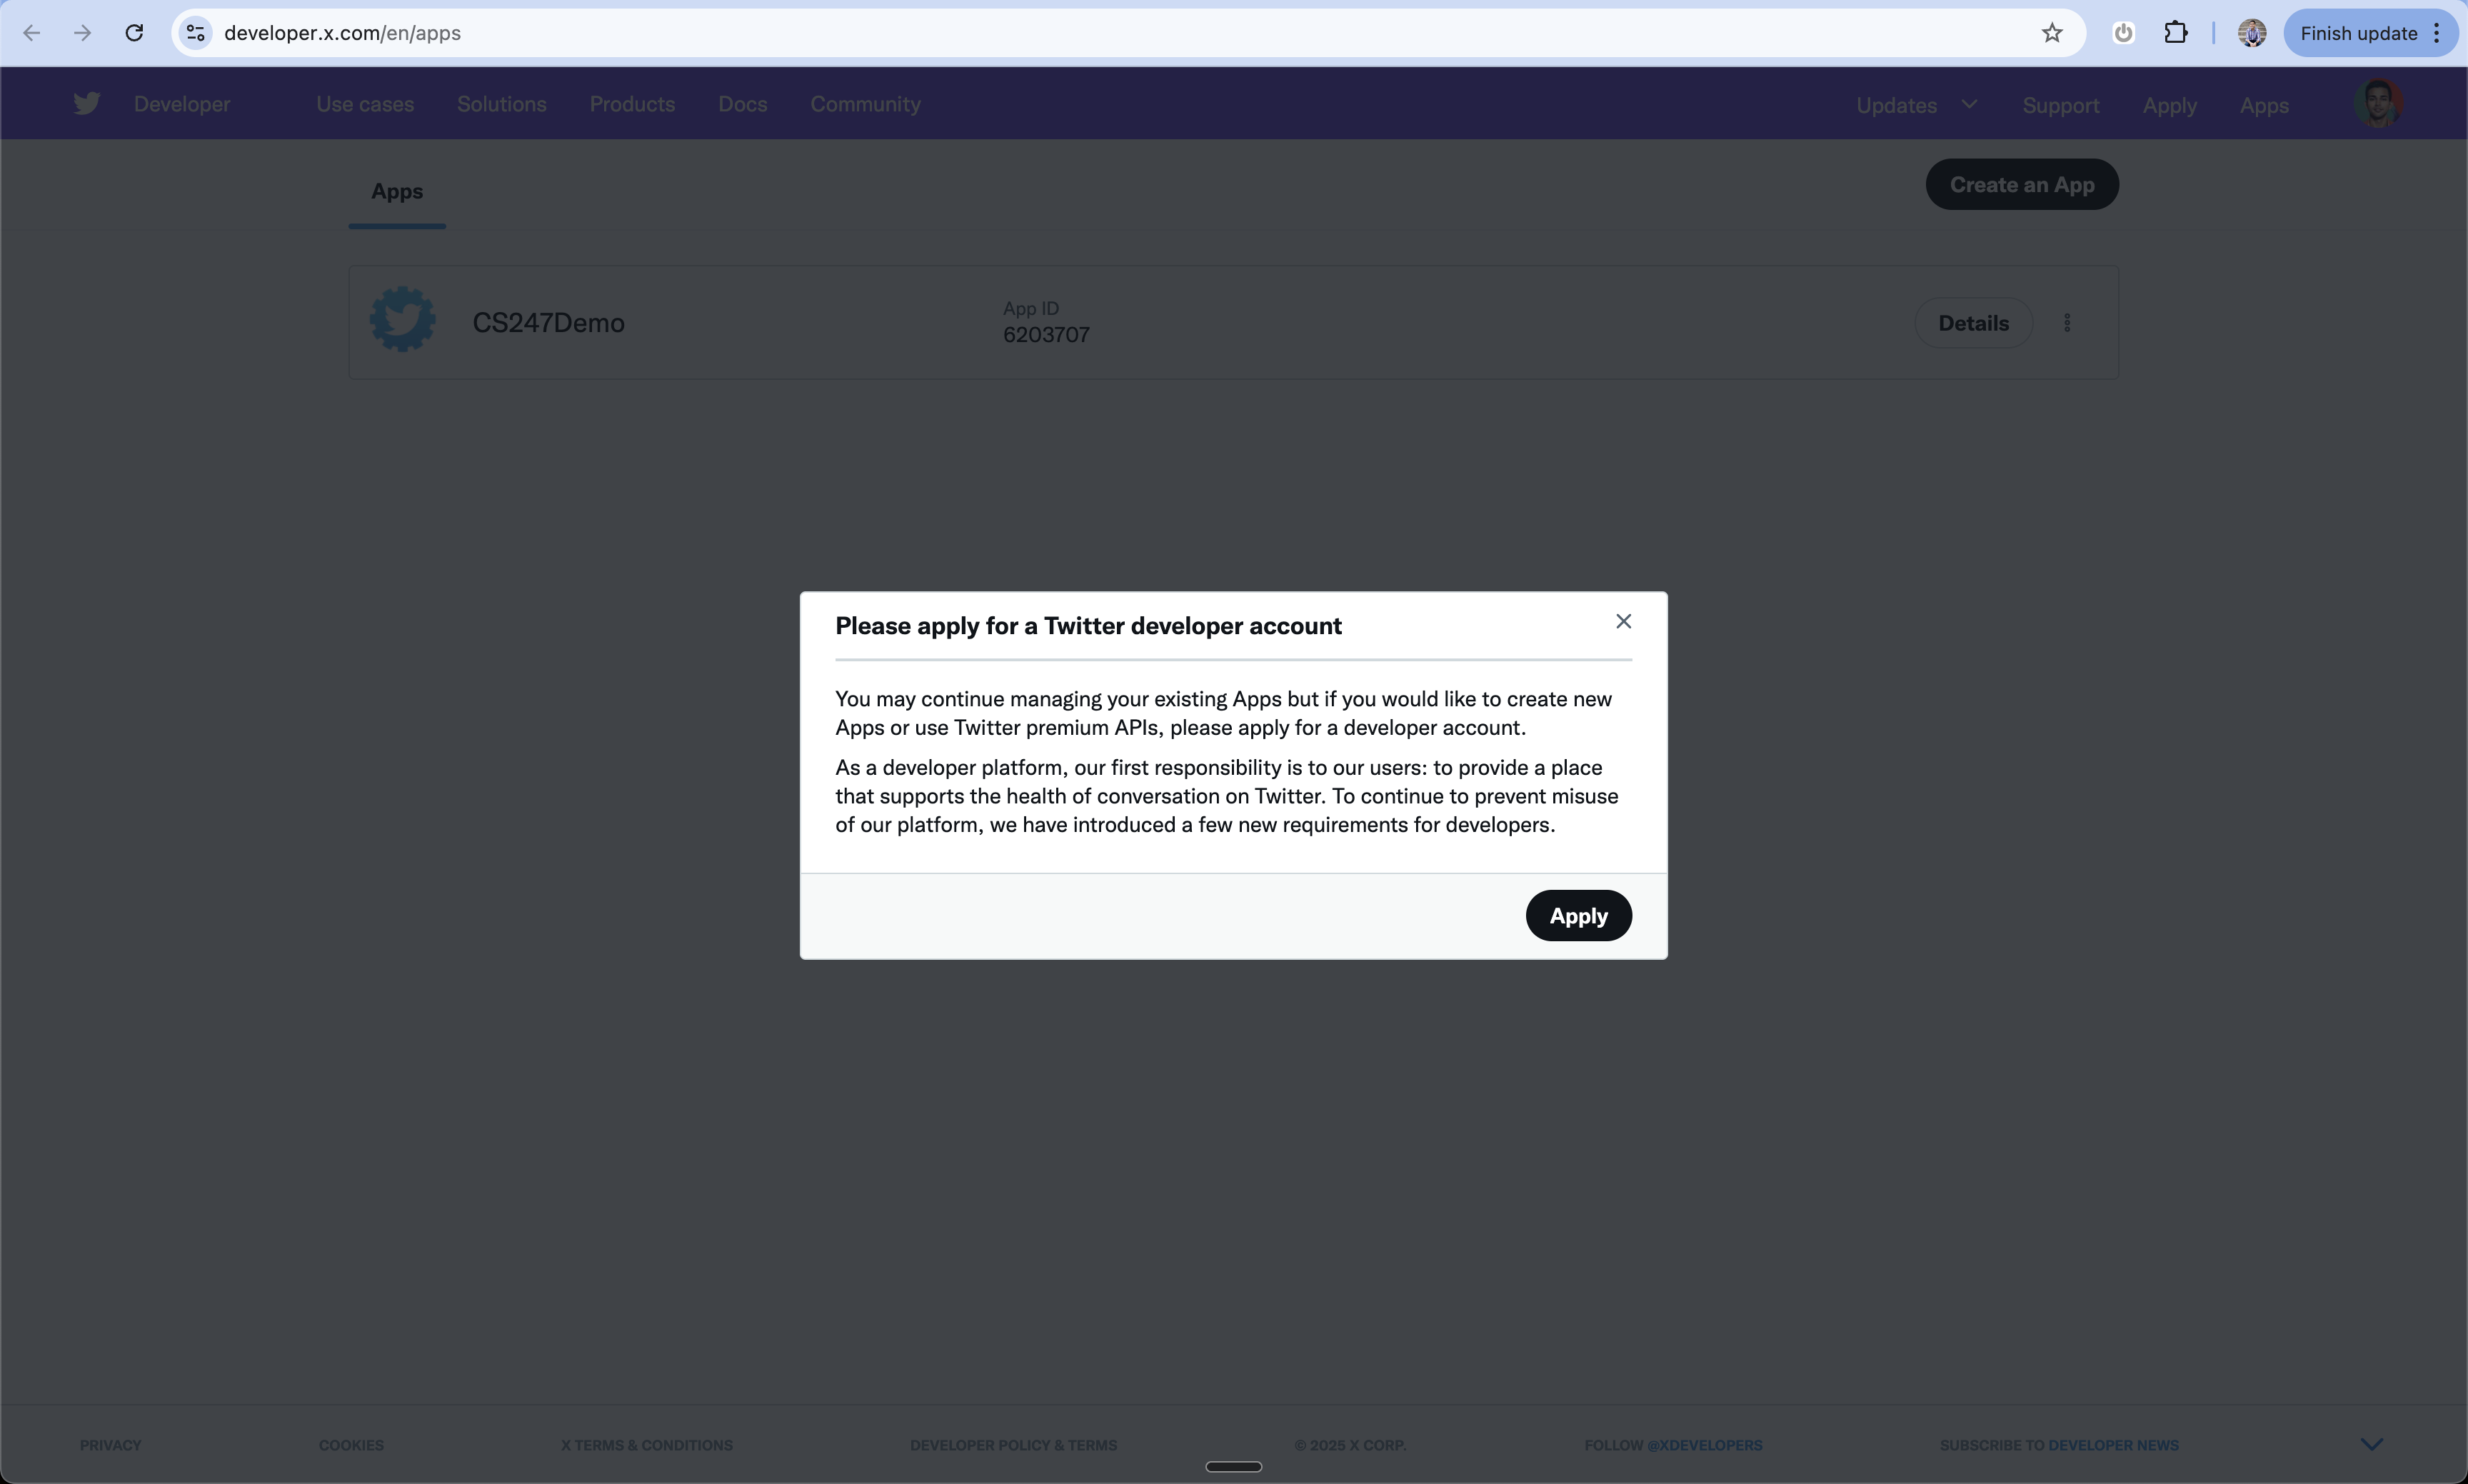
 1. If you don't have a developer account, you'll need to apply
2. Fill out the required information about your use case
3. Submit your application
1. If you don't have a developer account, you'll need to apply
2. Fill out the required information about your use case
3. Submit your application
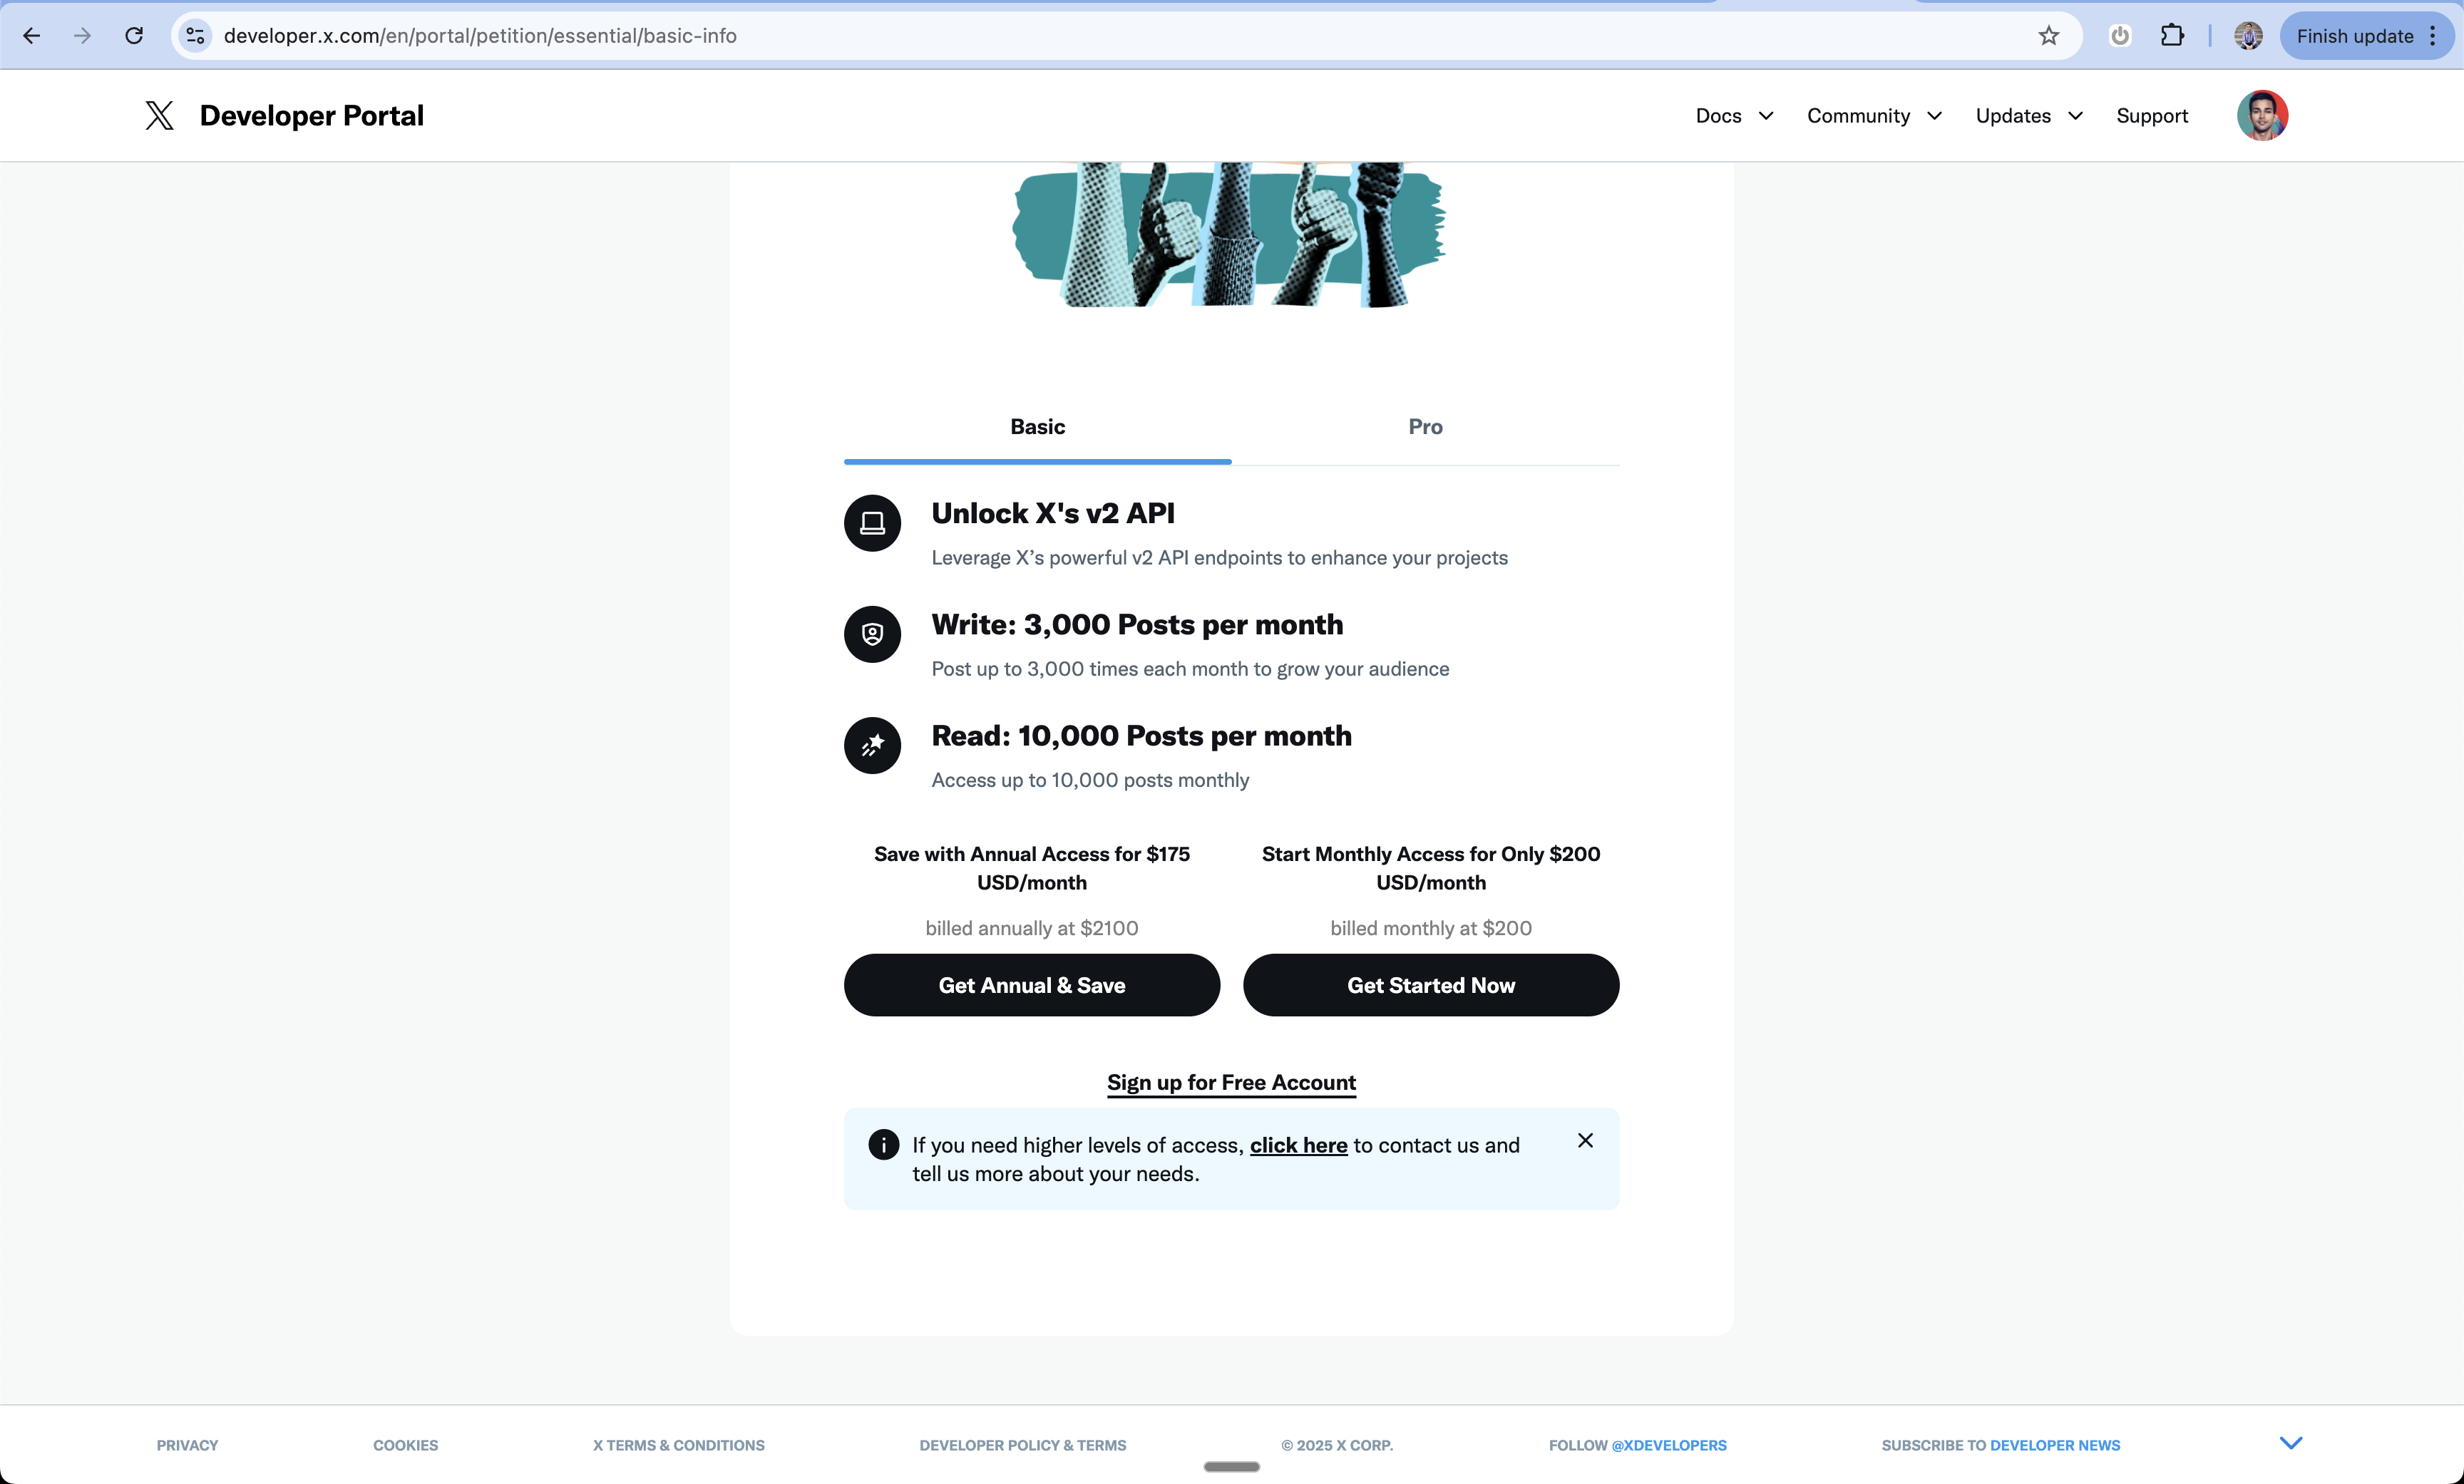
 1. Review the available developer plans
2. You can sign up for a Free account if you prefer
3. Select your plan and continue
1. Review the available developer plans
2. You can sign up for a Free account if you prefer
3. Select your plan and continue
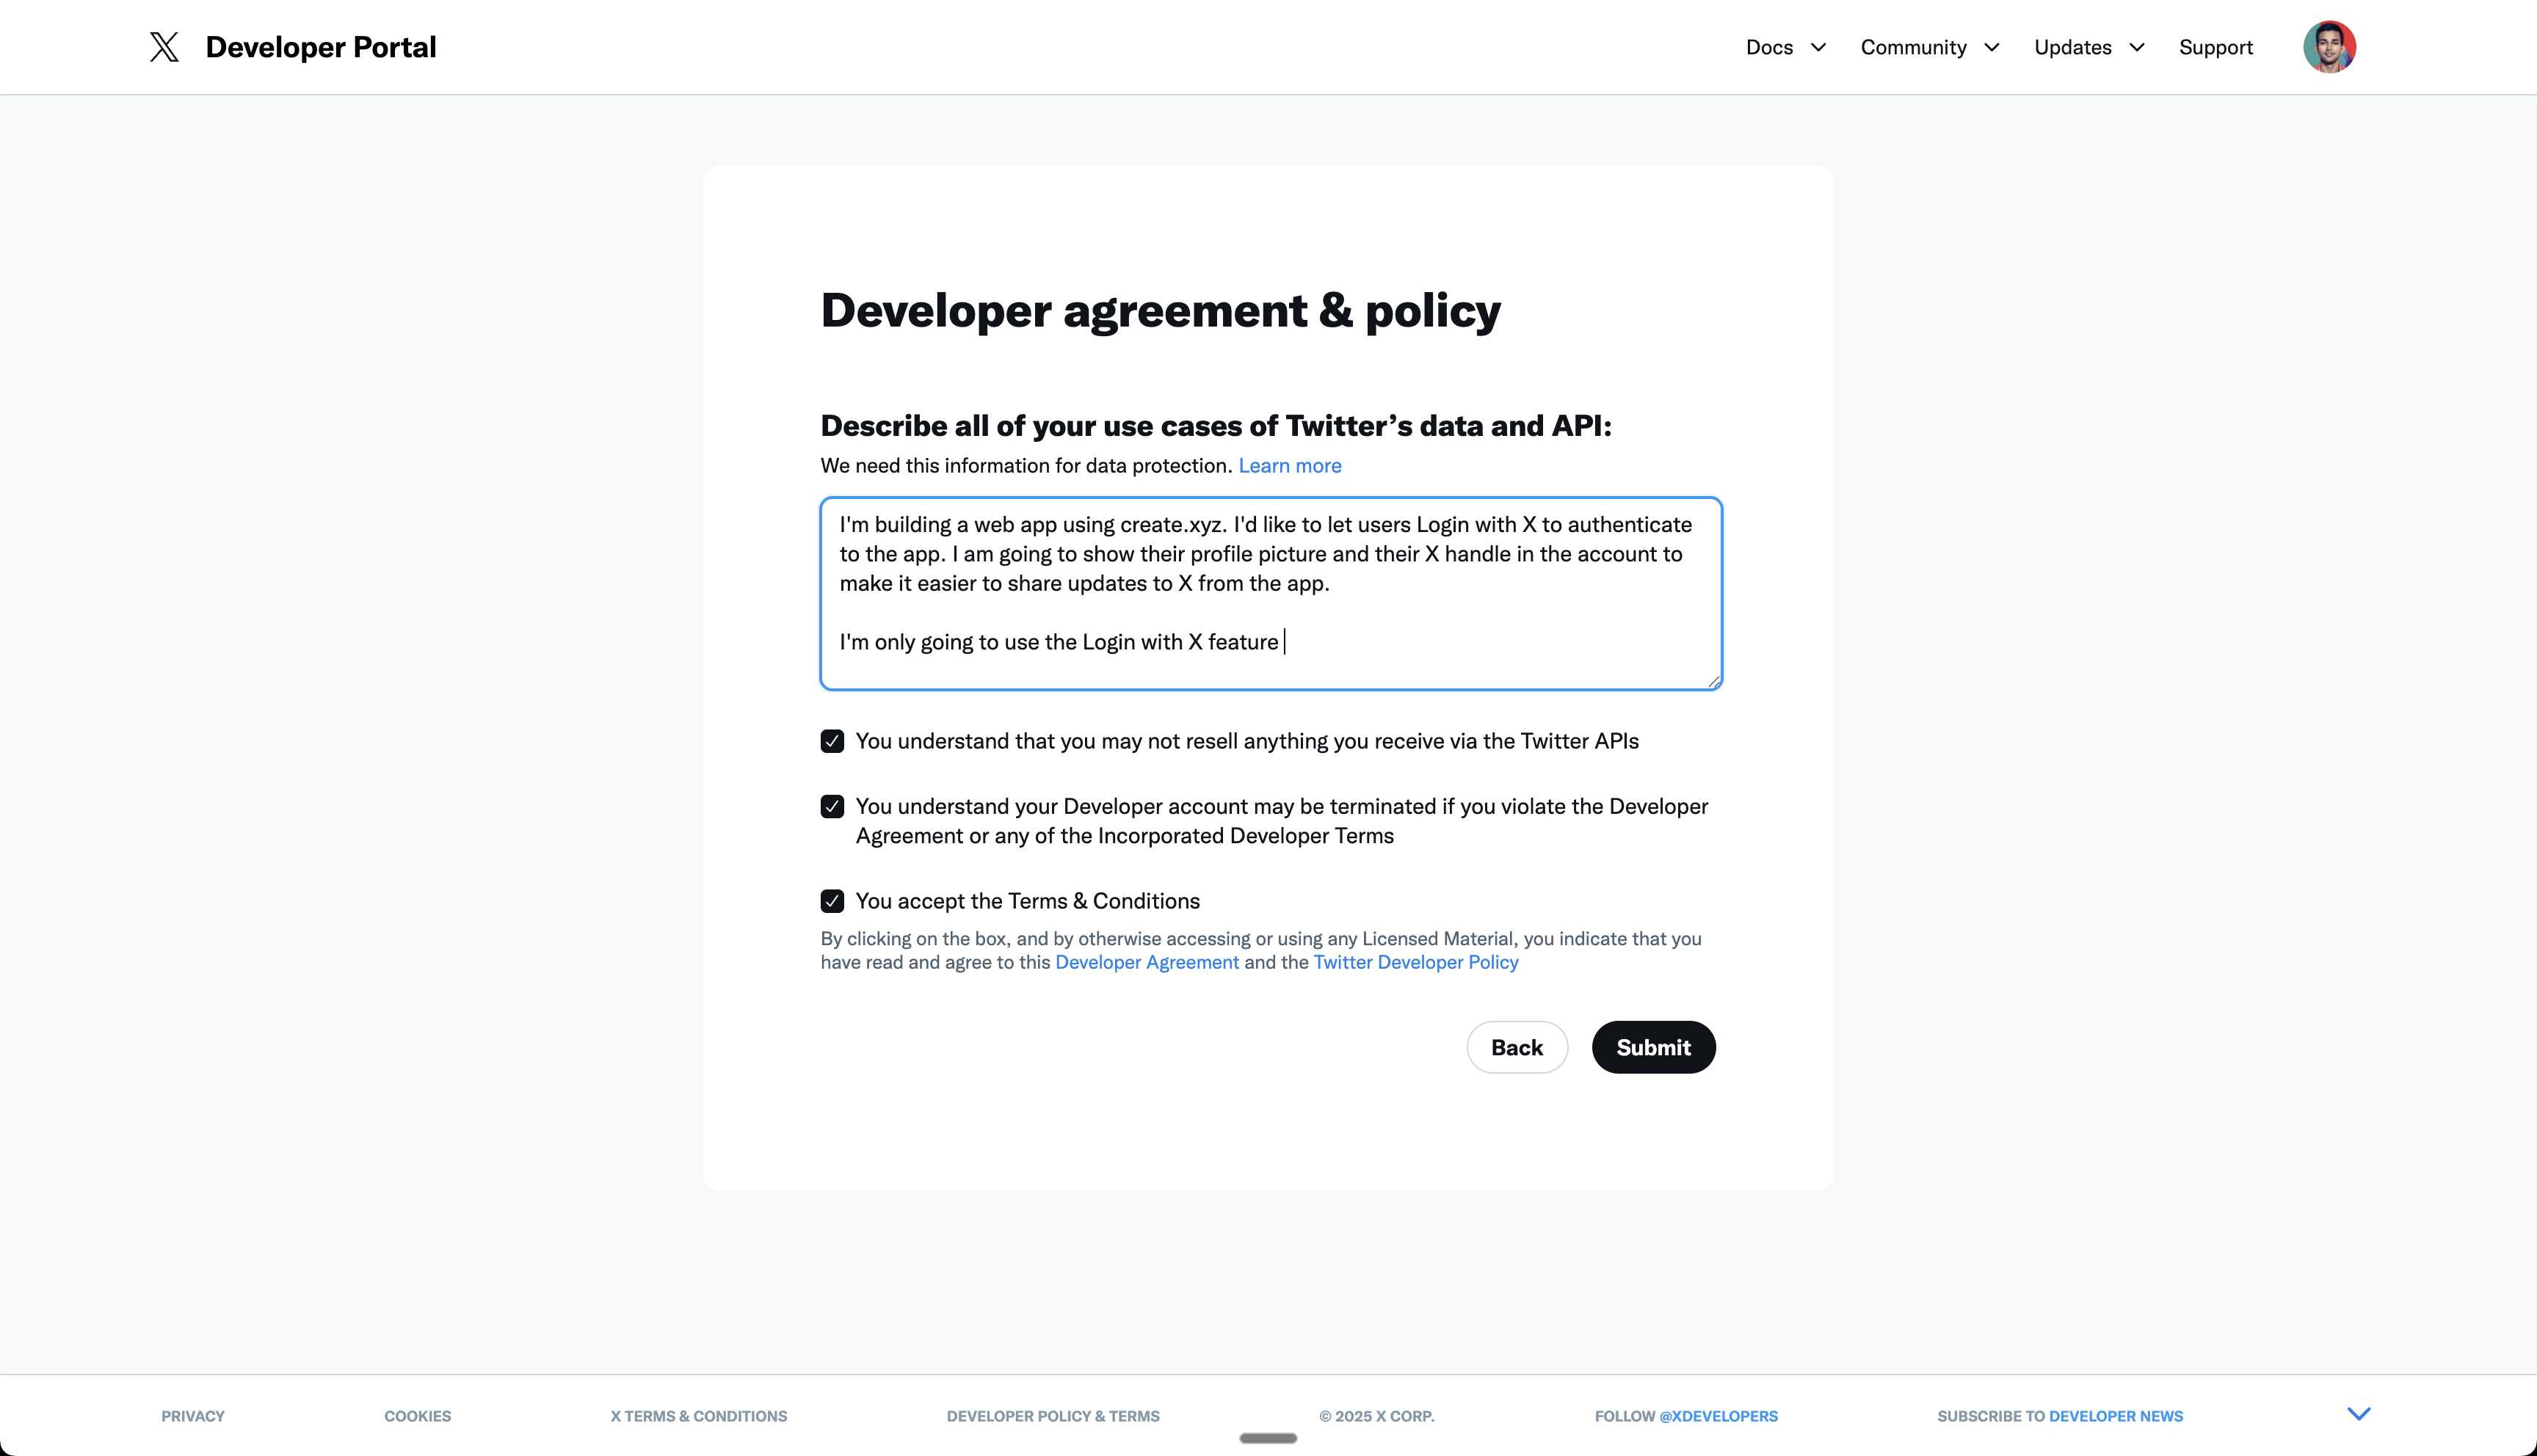
 1. Review the developer terms
2. Describe your app's purpose and that you're using Login with X
3. Accept the terms to proceed
1. Review the developer terms
2. Describe your app's purpose and that you're using Login with X
3. Accept the terms to proceed
 1. Once approved, navigate to your dashboard
2. Click "Create Project" to begin
1. Once approved, navigate to your dashboard
2. Click "Create Project" to begin
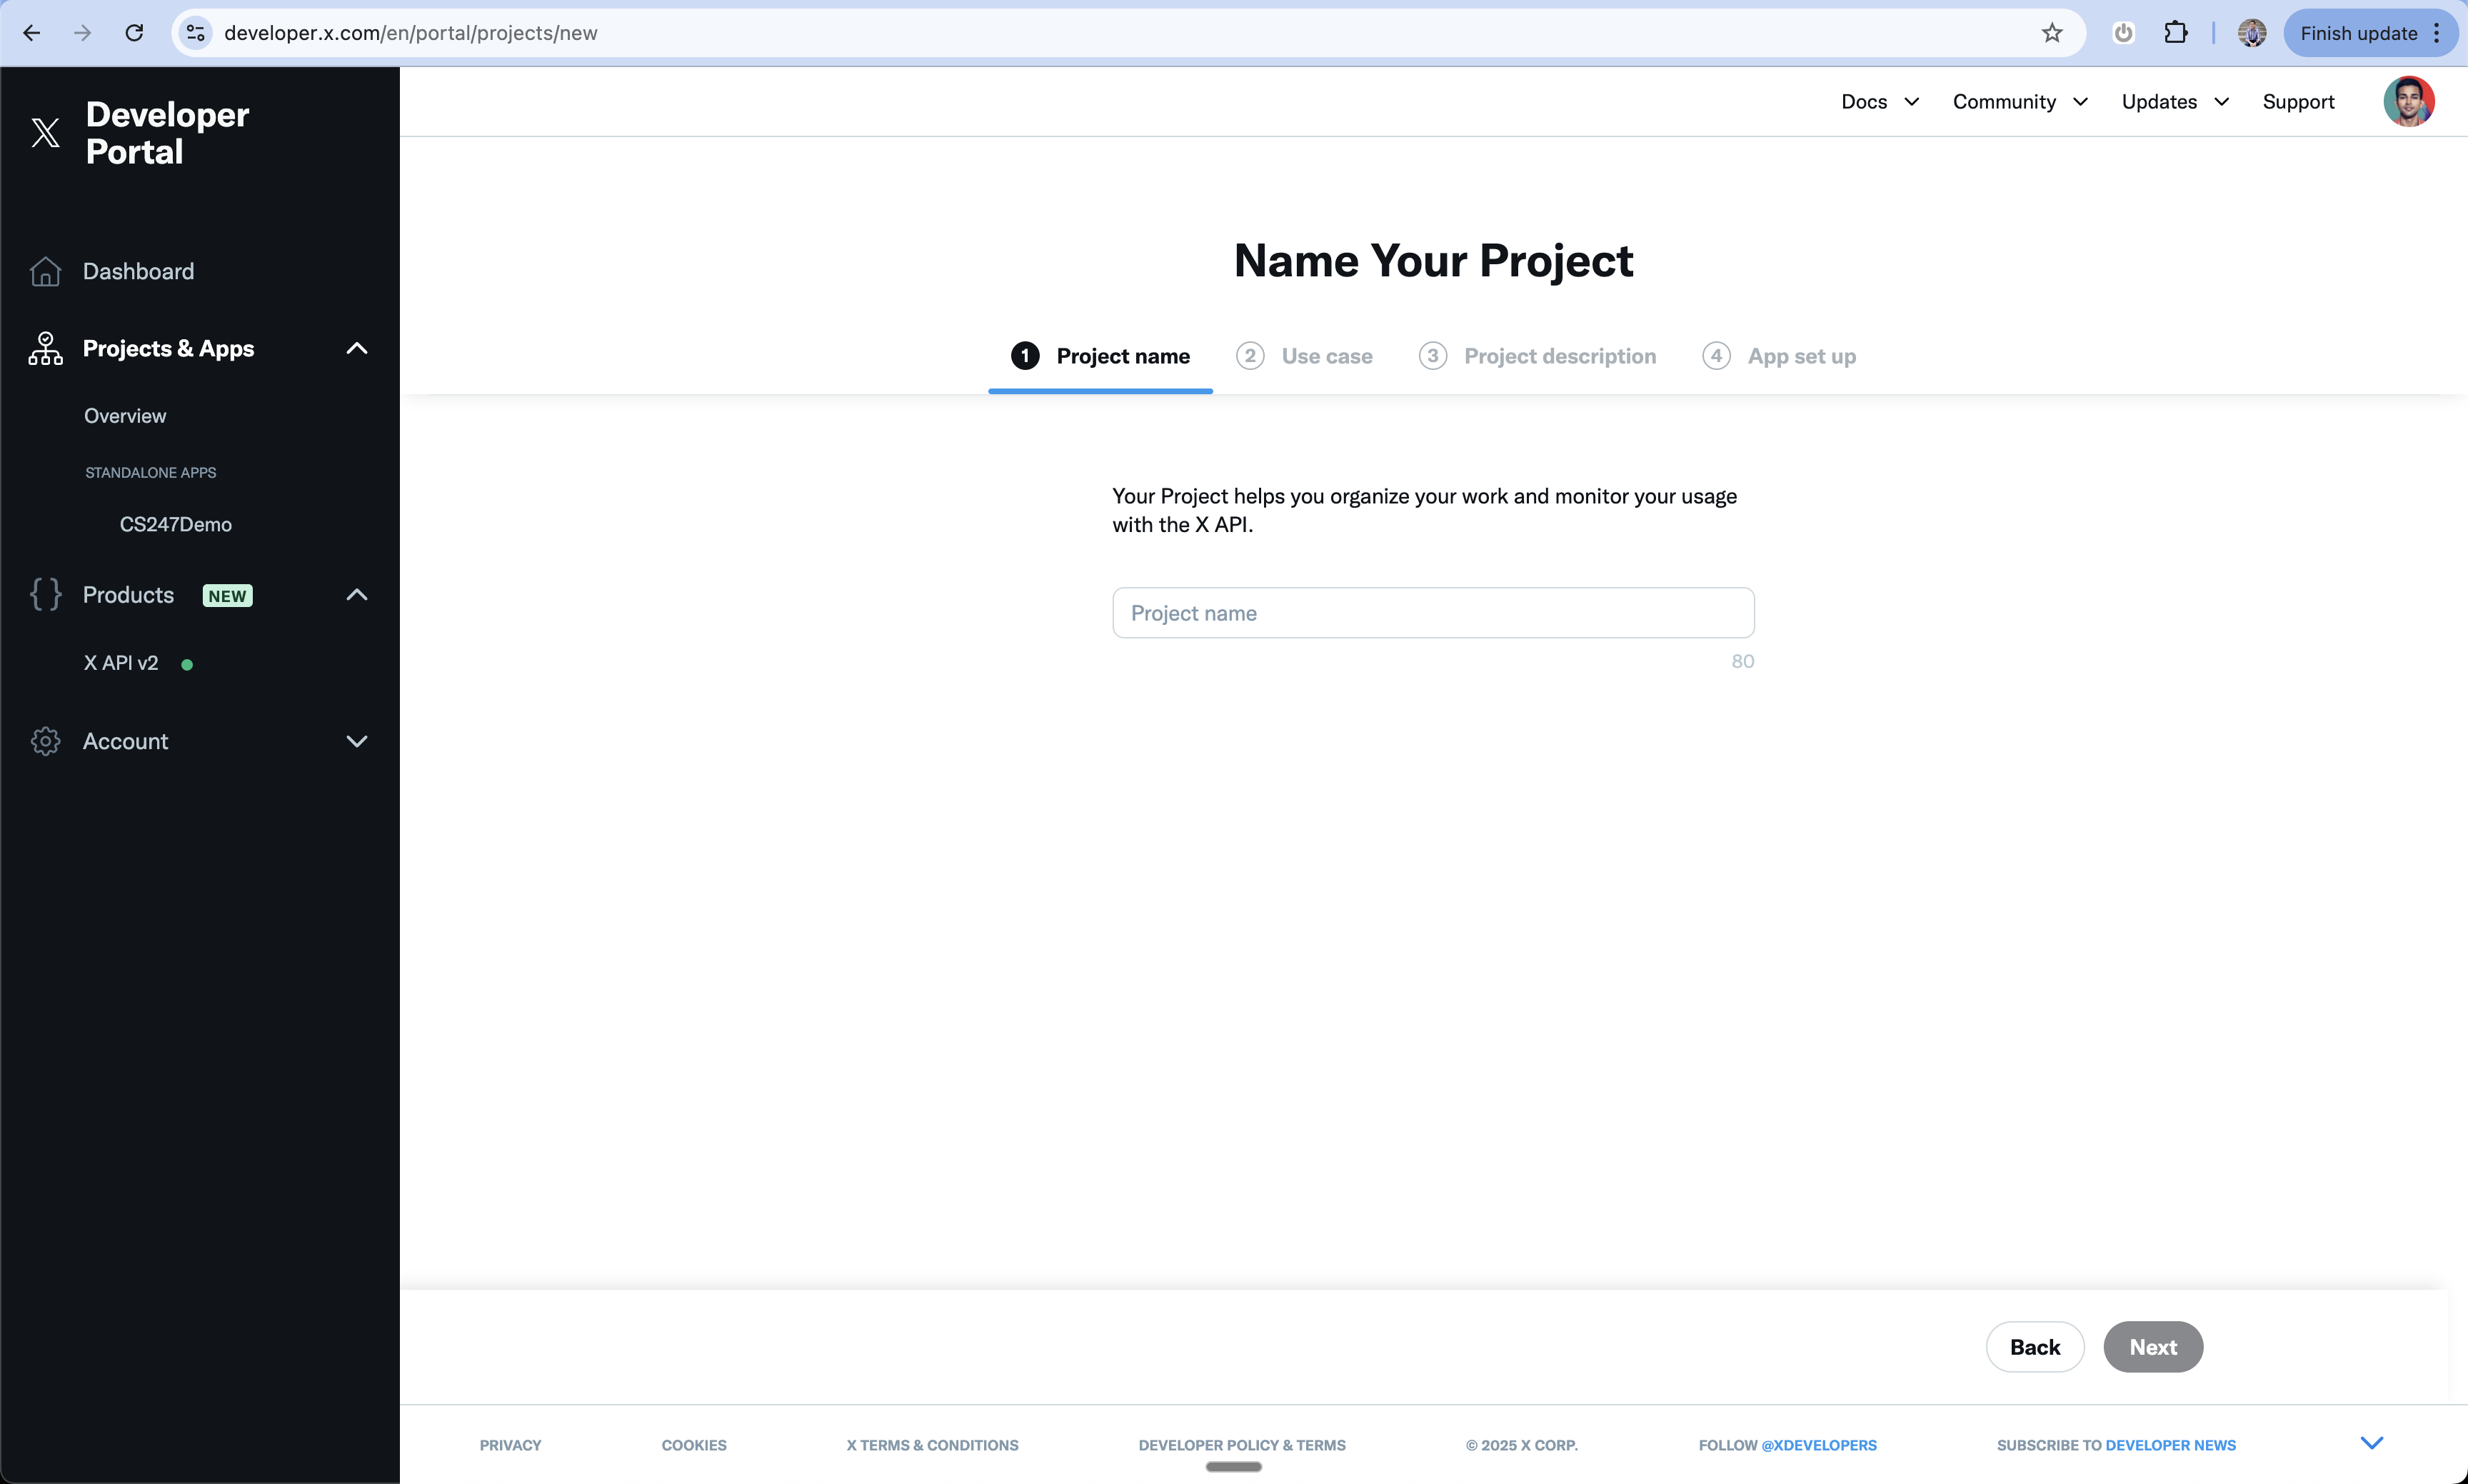 1. Choose a descriptive name for your project
2. This is for internal organization
3. Click continue
1. Choose a descriptive name for your project
2. This is for internal organization
3. Click continue
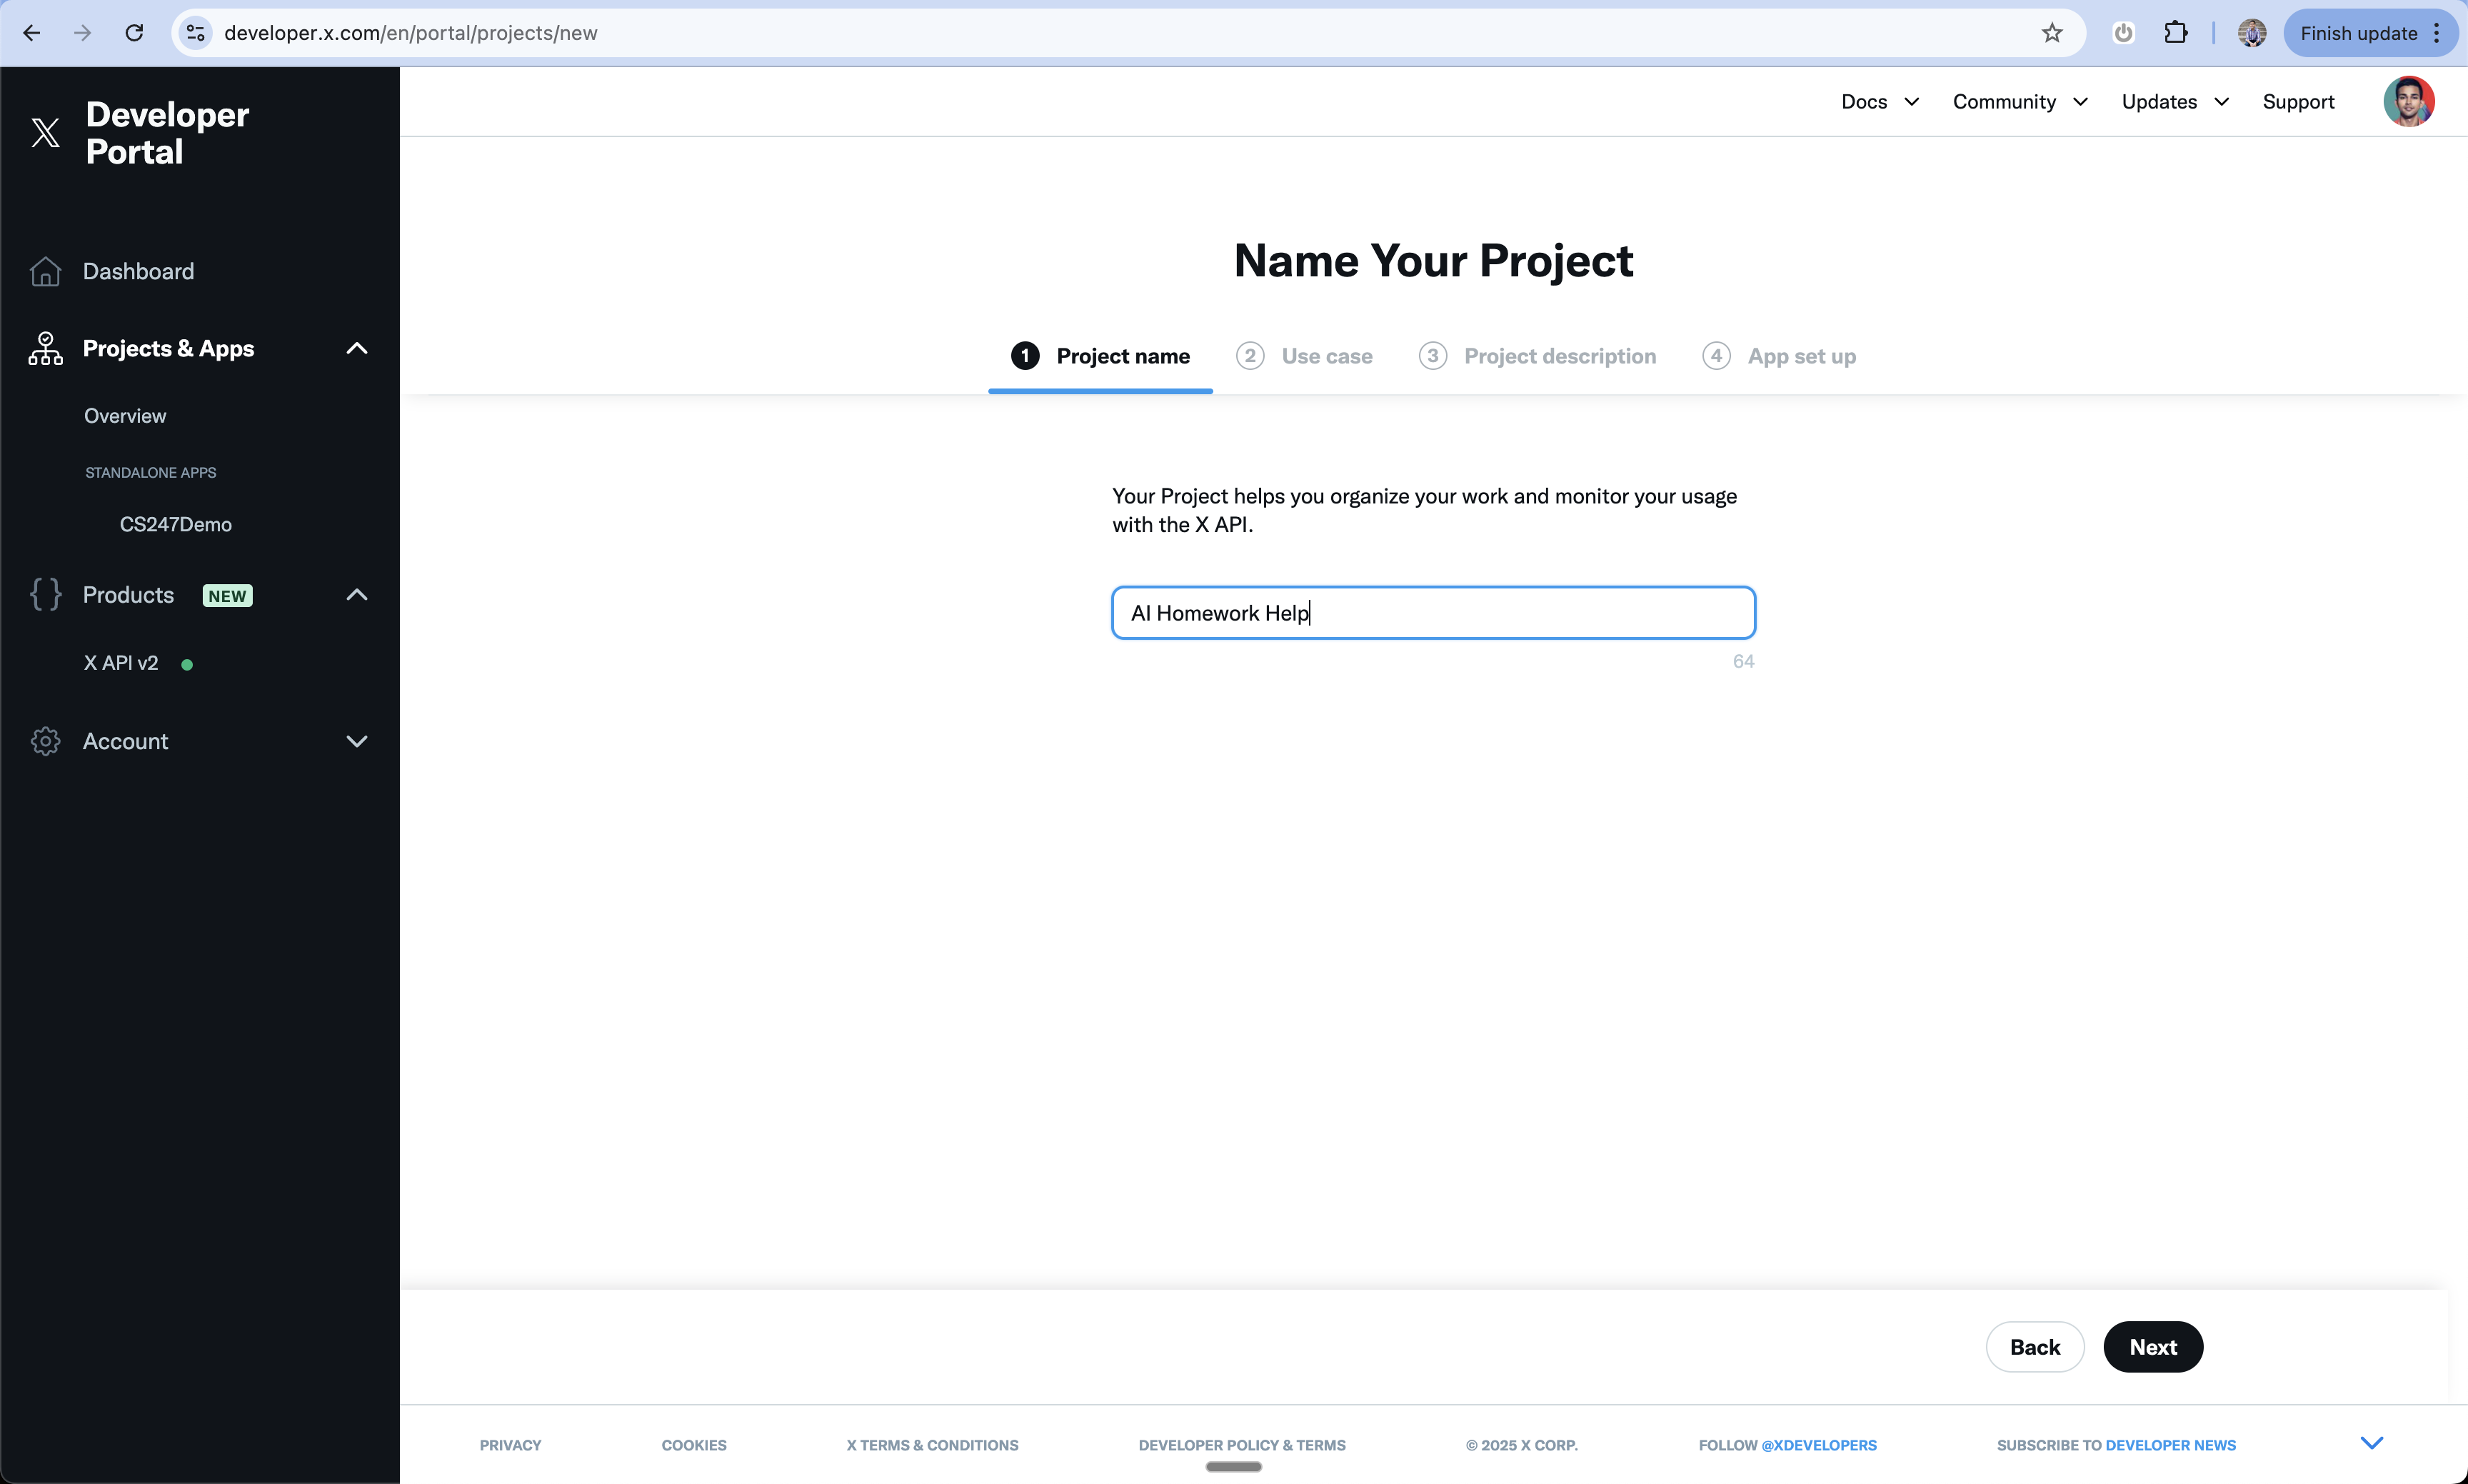 1. Choose the primary use case for your app
2. This helps X understand how you'll use their API
1. Choose the primary use case for your app
2. This helps X understand how you'll use their API
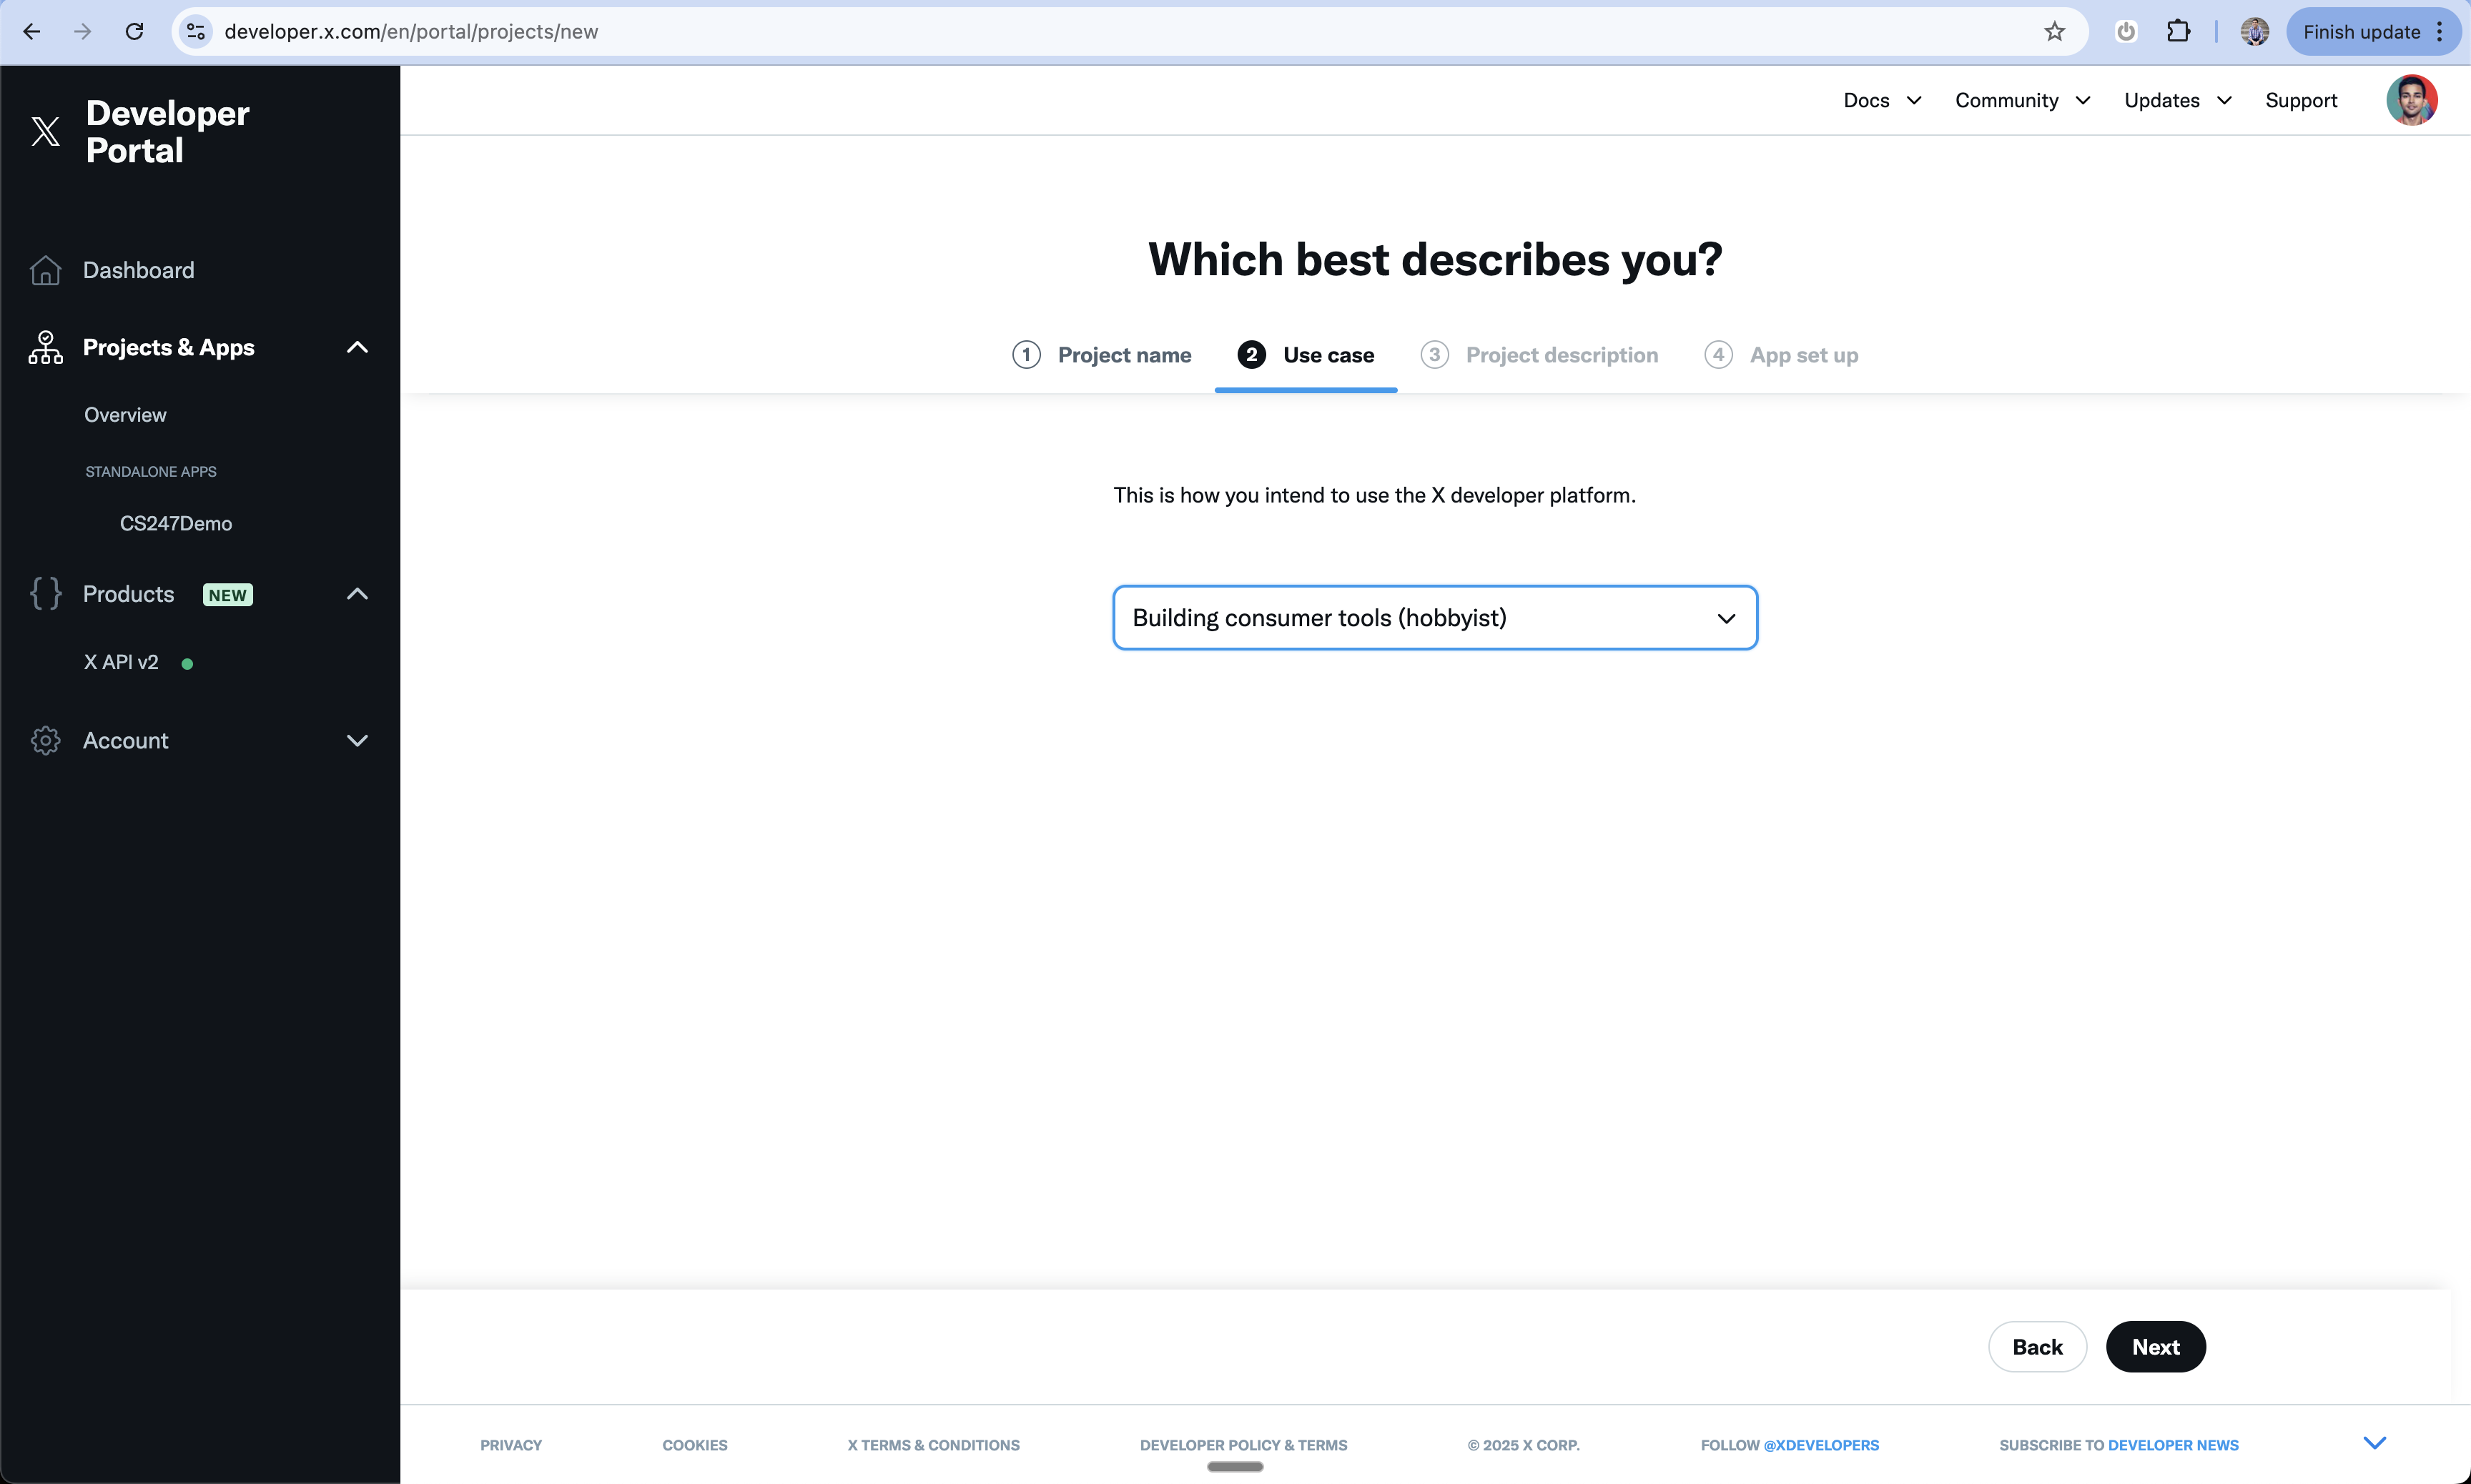 1. Provide a detailed description of your project
2. Explain how you'll use X's features
3. Be specific about your Login with X implementation
1. Provide a detailed description of your project
2. Explain how you'll use X's features
3. Be specific about your Login with X implementation
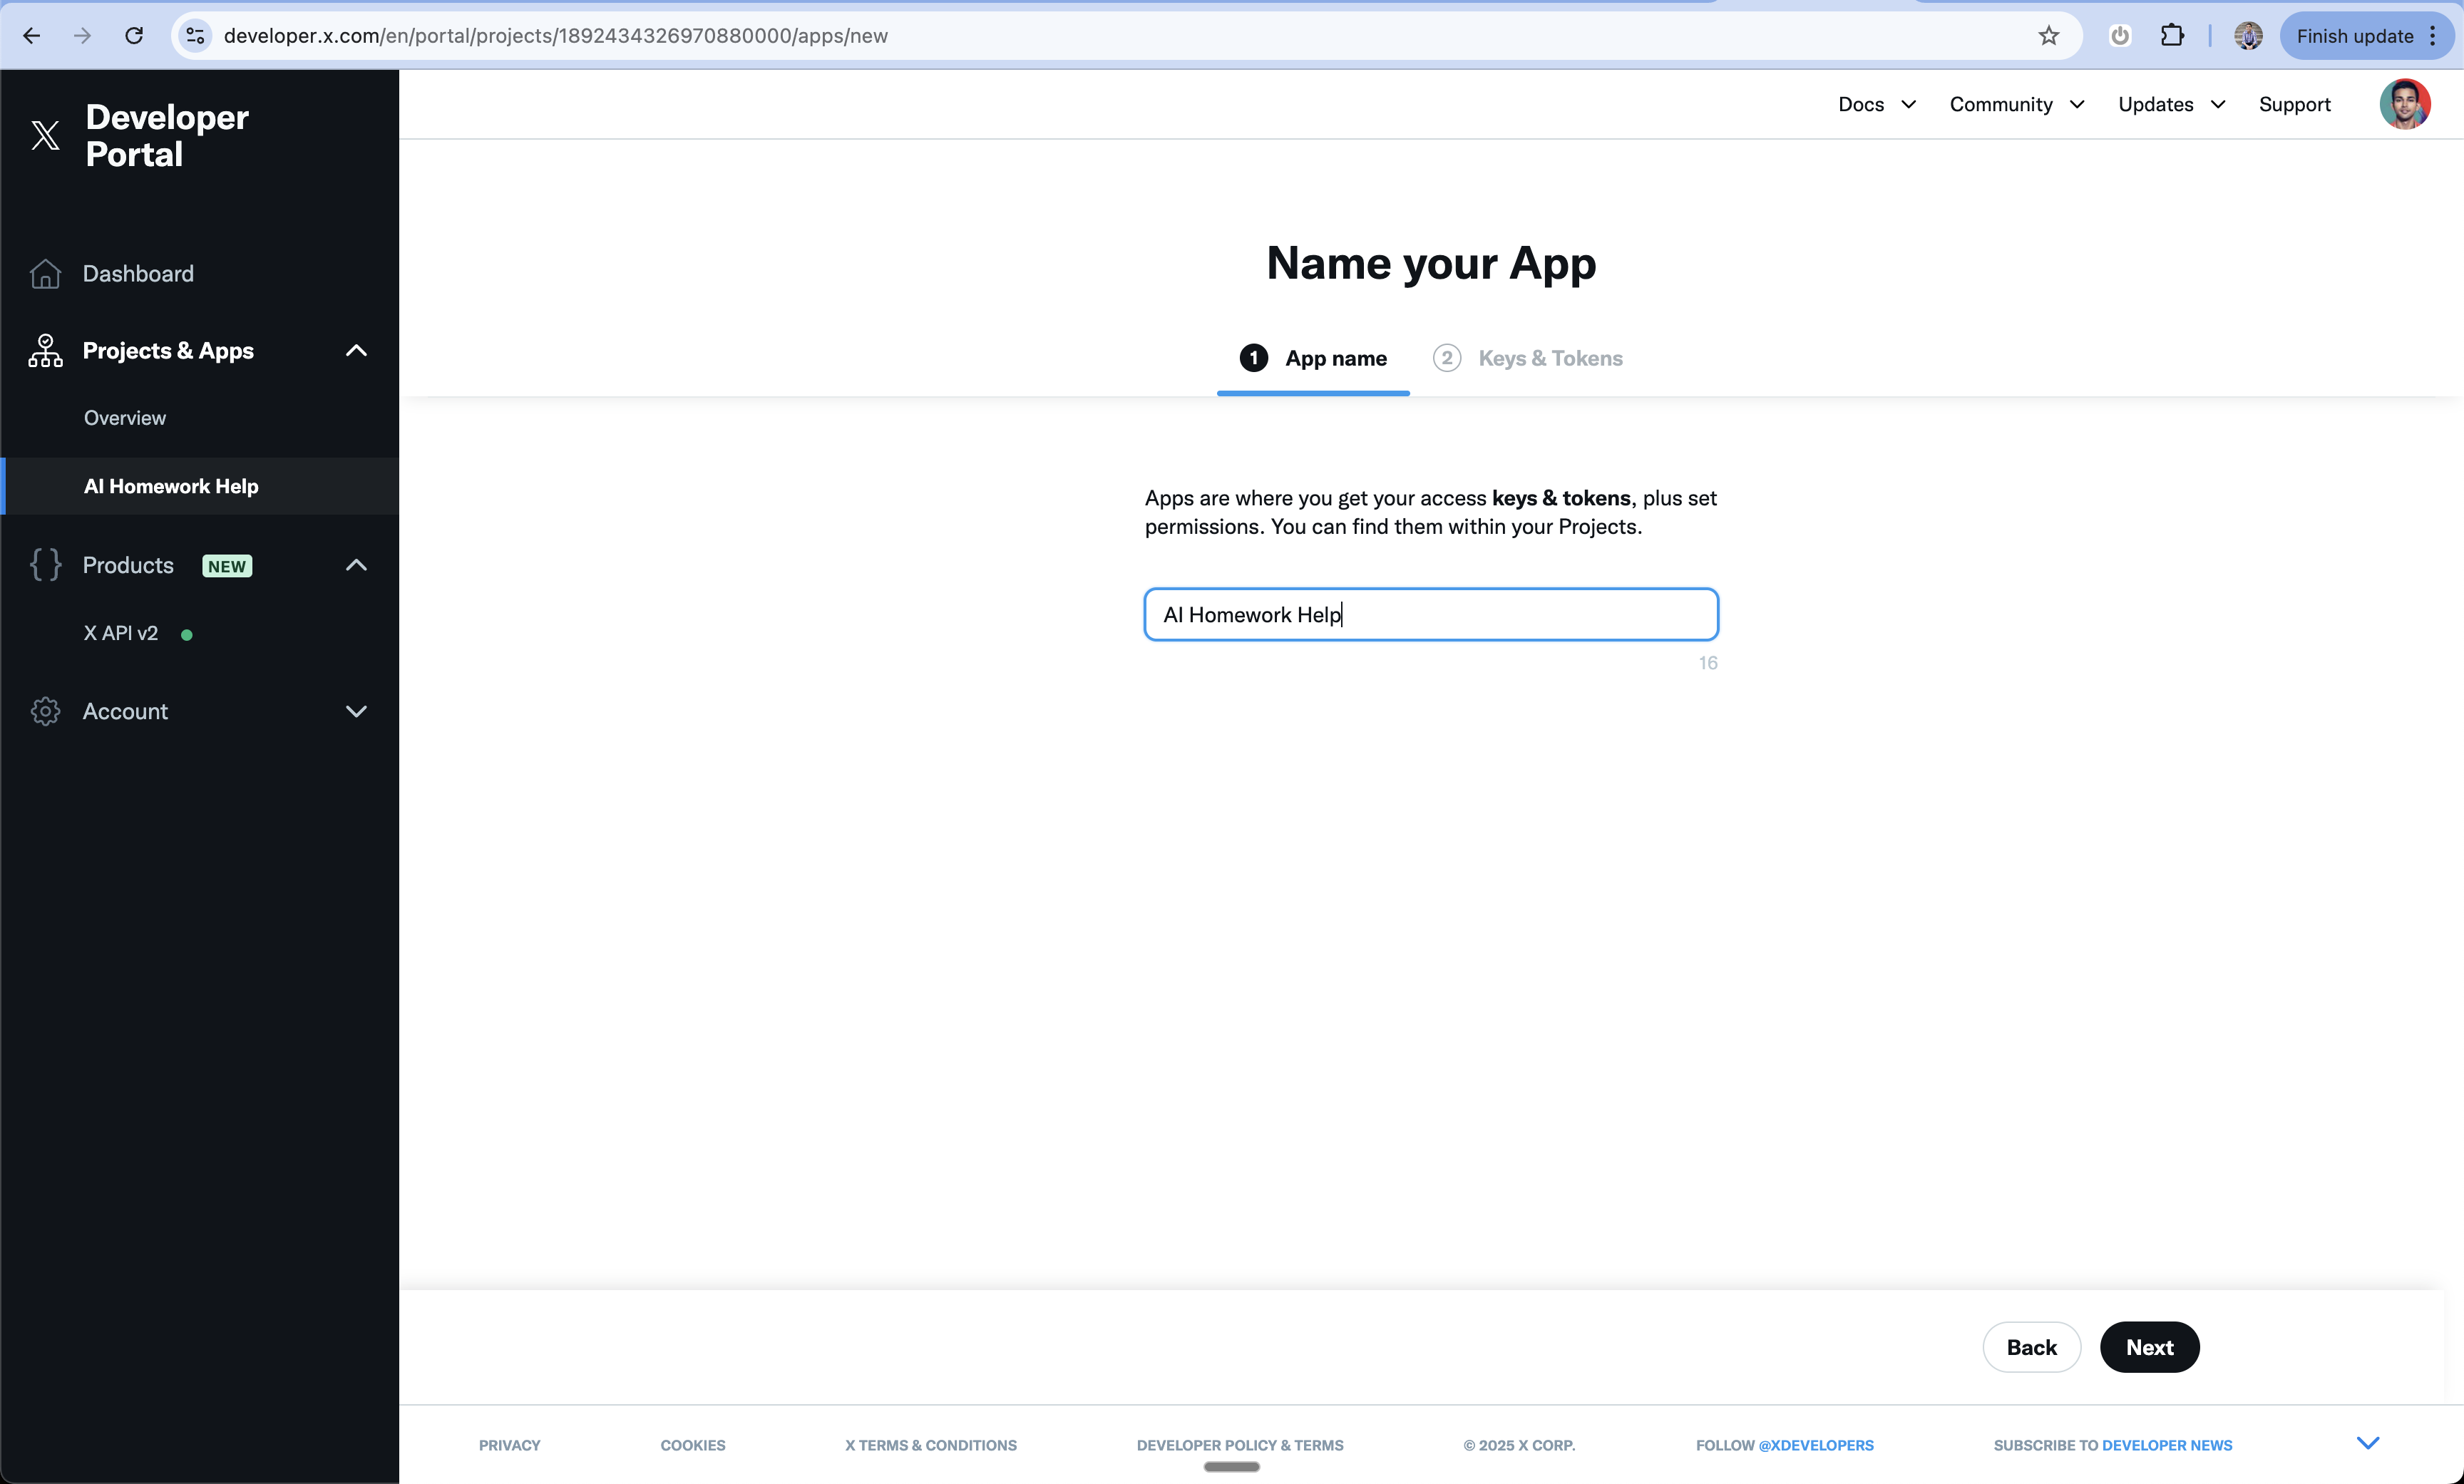
 1. Choose a user-facing name for your app
2. This will be visible to users during sign in
1. Choose a user-facing name for your app
2. This will be visible to users during sign in
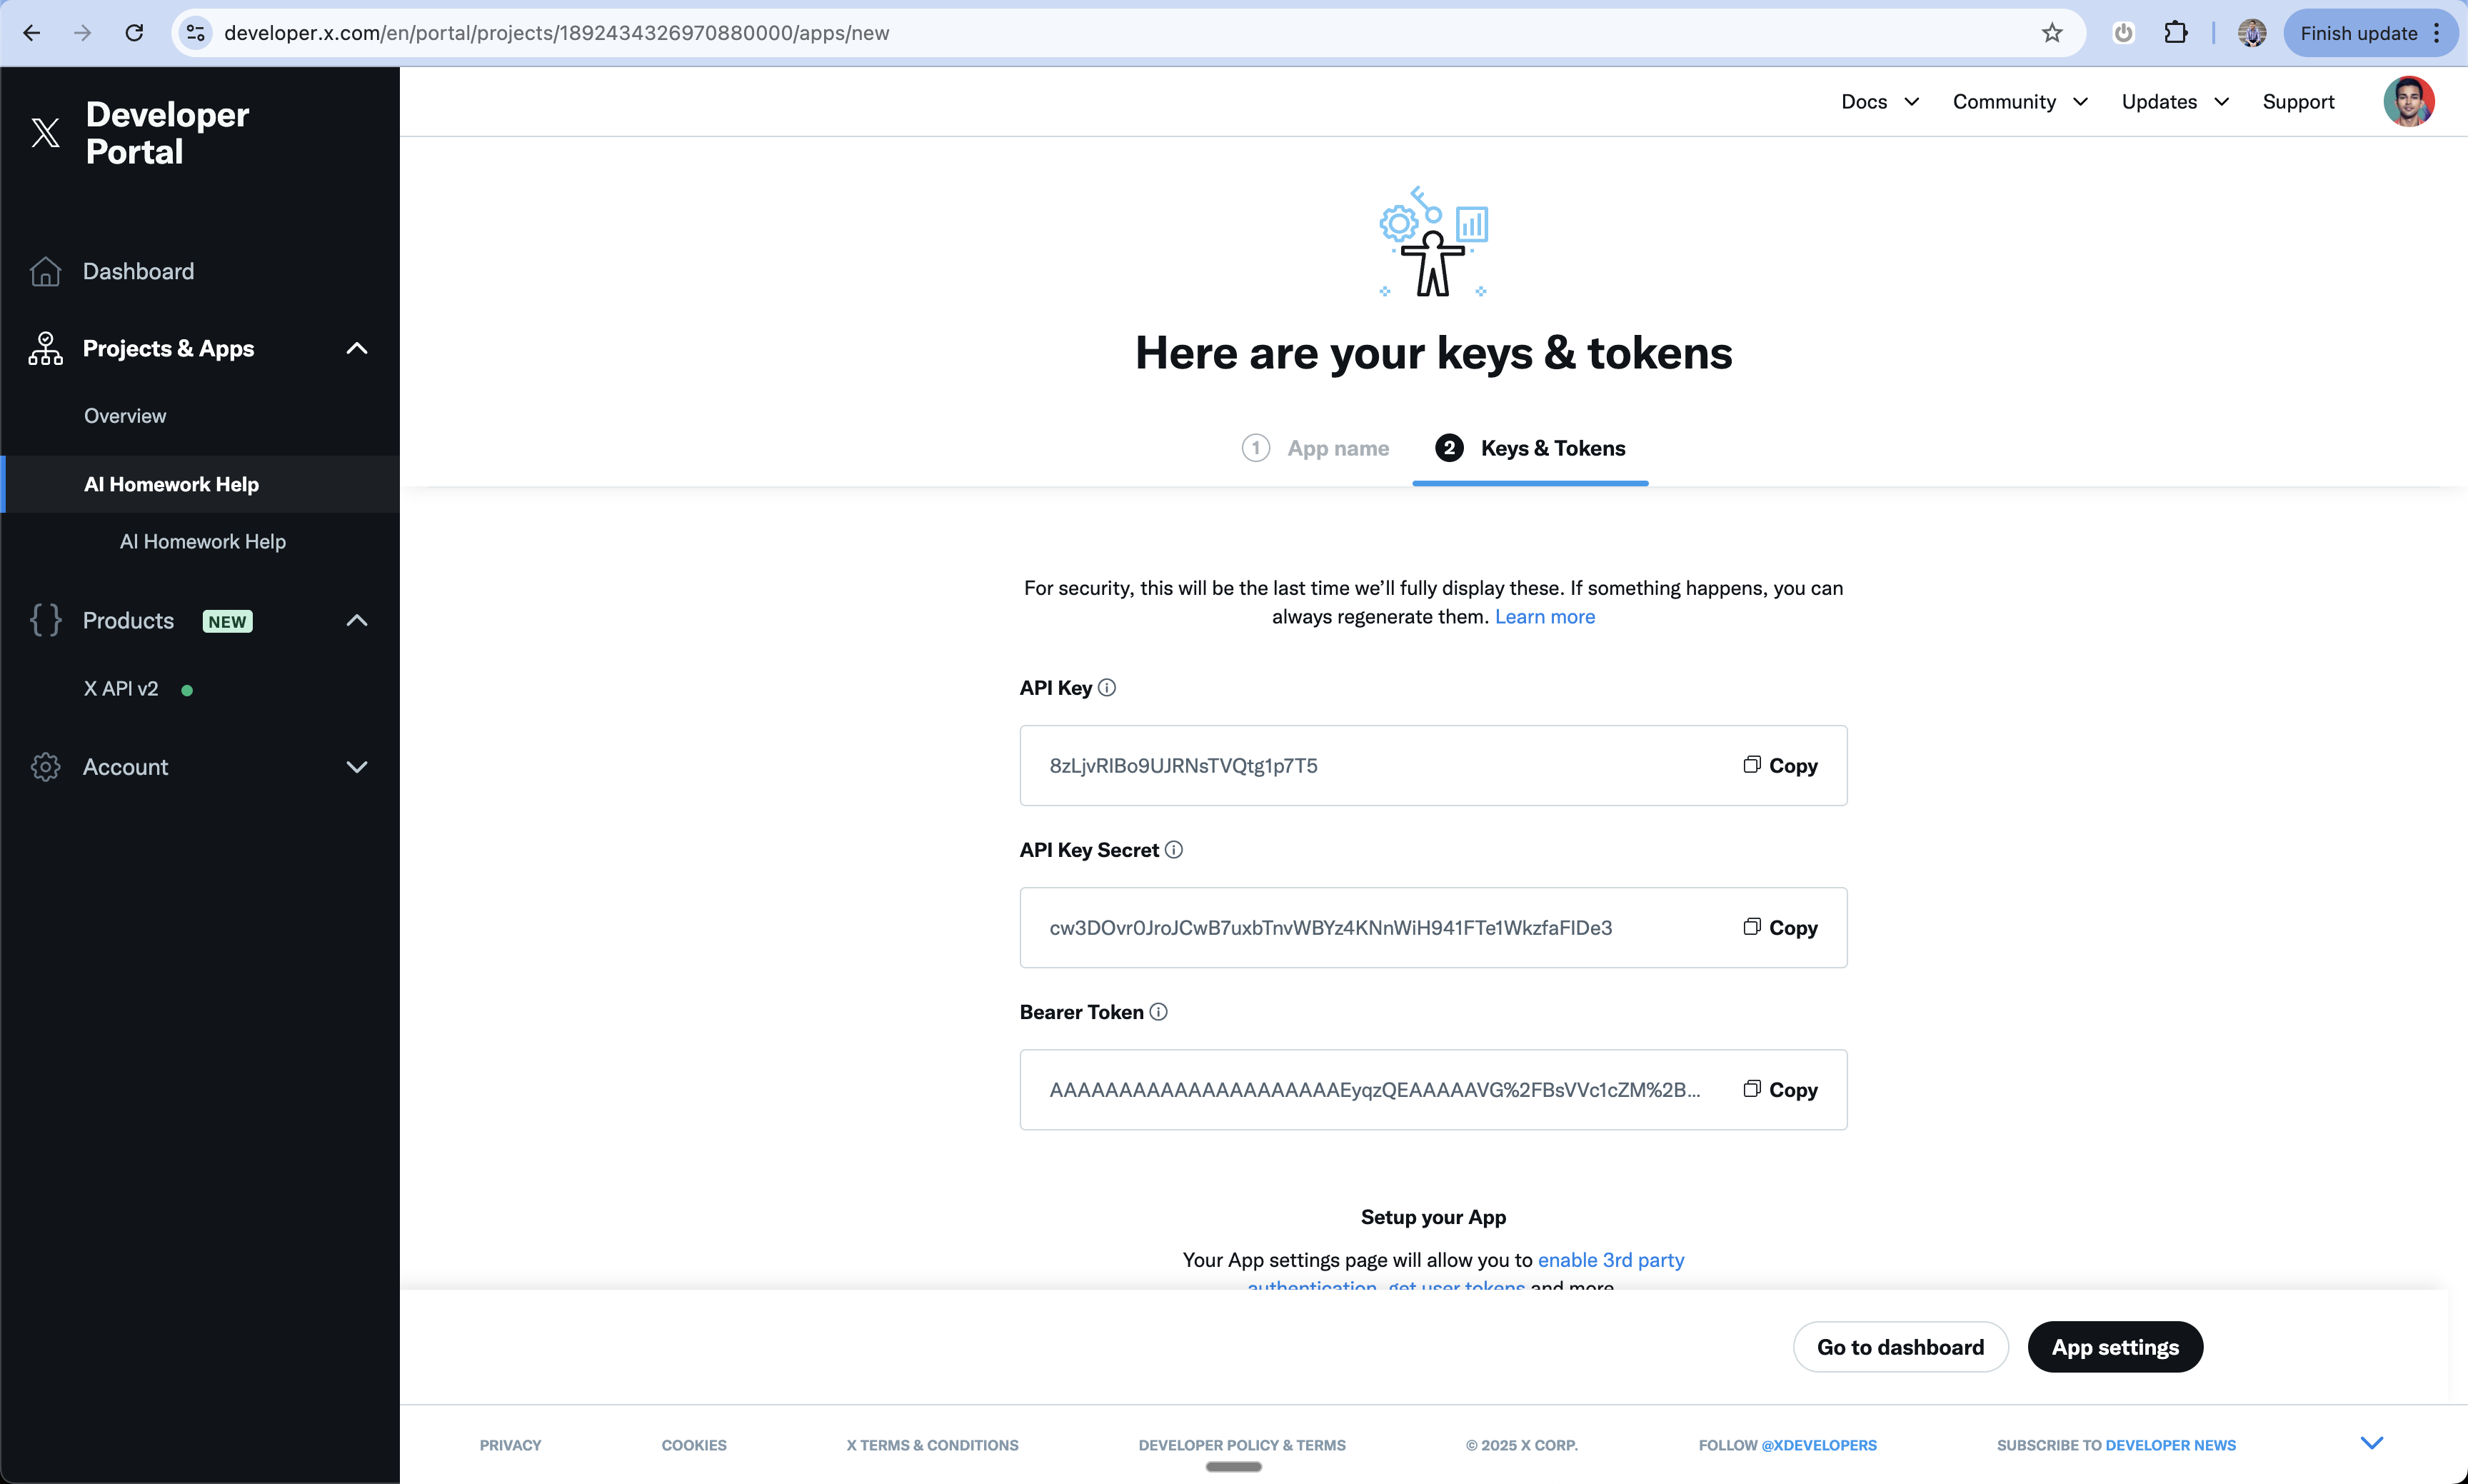
 1. You'll see initial Keys & Tokens
2. These include API Key, API Key Secret, and Bearer Token
3. You can skip these for now - click "App Settings"
1. You'll see initial Keys & Tokens
2. These include API Key, API Key Secret, and Bearer Token
3. You can skip these for now - click "App Settings"
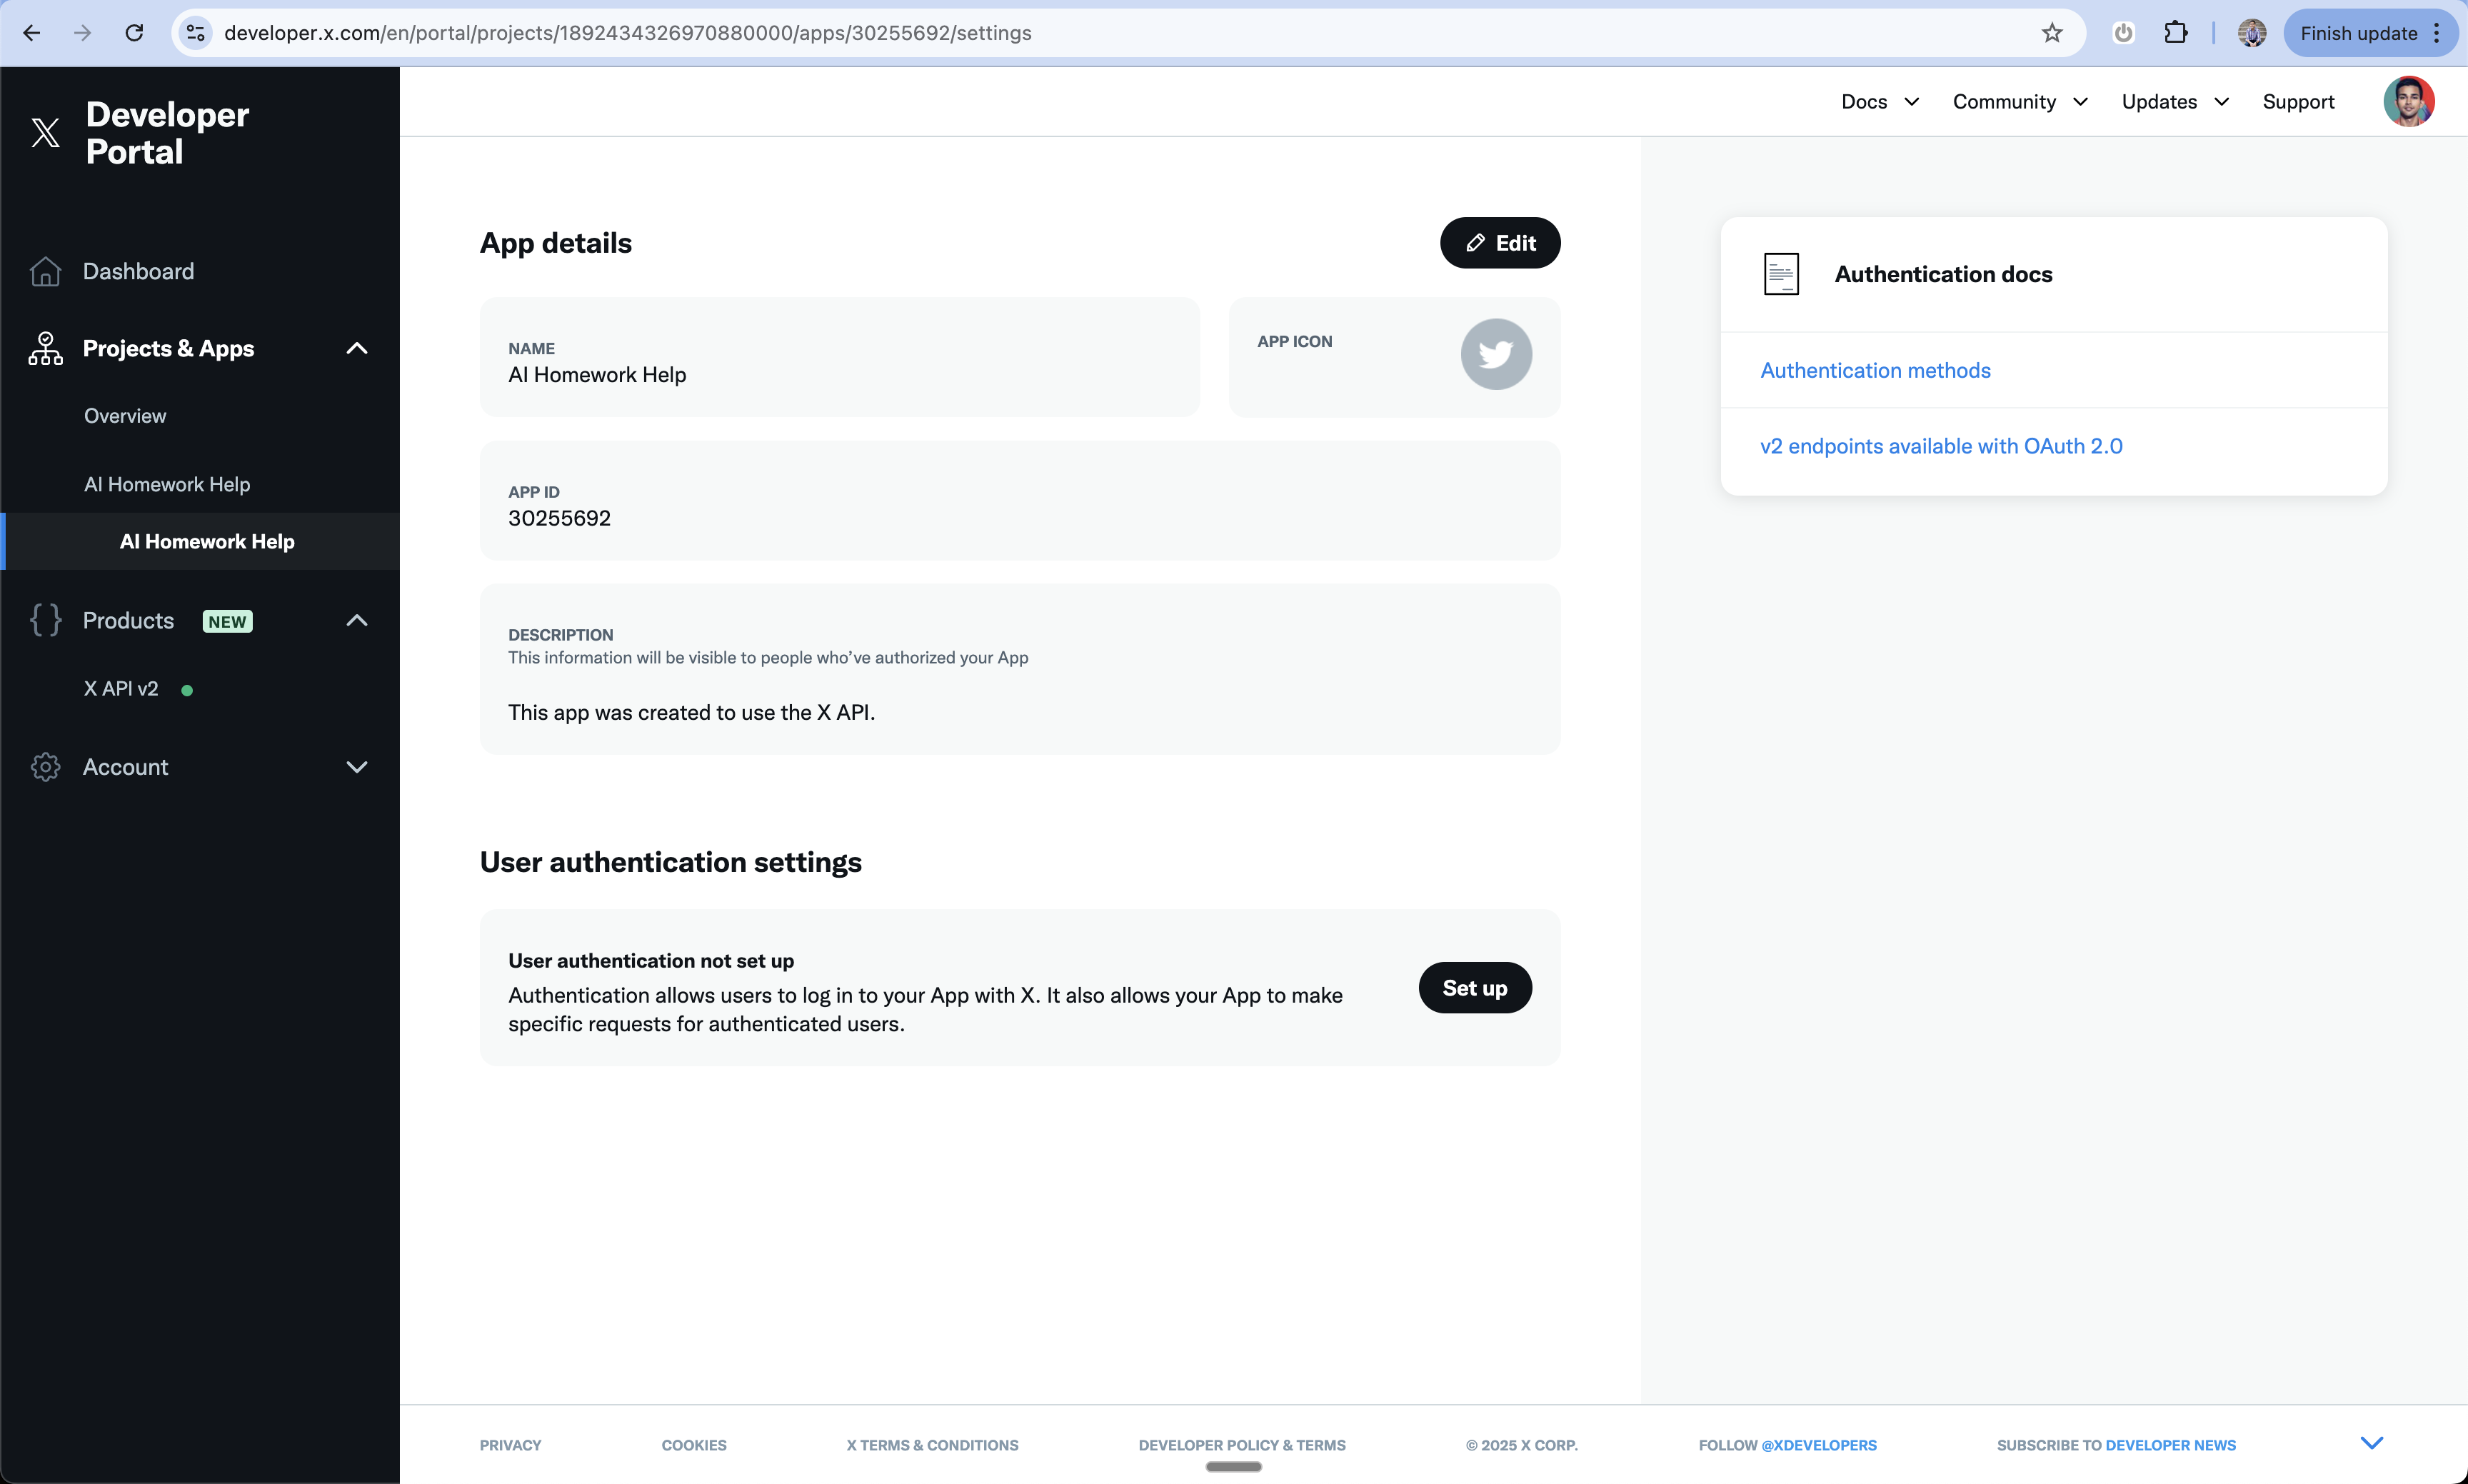
 1. In App Settings, find "User authentication settings"
2. Click "Set up"
1. In App Settings, find "User authentication settings"
2. Click "Set up"
 1. Choose your app permissions level
2. You can request read/write permissions
3. Optionally request email access for users if you want your app to send users emails
1. Choose your app permissions level
2. You can request read/write permissions
3. Optionally request email access for users if you want your app to send users emails
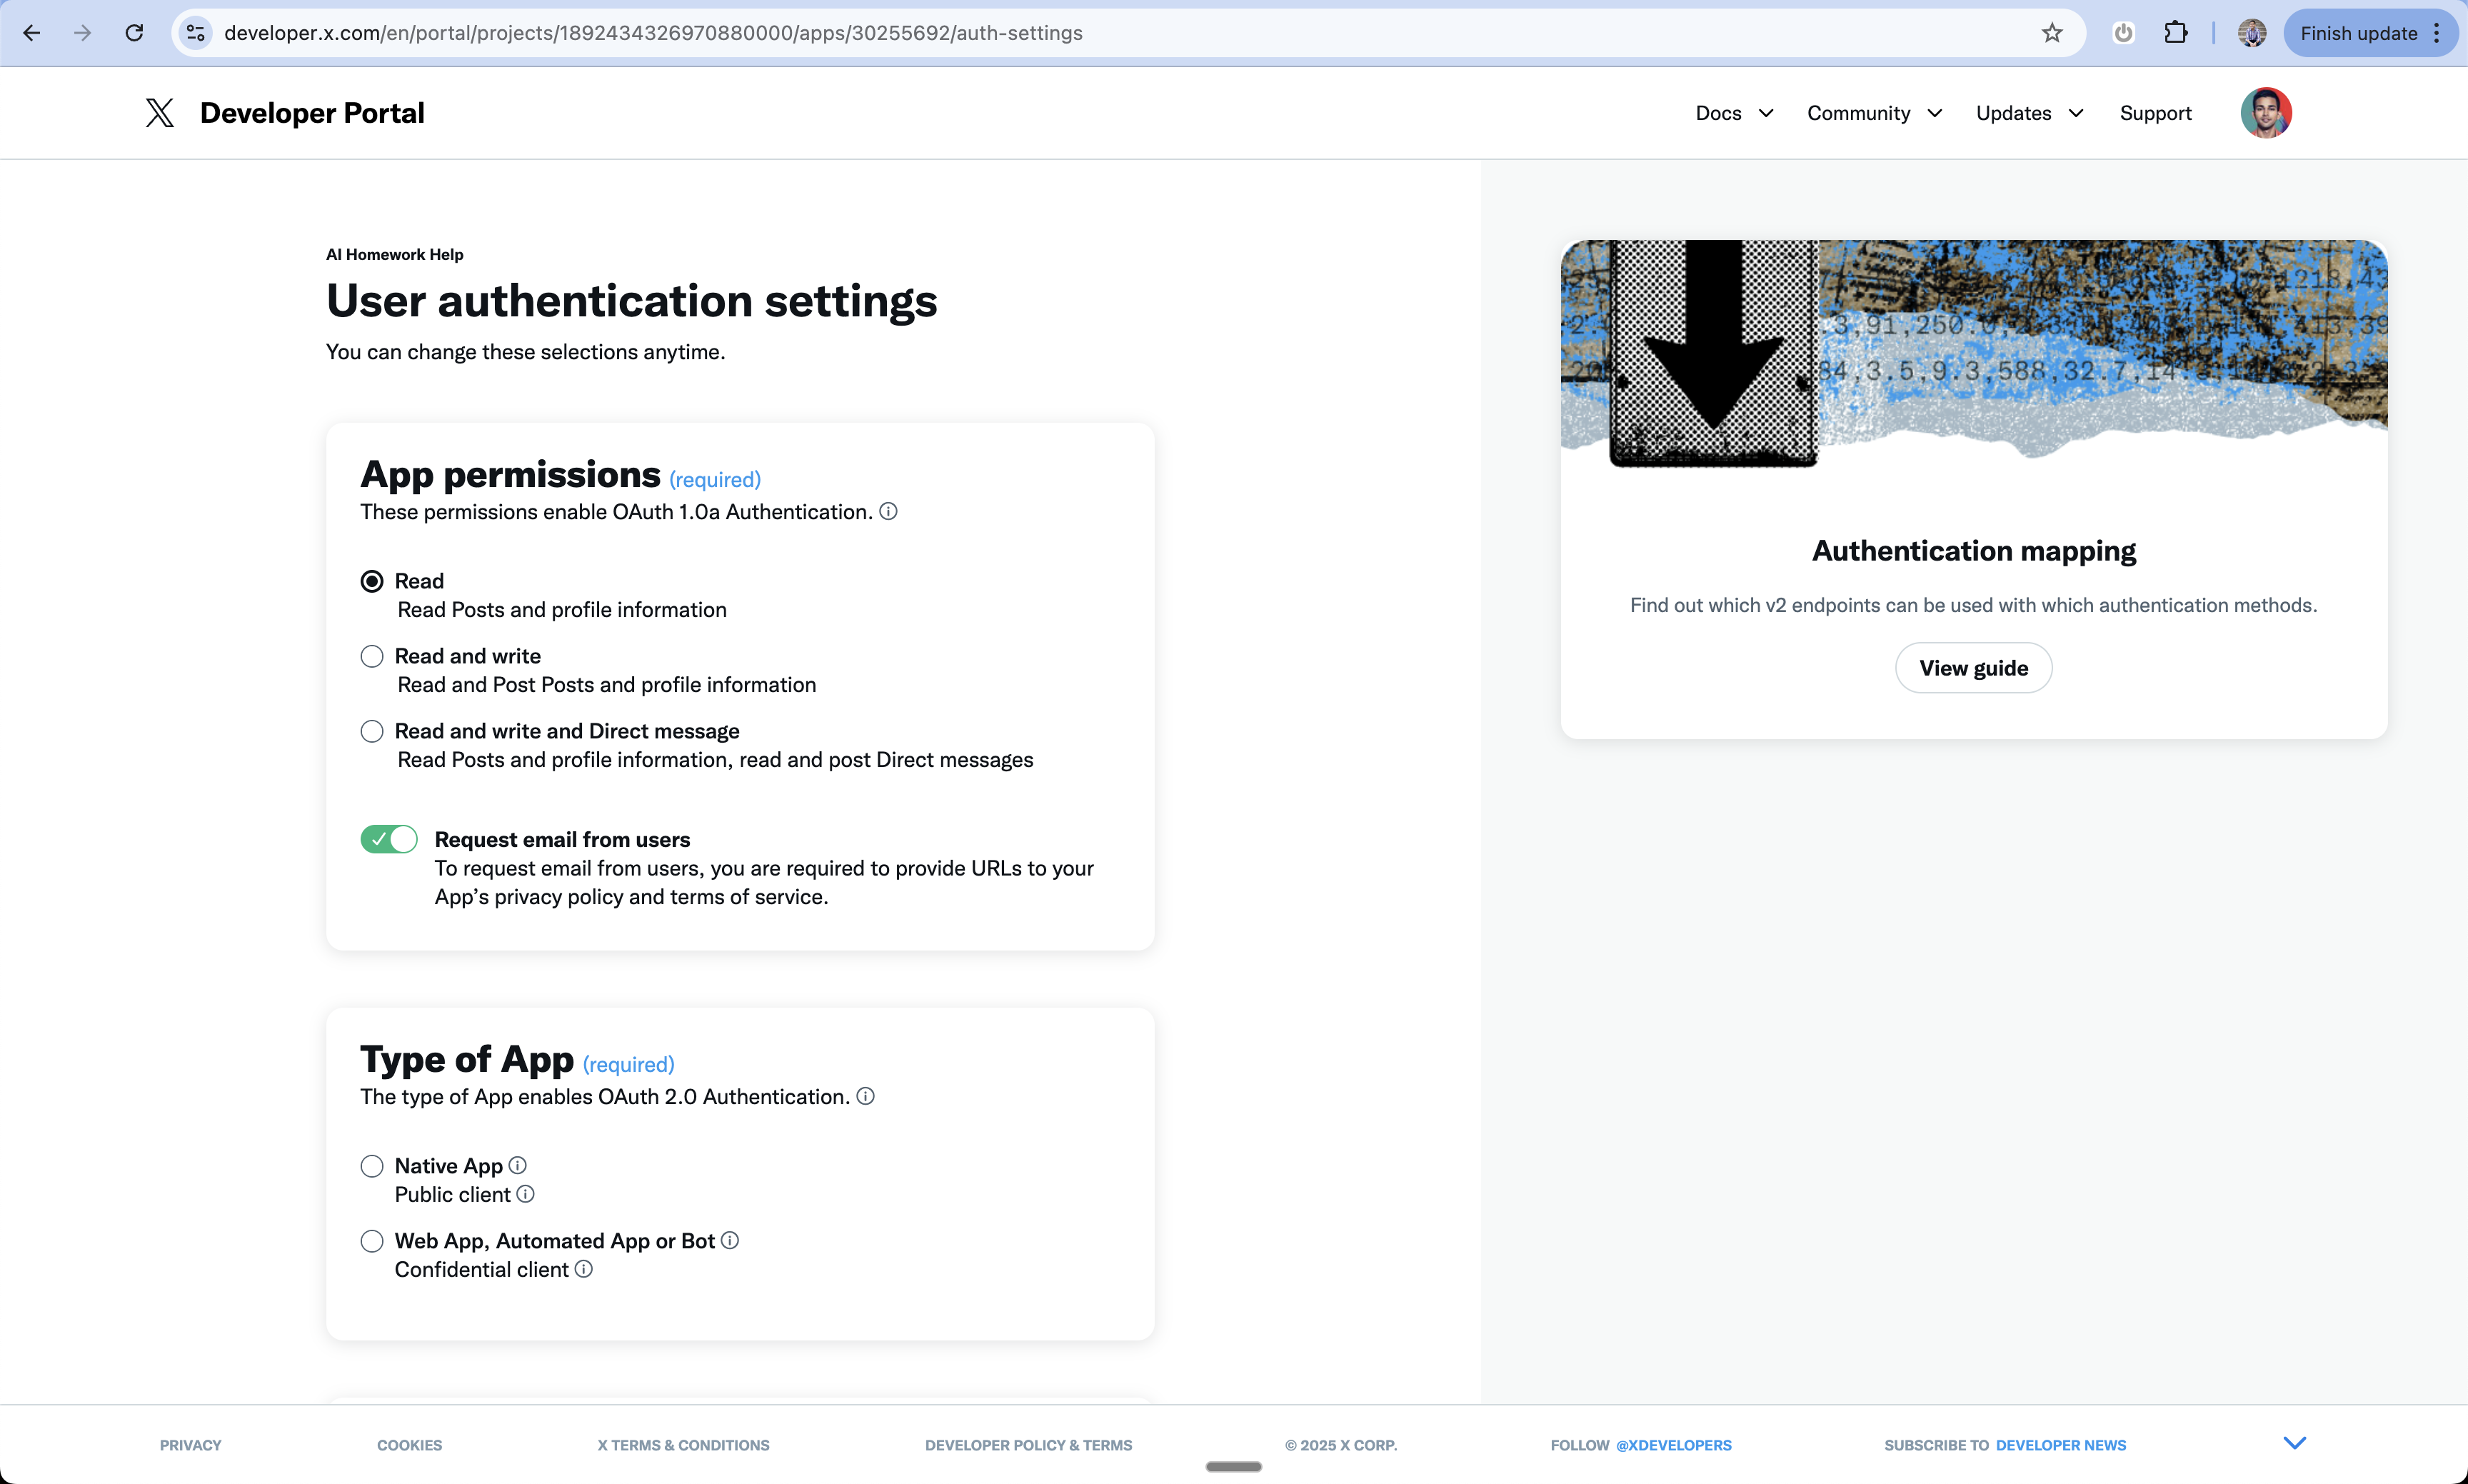 1. Select "Web App" as your app type
2. This enables web-based authentication
1. Select "Web App" as your app type
2. This enables web-based authentication
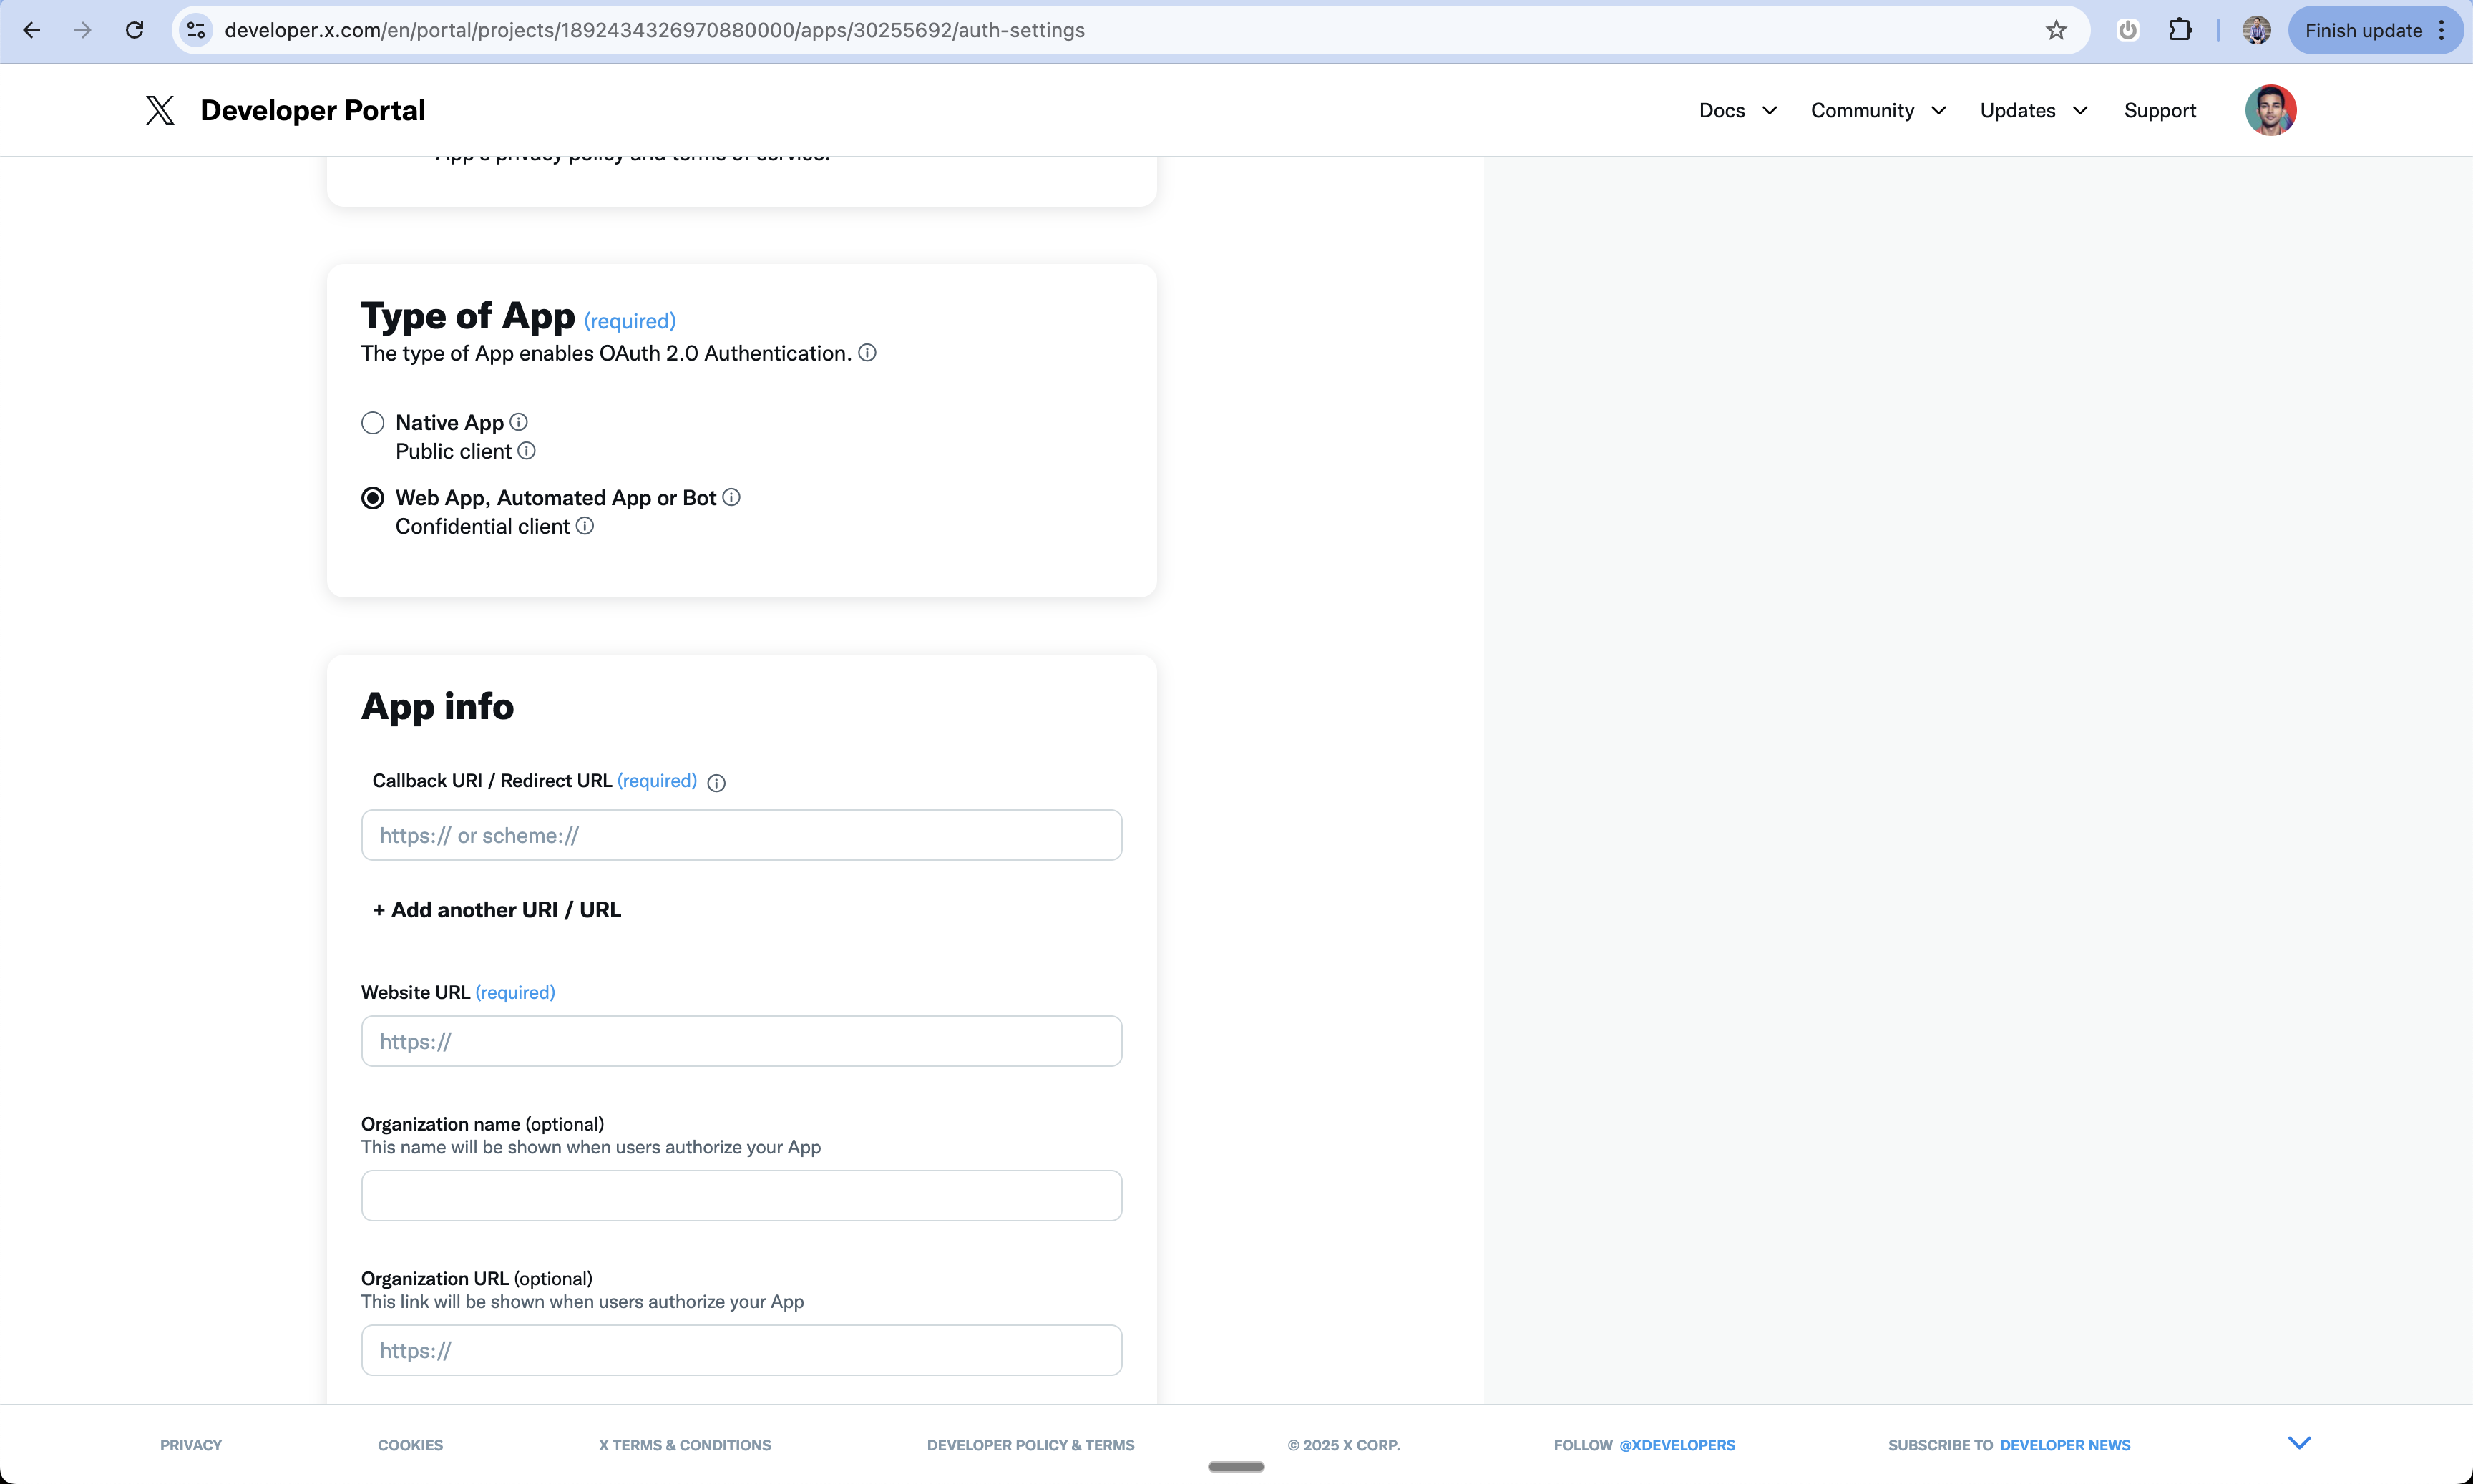 1. Enter your callback URL:
`https://www.your-domain.com/api/auth/callback/twitter`
2. Add your website URL:
`https://www.your-domain.com`
3. Add privacy policy URL:
`https://your-domain.com/privacy`
4. Add terms of service URL:
`https://your-domain.com/terms`
1. Enter your callback URL:
`https://www.your-domain.com/api/auth/callback/twitter`
2. Add your website URL:
`https://www.your-domain.com`
3. Add privacy policy URL:
`https://your-domain.com/privacy`
4. Add terms of service URL:
`https://your-domain.com/terms`
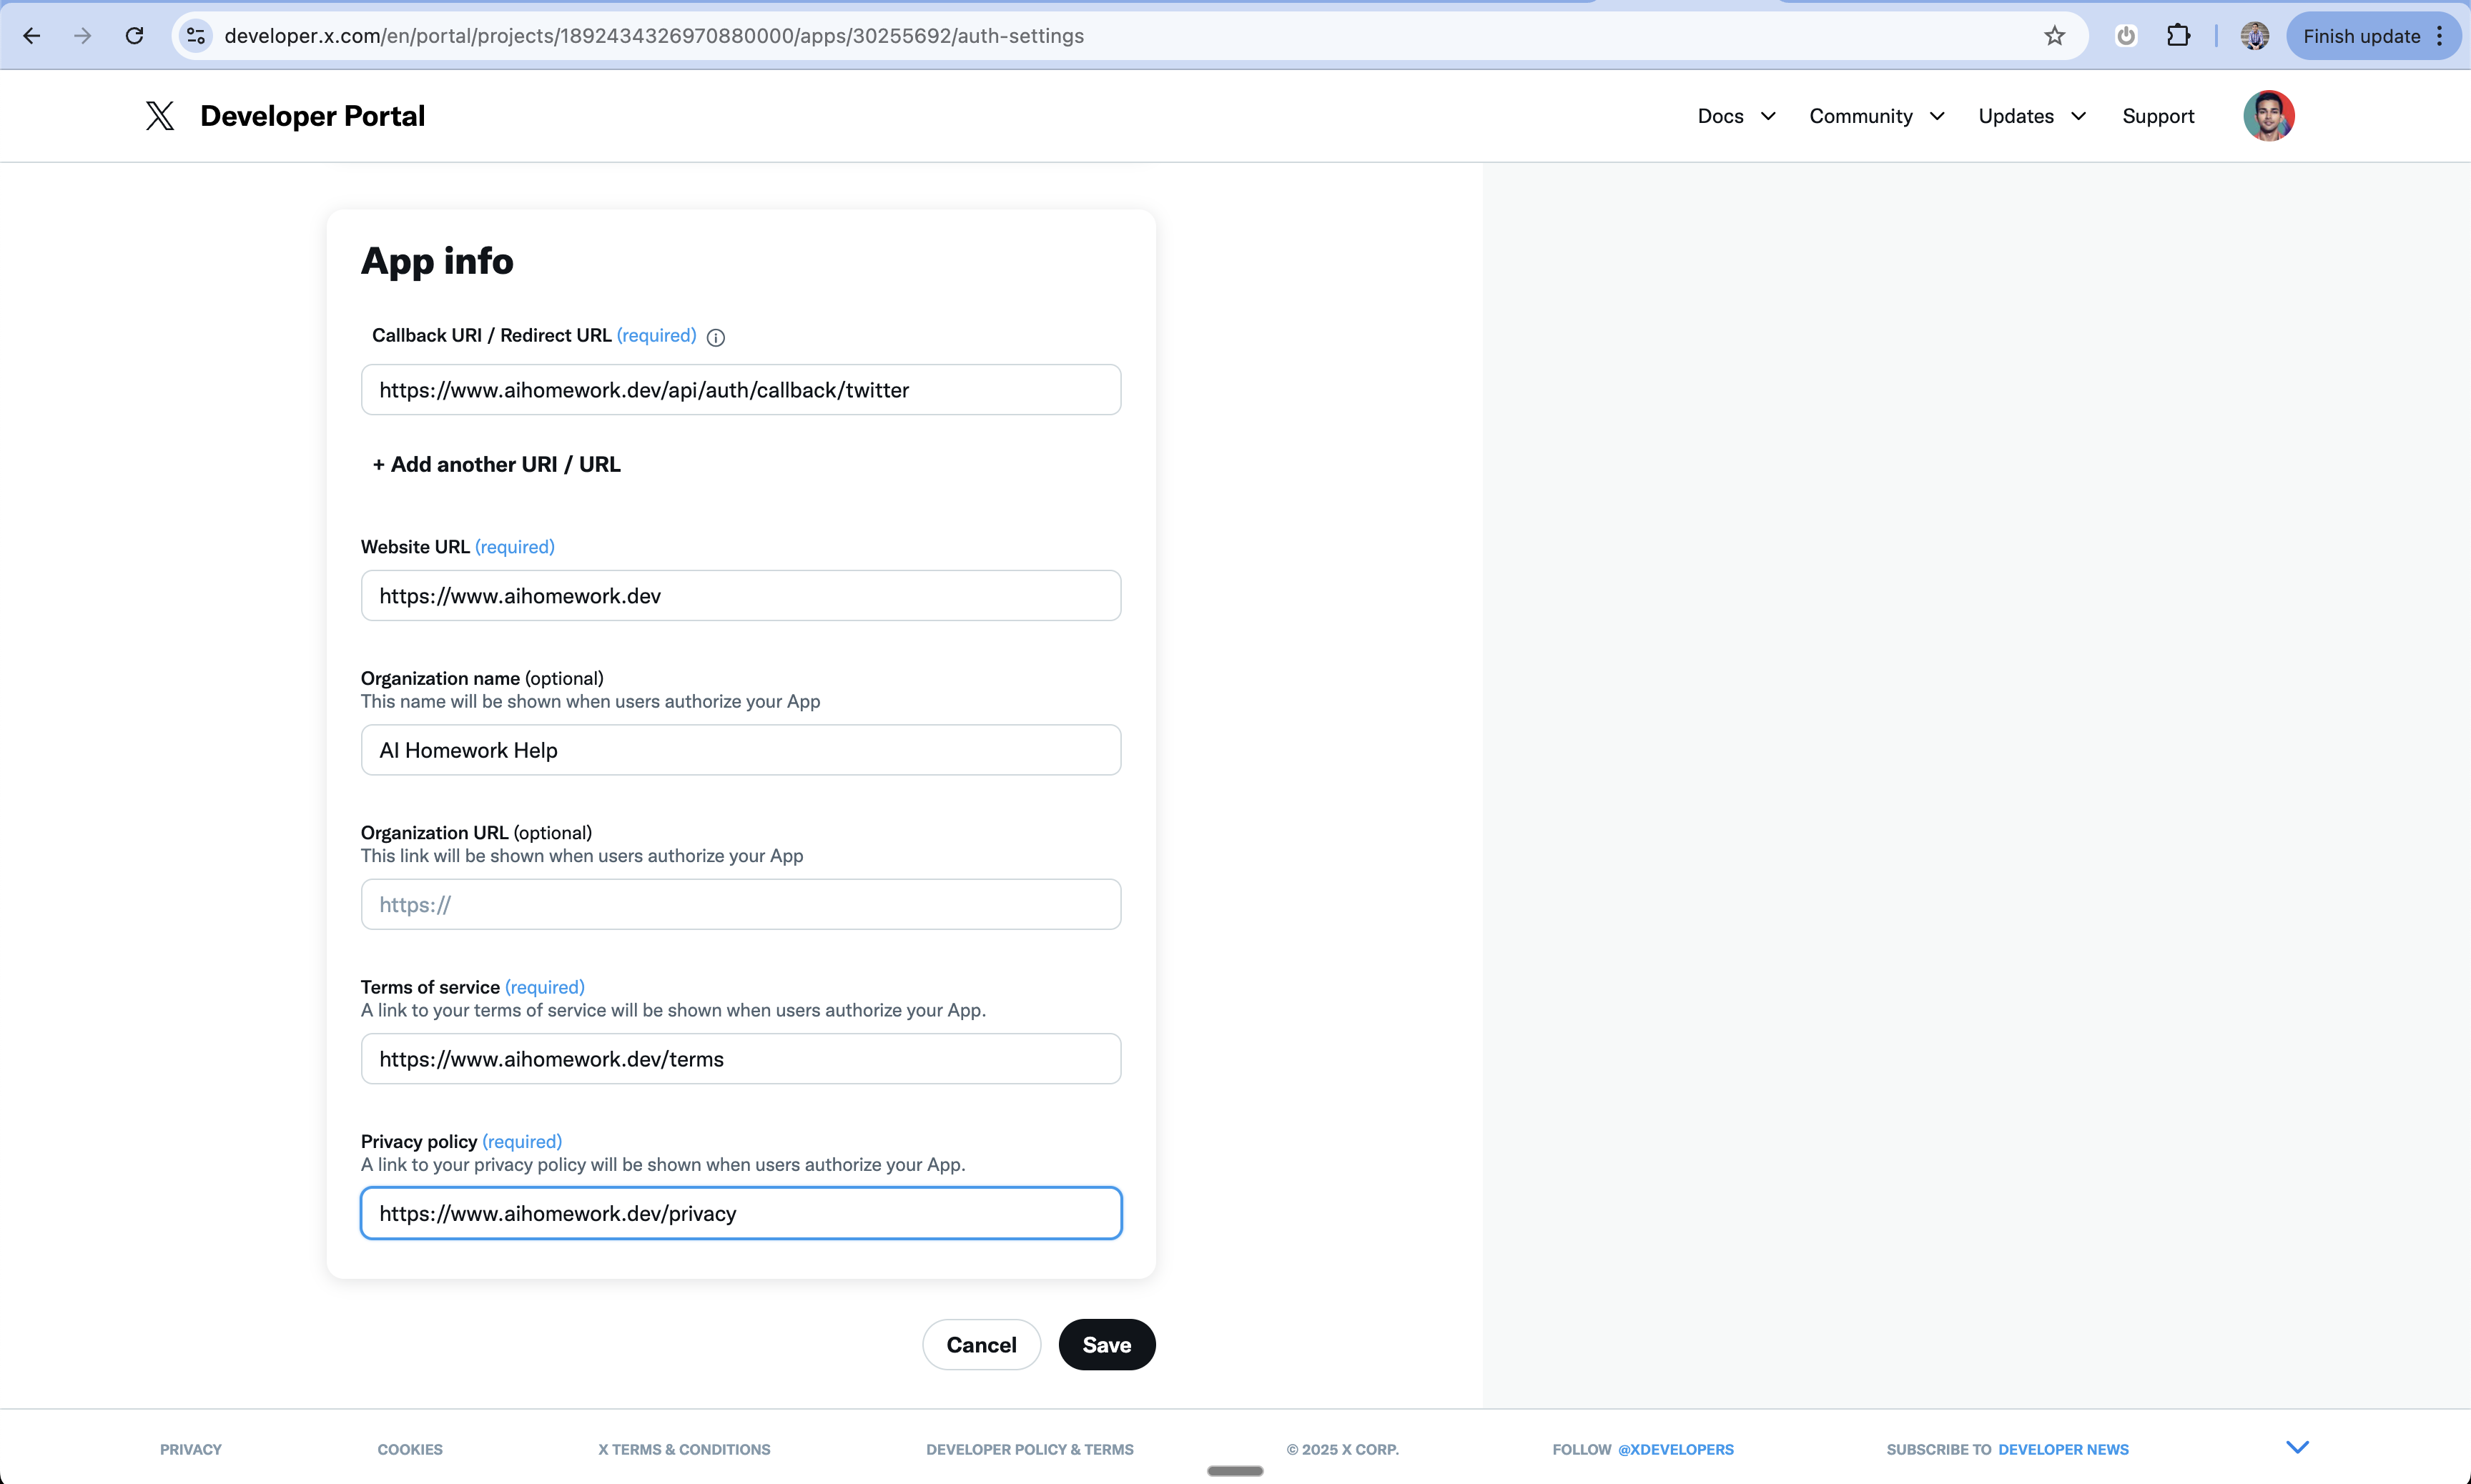 Must include:
* `https://` protocol
* `www` prefix for callback and website URLs
* Exact domain for the app used in Anything's custom domain settings
You can use services like Termly to generate these required policy documents and host them on pages in your Anything app
1. After saving settings, go to "Keys and Tokens" section
Must include:
* `https://` protocol
* `www` prefix for callback and website URLs
* Exact domain for the app used in Anything's custom domain settings
You can use services like Termly to generate these required policy documents and host them on pages in your Anything app
1. After saving settings, go to "Keys and Tokens" section
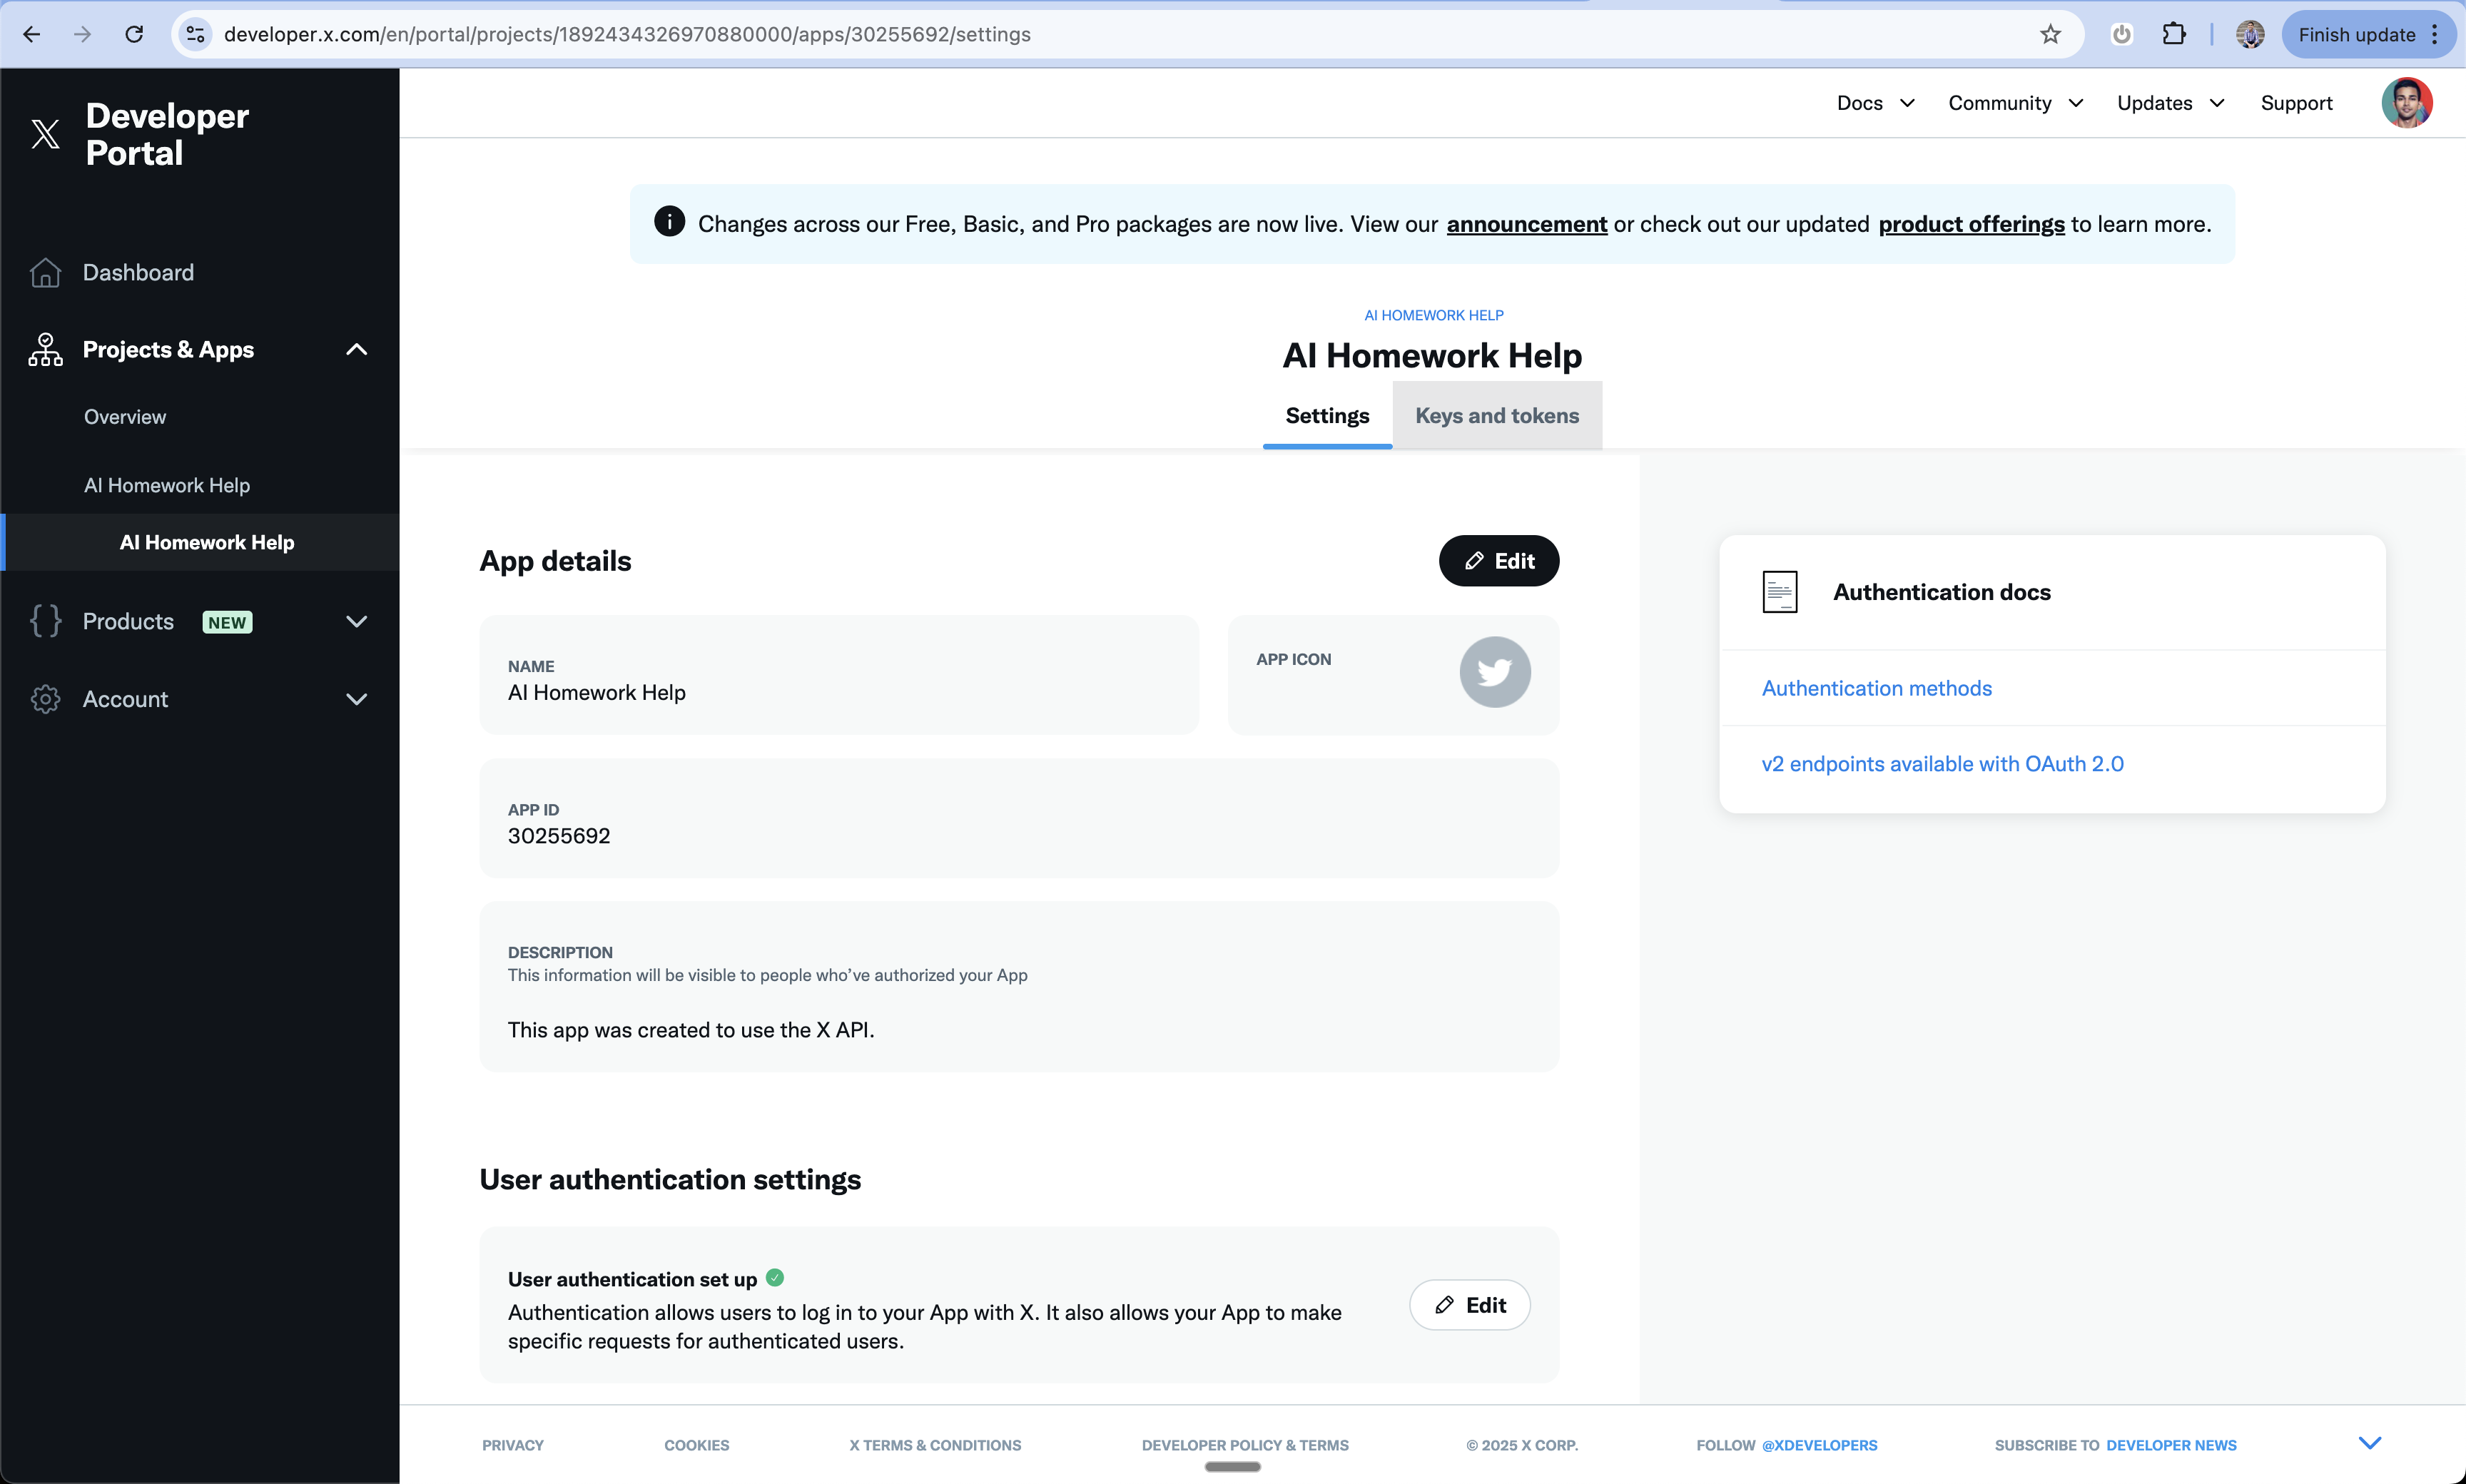 1. Under OAuth 2.0 Client ID and Client Secret
2. Copy the Client ID
3. Generate and copy the Client Secret
4. Save both values - you'll need them in Anything
1. Under OAuth 2.0 Client ID and Client Secret
2. Copy the Client ID
3. Generate and copy the Client Secret
4. Save both values - you'll need them in Anything
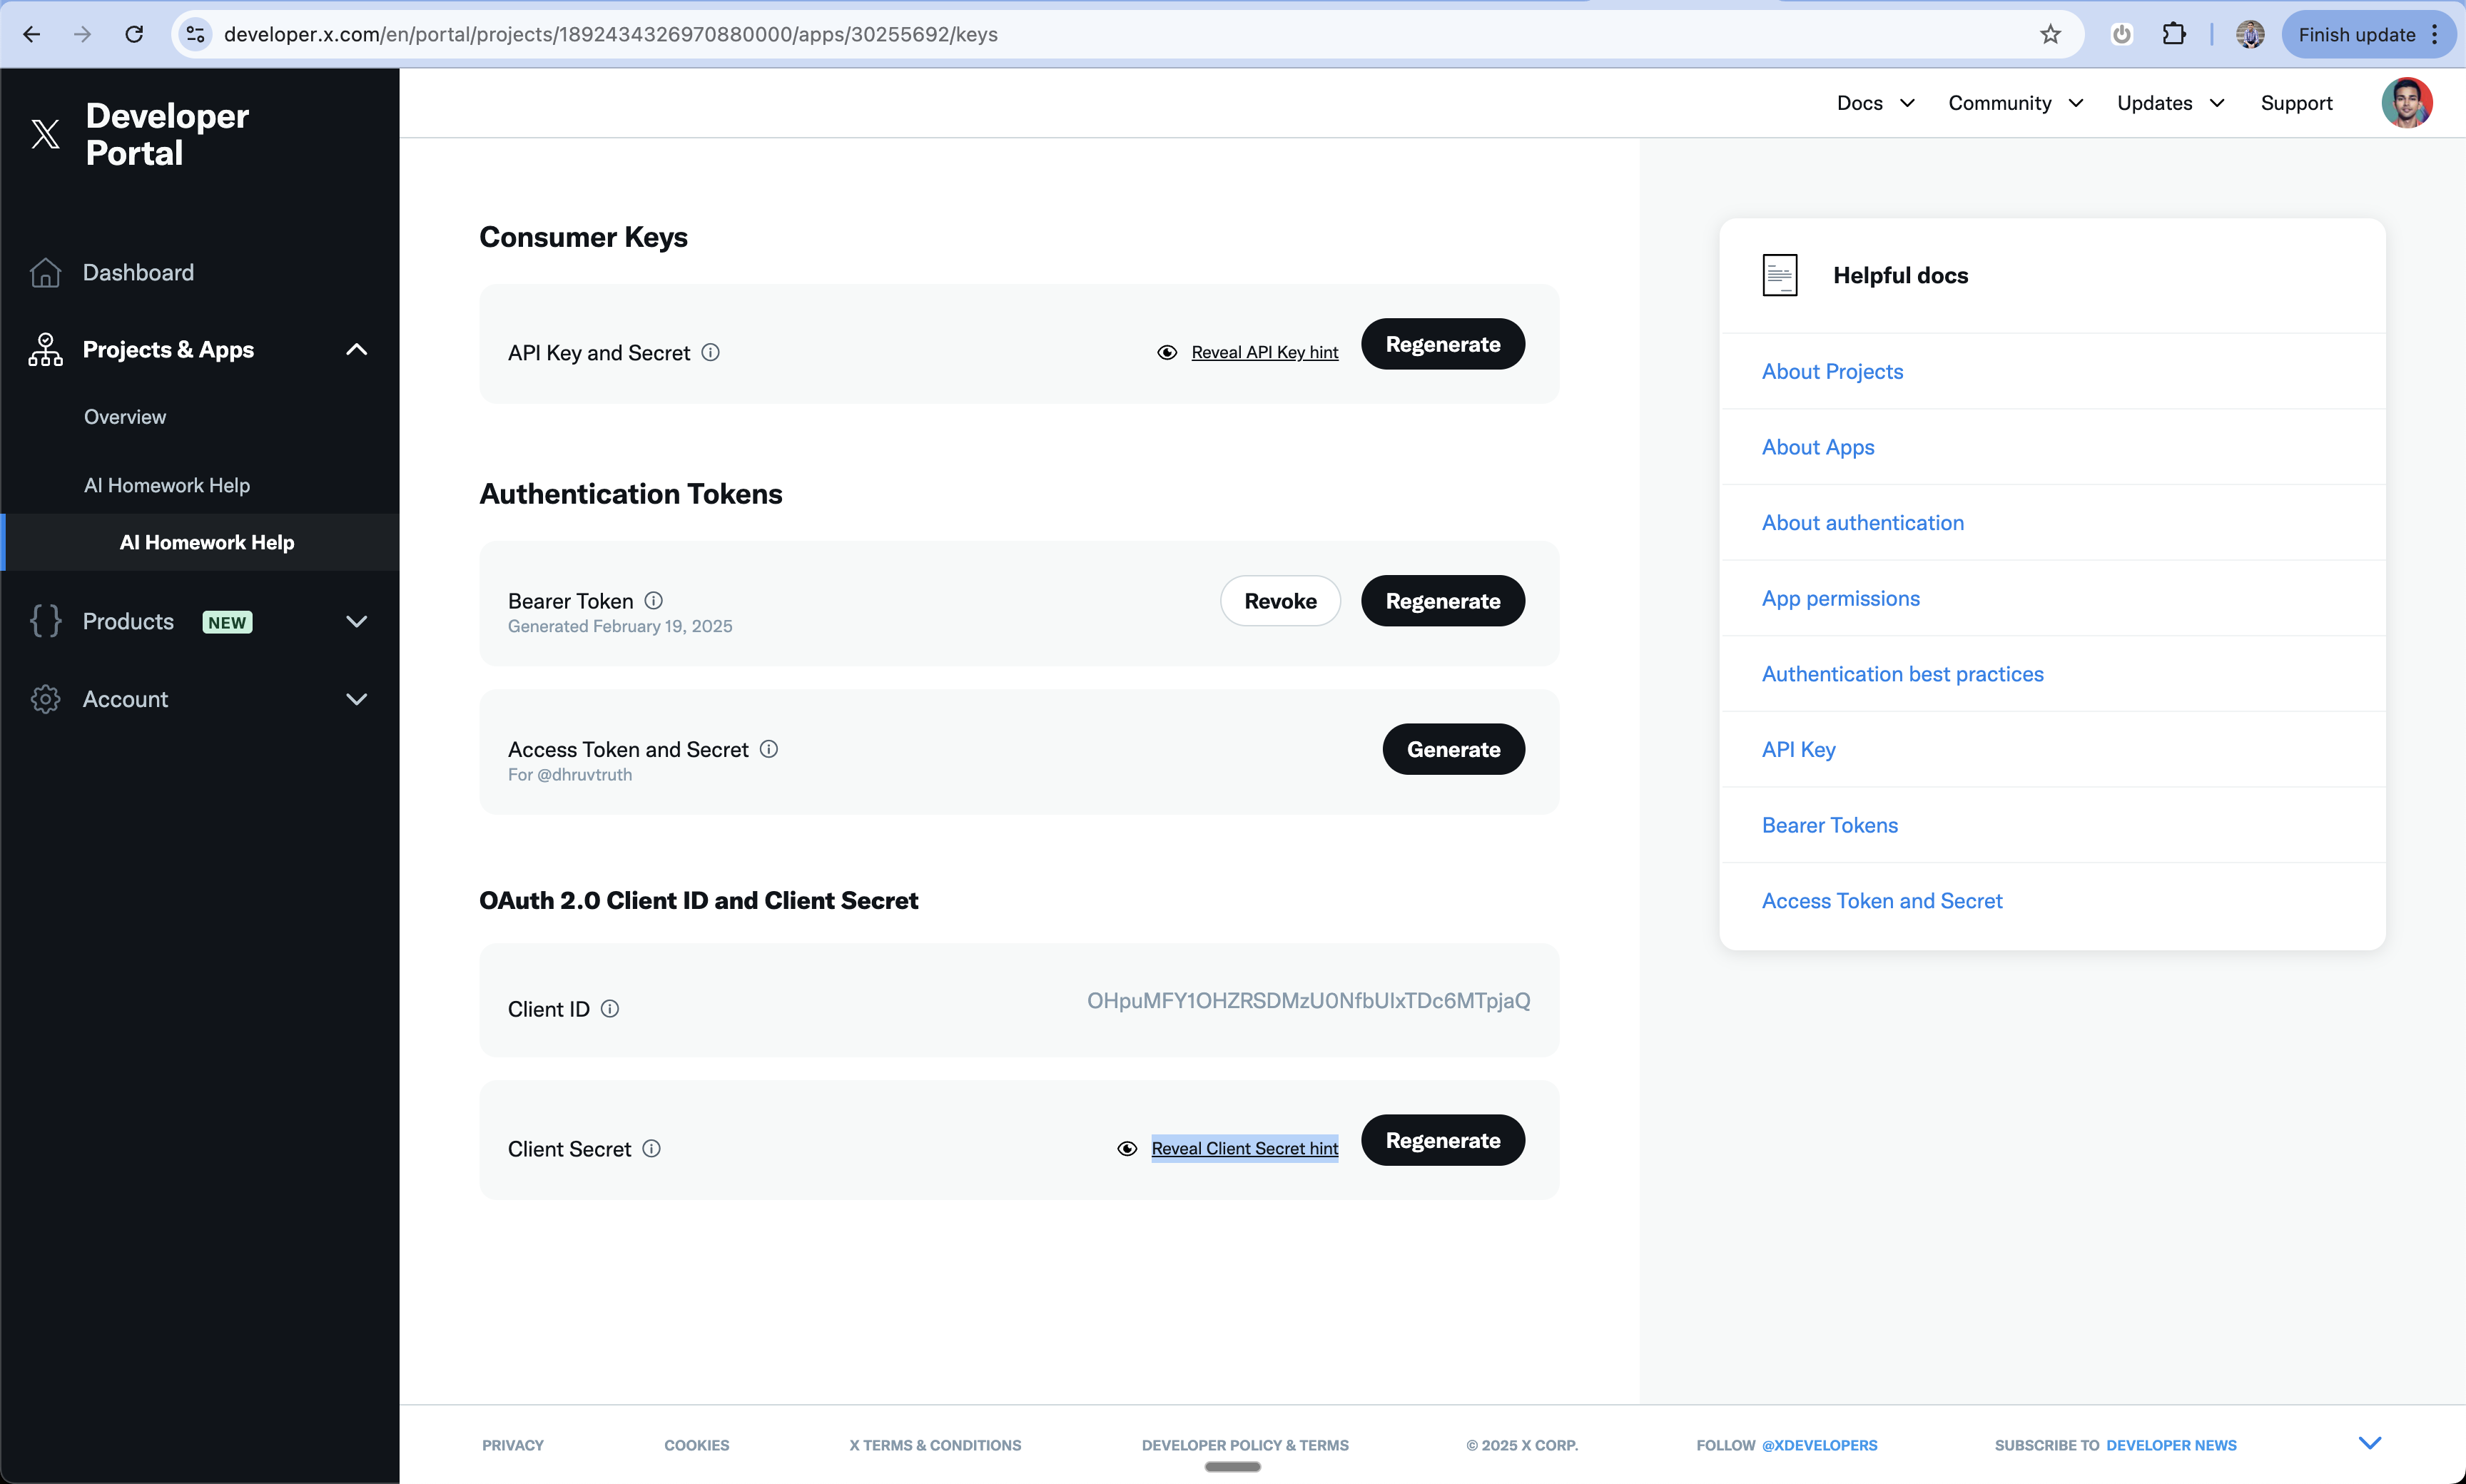 Keep your Client Secret secure - never share it publicly
## Add to Anything project
You have two options:
1. Prompt Anything with "Let users sign in"
2. Enable User Accounts from the logo menu
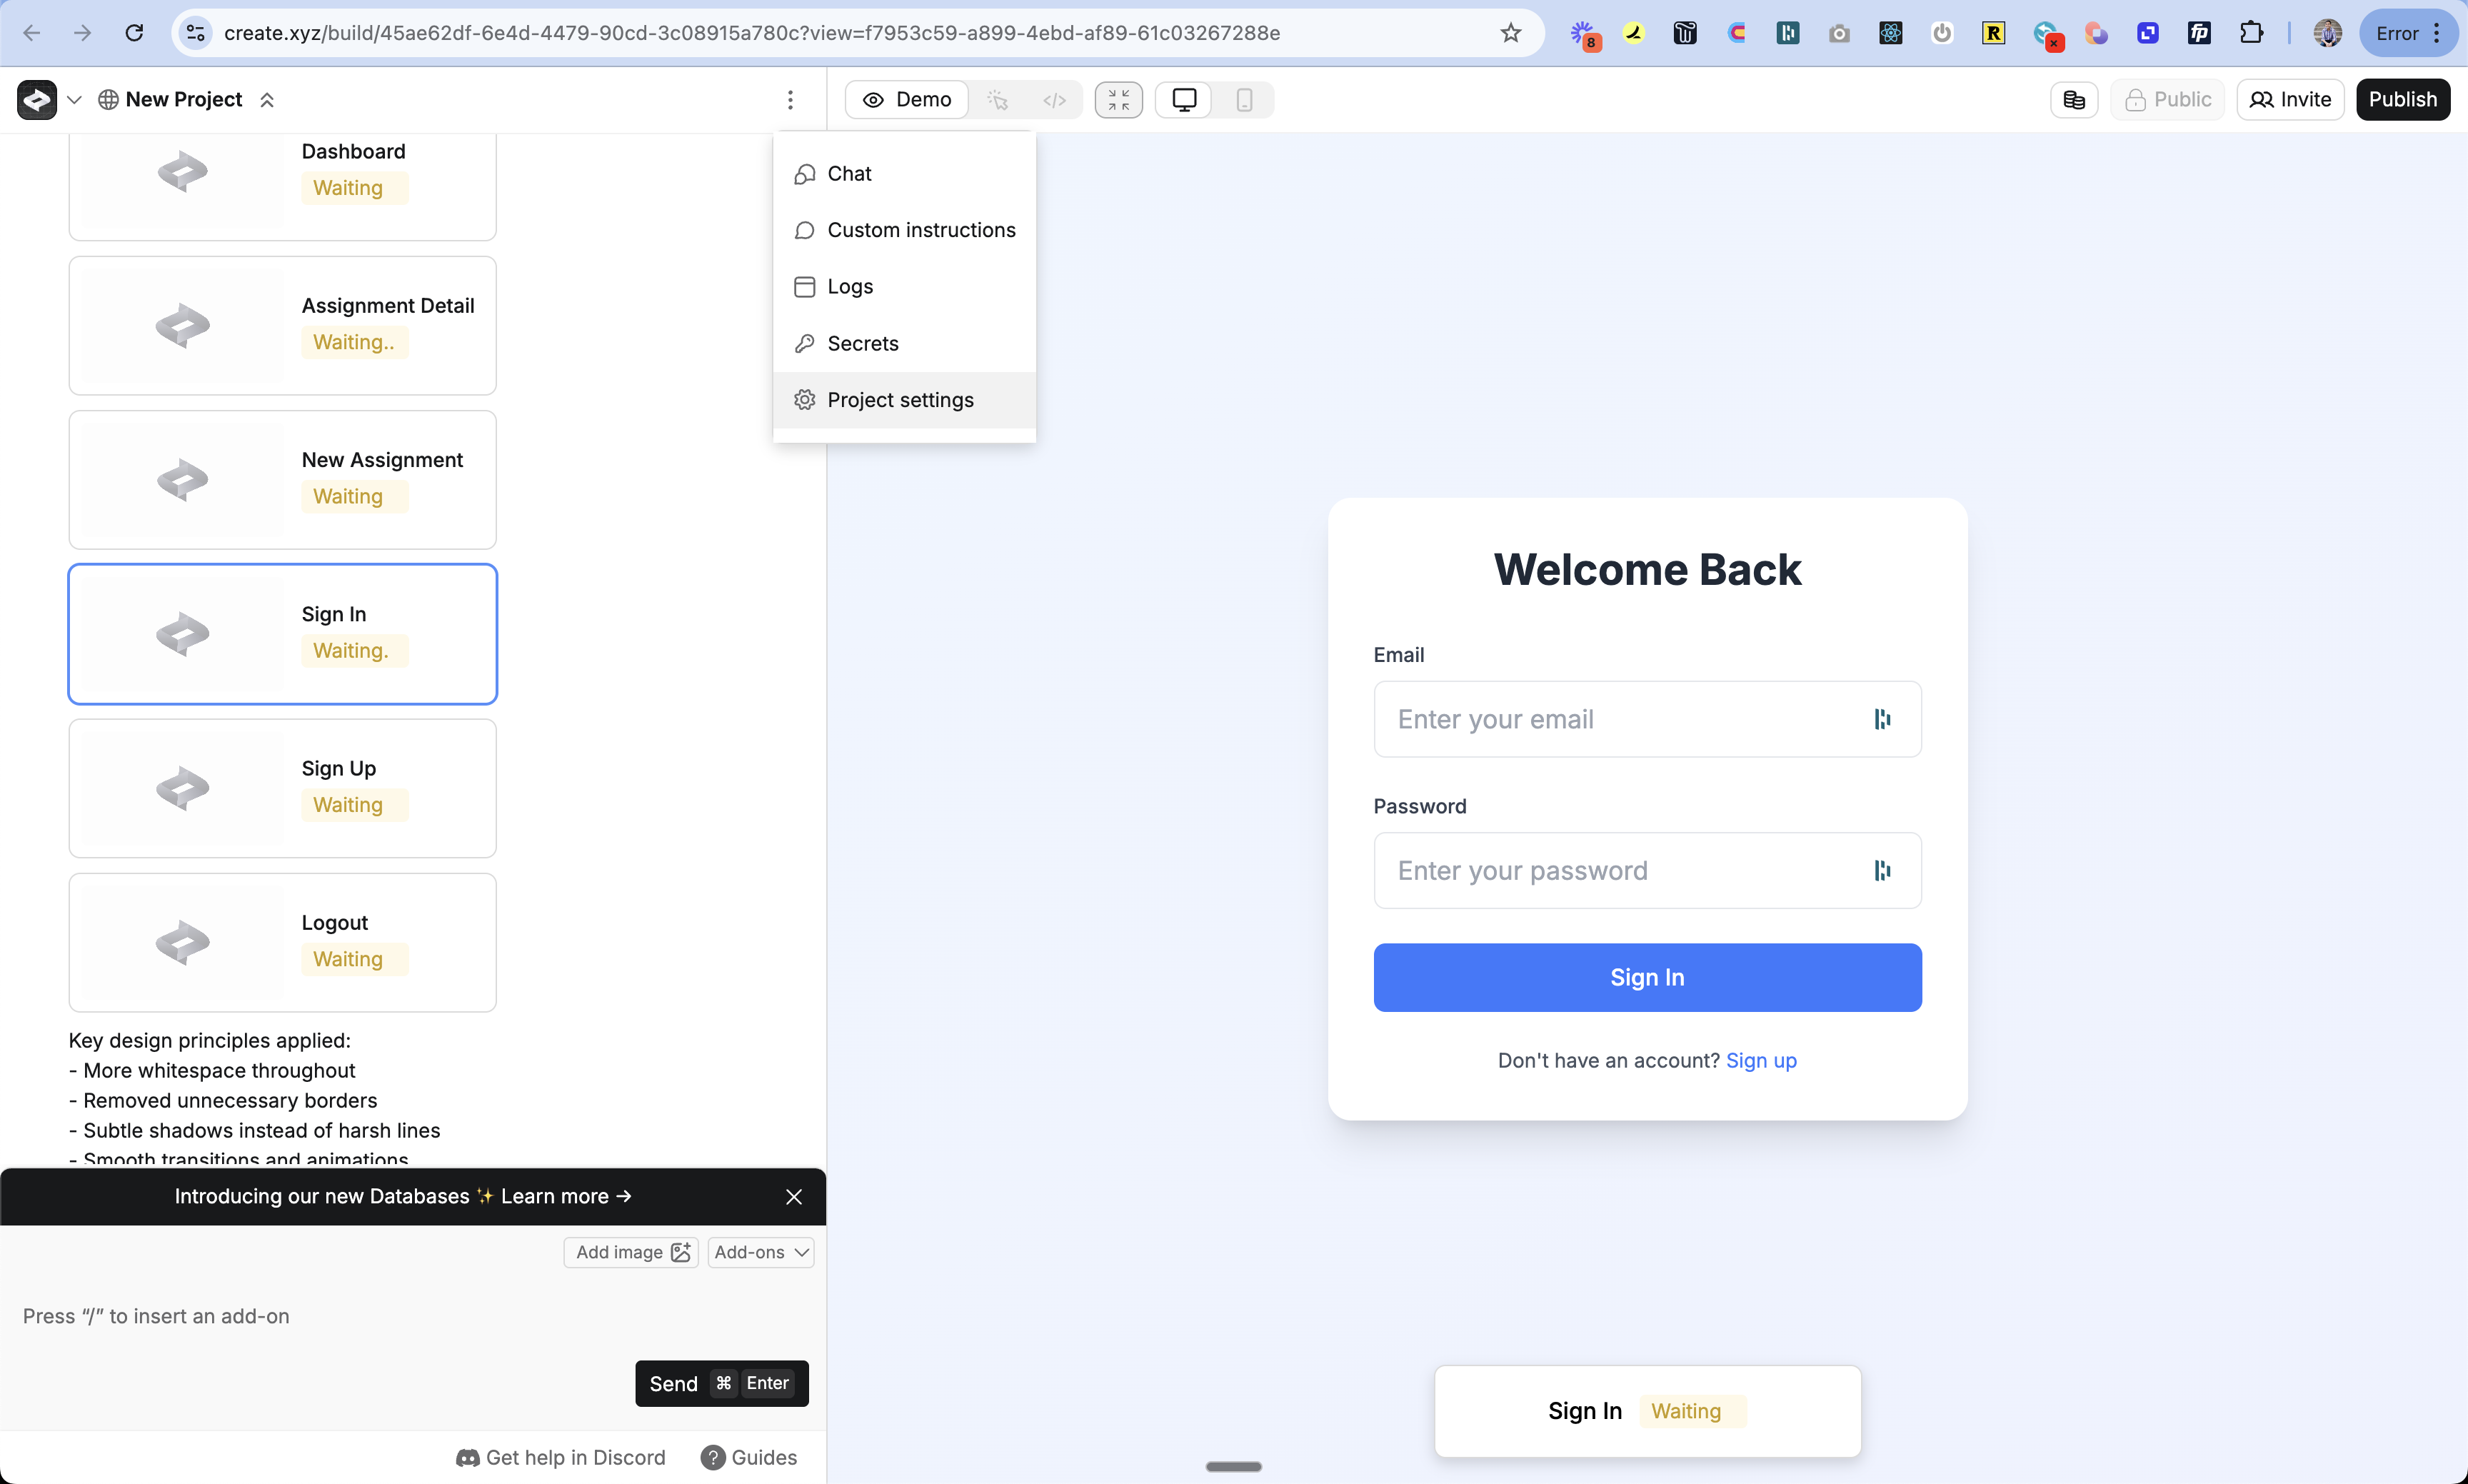
1. Click the 3-dot menu at the top of the chat
2. Select "Project Settings"
Keep your Client Secret secure - never share it publicly
## Add to Anything project
You have two options:
1. Prompt Anything with "Let users sign in"
2. Enable User Accounts from the logo menu
1. Click the 3-dot menu at the top of the chat
2. Select "Project Settings"
 1. Navigate to the Authentication section
2. Find Login with X toggle
3. Turn it on
1. Navigate to the Authentication section
2. Find Login with X toggle
3. Turn it on
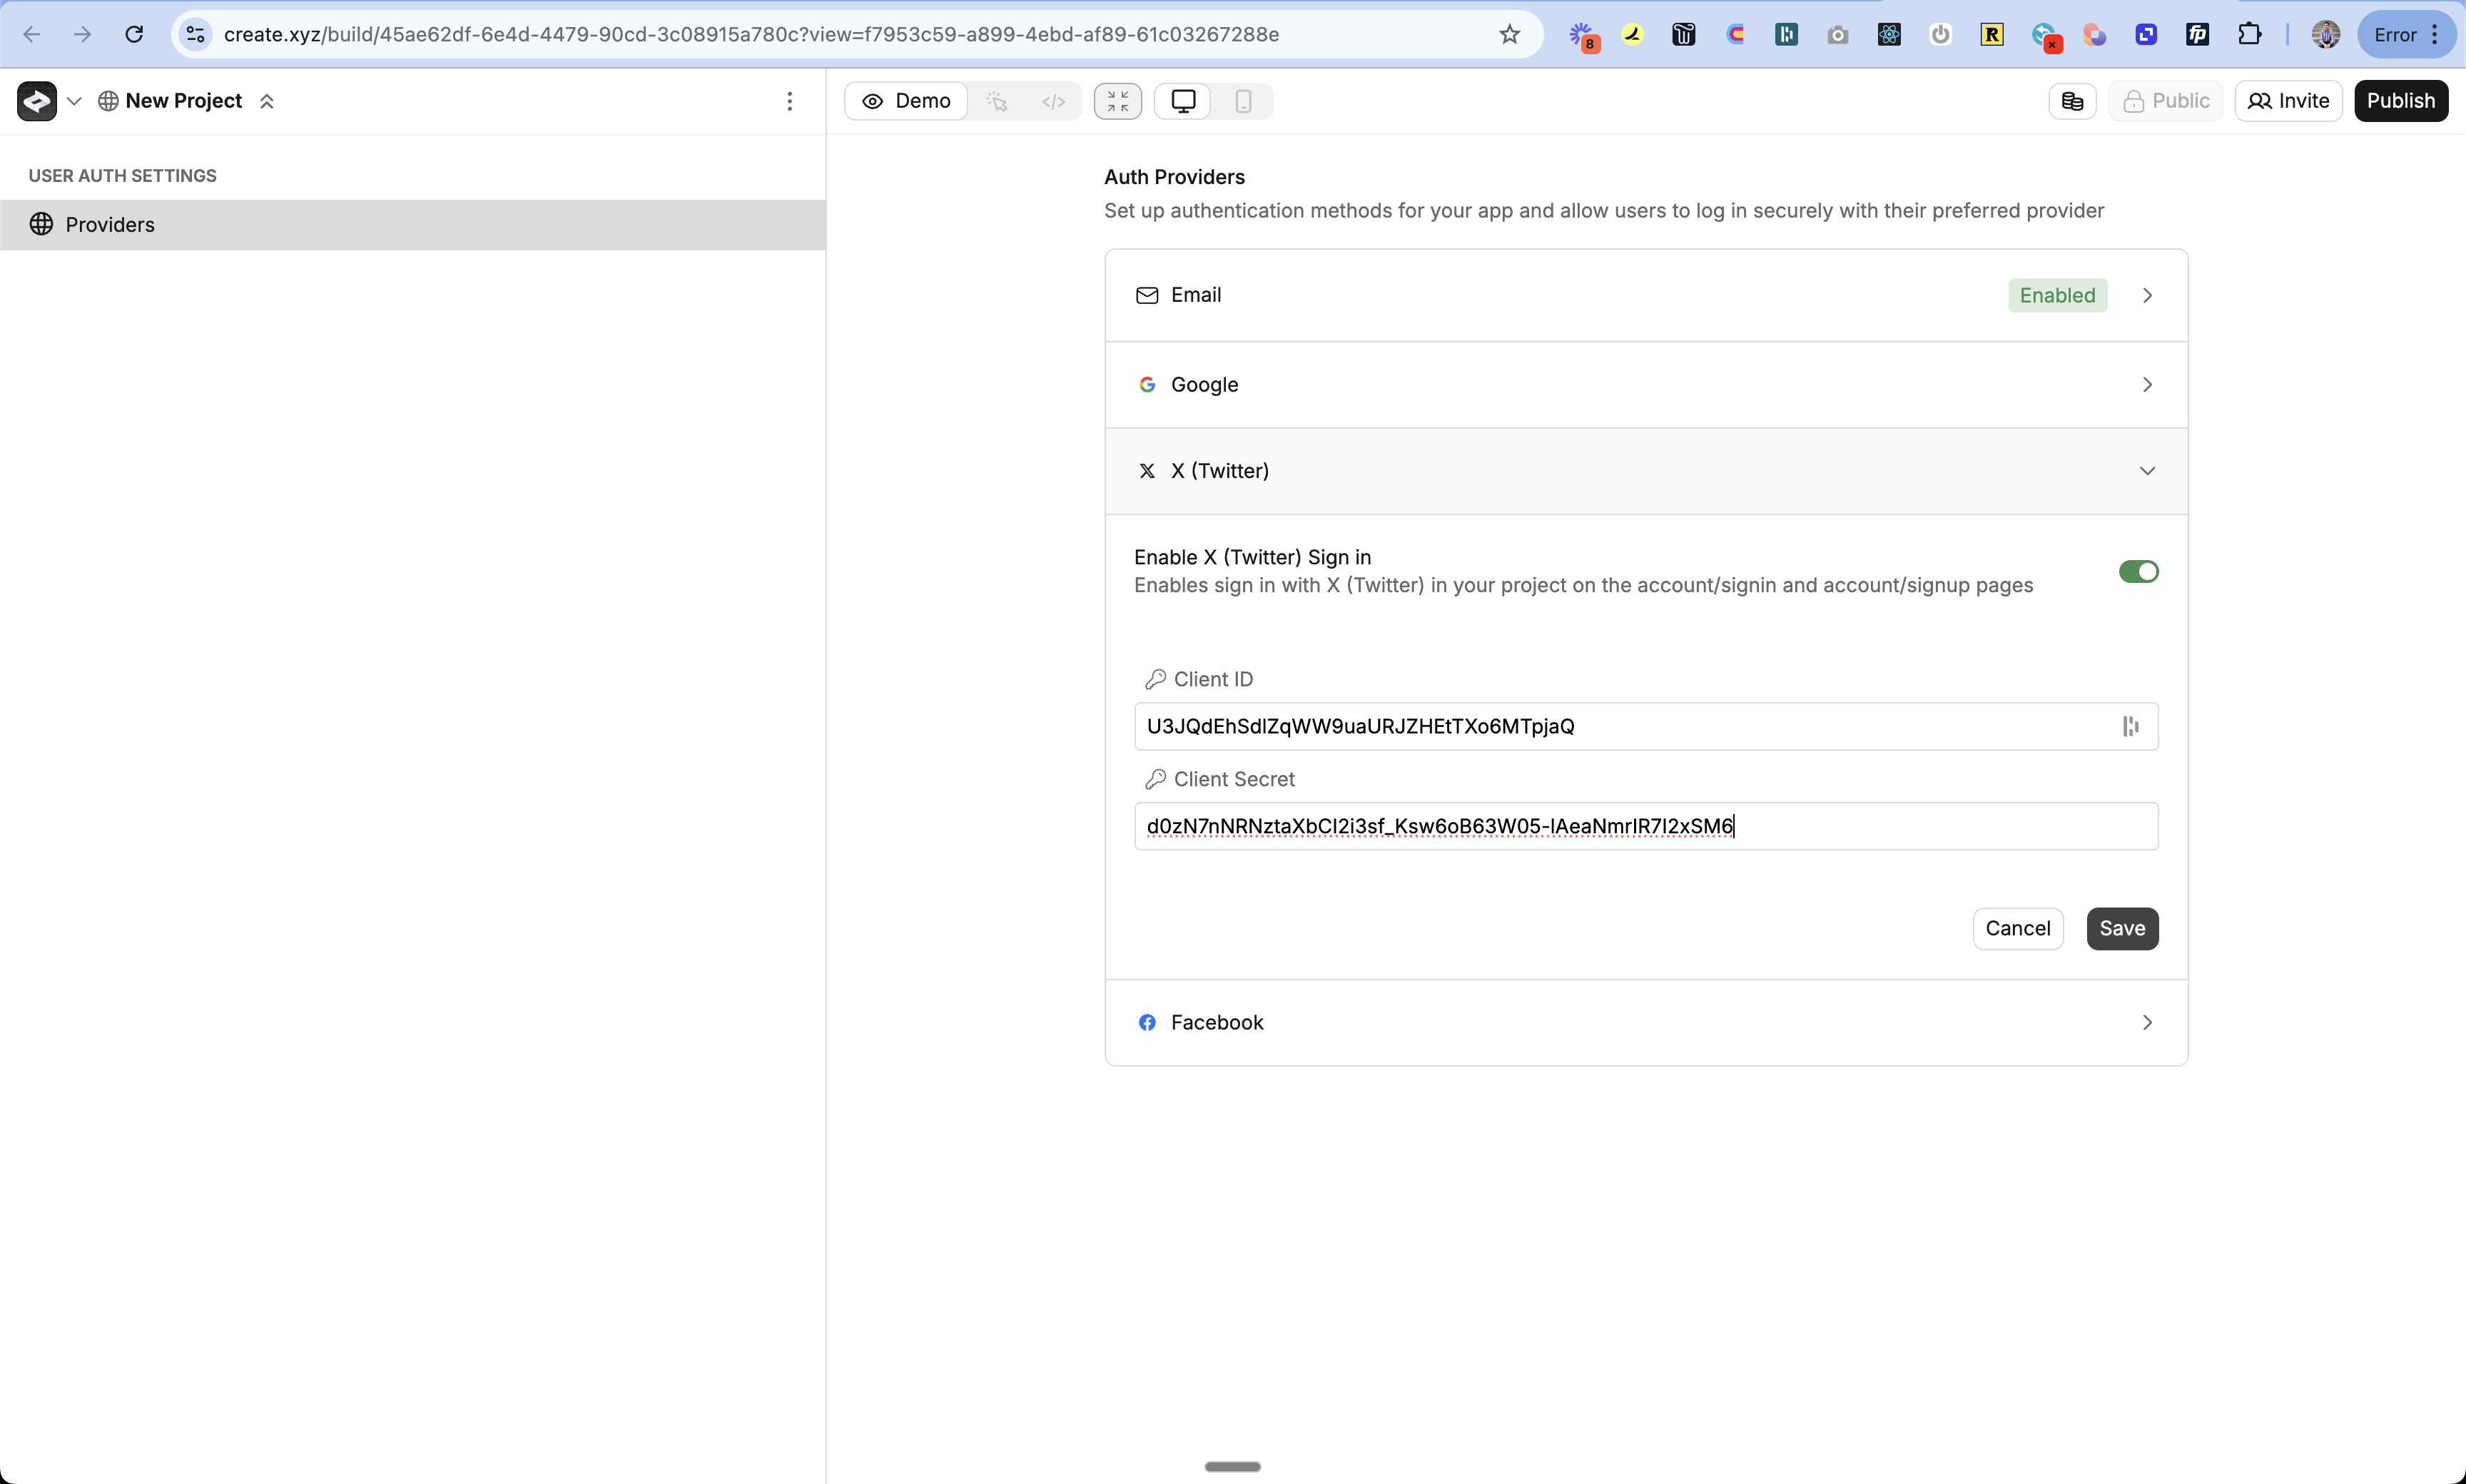 1. Paste in your Client ID
2. Paste in your Client Secret
3. Click Save
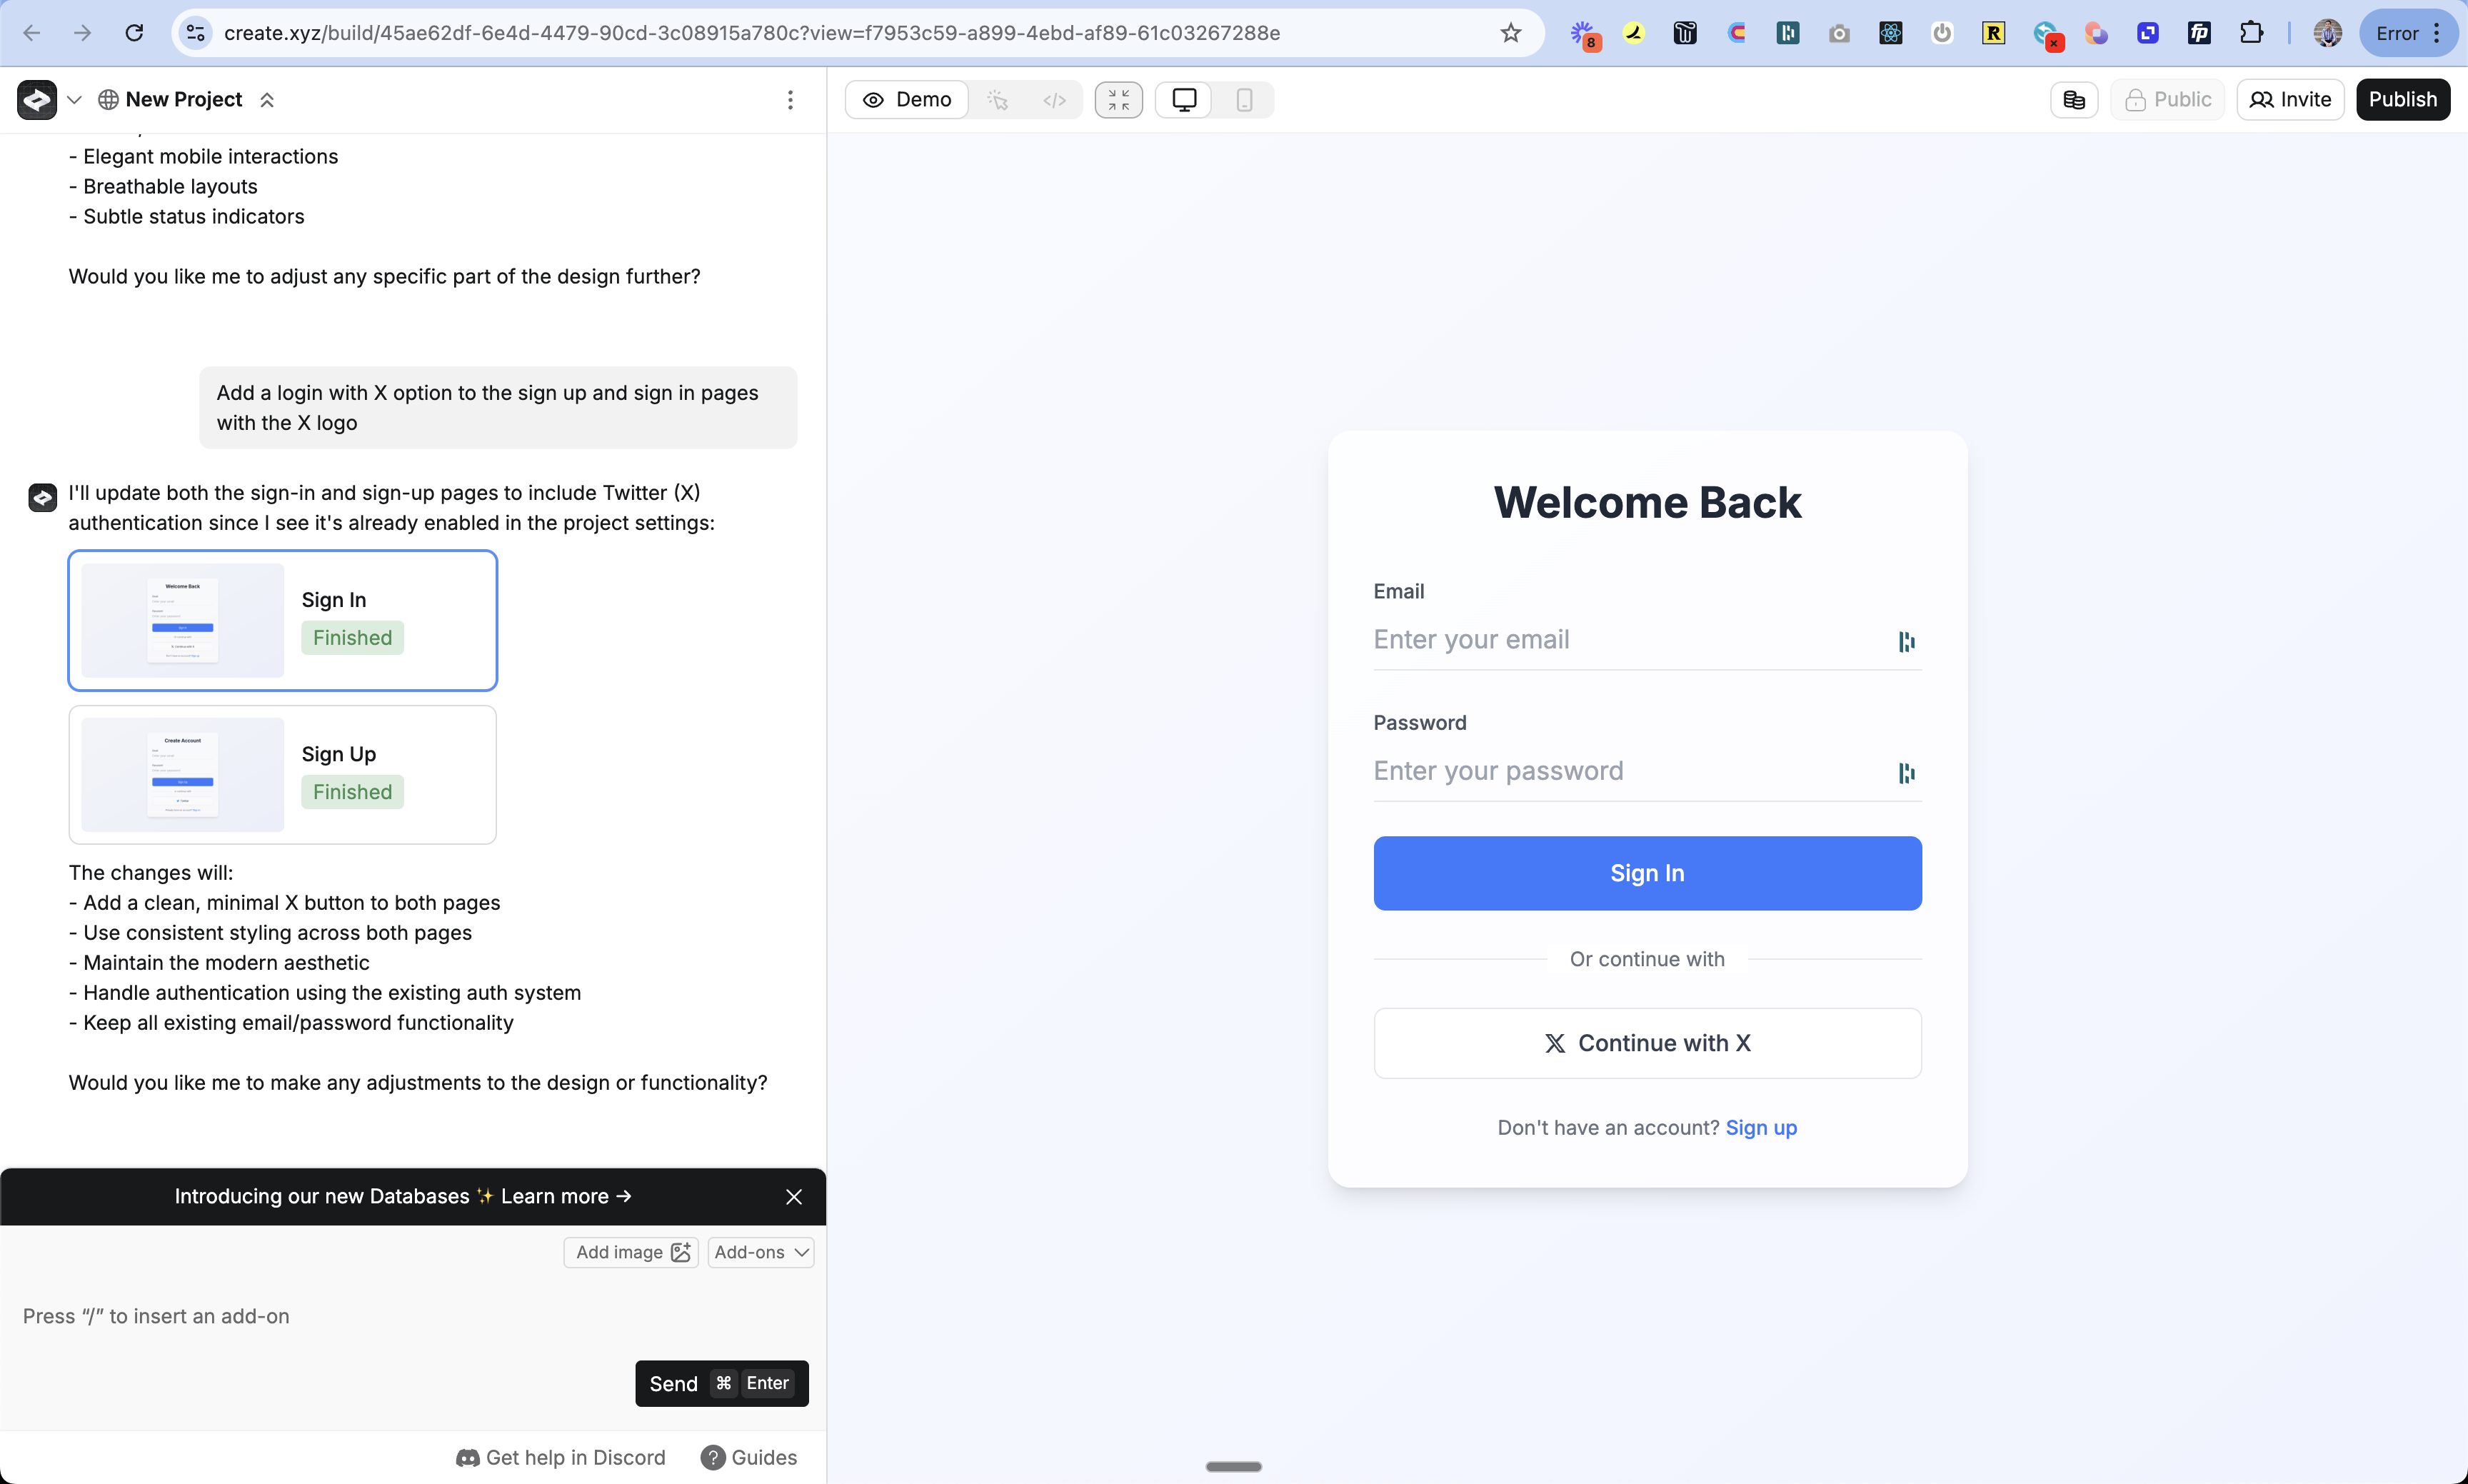
1. Return to the chat
2. Prompt Anything with "Add Login with X as an option"
3. Anything will update your sign-in pages automatically
1. Paste in your Client ID
2. Paste in your Client Secret
3. Click Save
1. Return to the chat
2. Prompt Anything with "Add Login with X as an option"
3. Anything will update your sign-in pages automatically
 1. Click the Publish button
2. Review your changes
3. Publish to make the Login with X feature live
## Testing
1. Publish your changes
2. Open your app in a new incognito window
3. Go to the sign in page
4. Try signing in with X
5. Check the [auth\_users table](/apps/databases) to see your new user
## Troubleshooting
* Check if User Accounts is turned on
* Make sure Login with X is enabled in Project Settings
* Prompt Anything with "Add Login with X as an option to the sign in page"
* Try publishing your changes again
* Clear your browser data and try in incognito mode
* Double check your domain is exactly the same in Anything and X
* Make sure your callback URL is right: `www.[your-domain].com/api/auth/callback/twitter`
* Check if your Client ID and Secret are pasted correctly
* Make sure OAuth 2.0 is turned on in X
* Make sure your app is live at your custom domain
* Update the callback URLs in X Developer Portal
* Update your website URL in X app settings
* Re-publish your app on the new domain
## FAQ
By default:
* Username
* Display name
* Profile picture (if they have one)
Additional information requires requesting extra permissions and may require X app review.
Yes! Just:
1. Go back to chat
2. Tell Anything how you want it to look
3. Anything will help style it while following X's rules
* For basic login: No
* For extra features: Yes
* You'll need to submit your app to X for approval
## See Also
* [User Accounts](/apps/auth)
* [Customizing Login Pages](/apps/auth#customizing-auth-pages)
1. Click the Publish button
2. Review your changes
3. Publish to make the Login with X feature live
## Testing
1. Publish your changes
2. Open your app in a new incognito window
3. Go to the sign in page
4. Try signing in with X
5. Check the [auth\_users table](/apps/databases) to see your new user
## Troubleshooting
* Check if User Accounts is turned on
* Make sure Login with X is enabled in Project Settings
* Prompt Anything with "Add Login with X as an option to the sign in page"
* Try publishing your changes again
* Clear your browser data and try in incognito mode
* Double check your domain is exactly the same in Anything and X
* Make sure your callback URL is right: `www.[your-domain].com/api/auth/callback/twitter`
* Check if your Client ID and Secret are pasted correctly
* Make sure OAuth 2.0 is turned on in X
* Make sure your app is live at your custom domain
* Update the callback URLs in X Developer Portal
* Update your website URL in X app settings
* Re-publish your app on the new domain
## FAQ
By default:
* Username
* Display name
* Profile picture (if they have one)
Additional information requires requesting extra permissions and may require X app review.
Yes! Just:
1. Go back to chat
2. Tell Anything how you want it to look
3. Anything will help style it while following X's rules
* For basic login: No
* For extra features: Yes
* You'll need to submit your app to X for approval
## See Also
* [User Accounts](/apps/auth)
* [Customizing Login Pages](/apps/auth#customizing-auth-pages)