> ## Documentation Index
> Fetch the complete documentation index at: https://www.anything.com/docs/llms.txt
> Use this file to discover all available pages before exploring further.

# Submit to App Store

> Get your mobile app live on the Apple App Store using TestFlight

Anything handles the build and submission process for you. You publish through Apple's [TestFlight](https://developer.apple.com/testflight/), test on a real device, then submit for App Store review.

## Publish via TestFlight

<Steps>
  <Step title="Prepare your app">
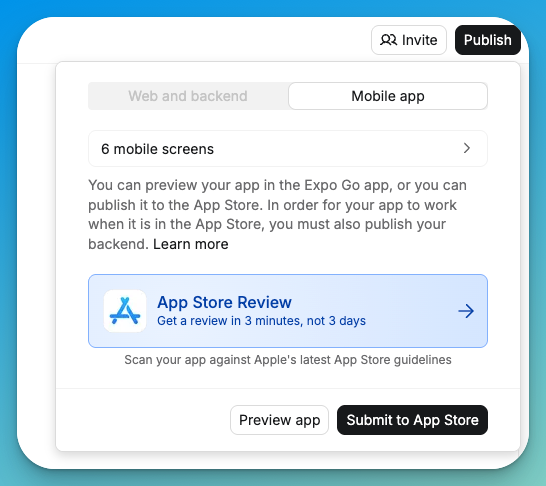
    Click **Publish** in your mobile project and select **App Store Review** to start the automated review system.

    <Frame caption="App Store review option in the publish menu">
      <img src="https://mintcdn.com/create/rQqb37BxBaZ_dcTn/images/appstorereview.png?fit=max&auto=format&n=rQqb37BxBaZ_dcTn&q=85&s=78ac2f6fb3ba5b157fe68b17bbef041b" alt="App Store review option in the publish menu" width="546" height="486" data-path="images/appstorereview.png" />
    </Frame>

    Make sure you have an [Apple Developer Account](https://developer.apple.com/account) and [verify it's active](/apps/mobile/verify-apple-developer-account).

    <Warning>
      New Apple Developer Accounts typically take 3 days to process and may require ID verification. You won't be able to publish until Apple sends a "Welcome to The Developer Program" email.
    </Warning>

    Gather these assets before you start:

    * App icon (1024x1024px)
    * App description
    * Screenshots for iPhone and iPad displays (or [generate them](#generate-screenshots) in Project Settings)
    * Privacy policy URL (use [Termly](https://www.termly.io) to generate one)
    * A support page in your project
  </Step>

  <Step title="Submit your app">
    Click **Publish** and select **Submit to App Store**.

    <Frame caption="Mobile app publishing walkthrough">
      <iframe width="100%" height="400" src="https://www.loom.com/embed/af51b0cf1d634dd48ab03688a0b01af6?sid=47d4190a-92bb-4c81-877f-c1ad76aff7d3" title="Mobile App Publishing Tutorial" frameBorder="0" allow="accelerometer; autoplay; clipboard-write; encrypted-media; gyroscope; picture-in-picture; fullscreen" allowFullScreen webkitallowfullscreen="true" mozallowfullscreen="true" />
    </Frame>

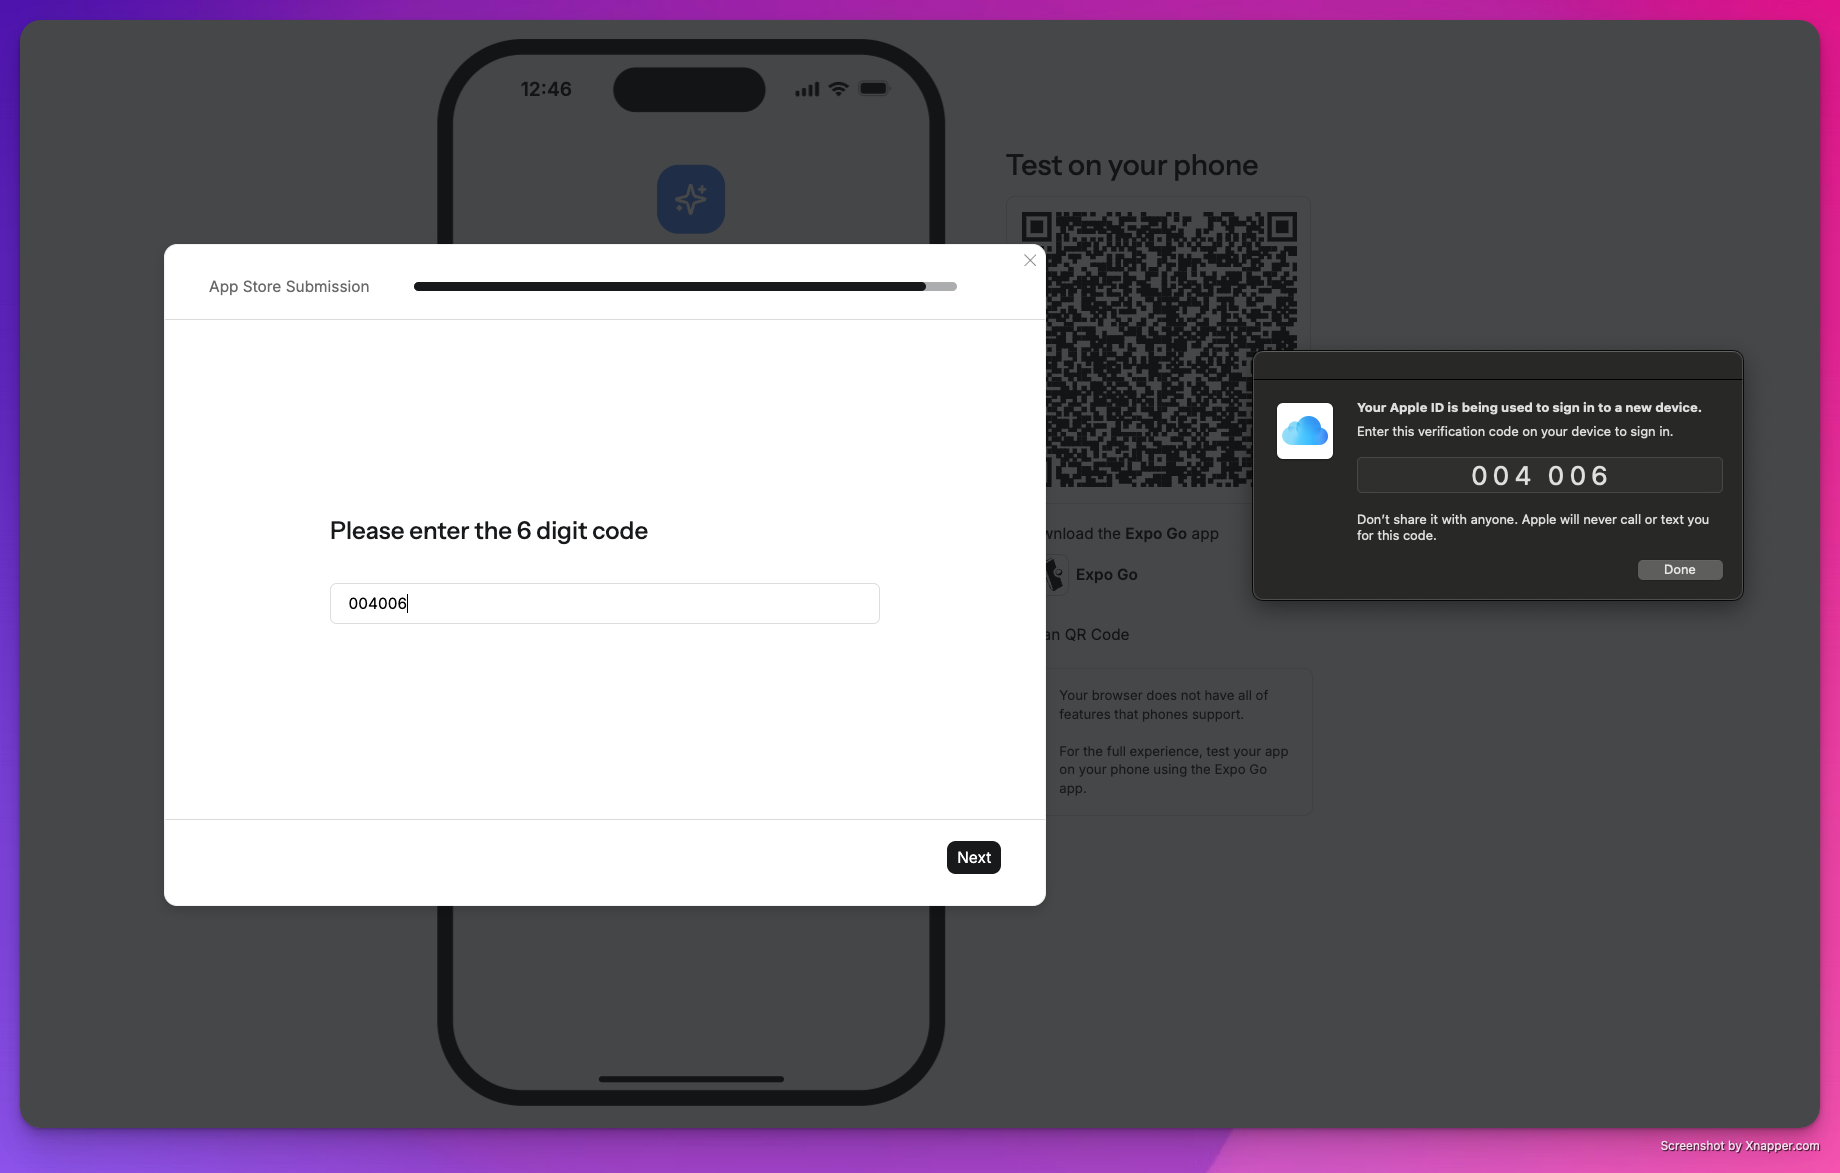
    Enter your Apple ID credentials, then complete verification. Text verification sends a code to your phone on record. Device authentication prompts a security code on any Apple device signed in with your Apple ID.

    If something goes wrong during sign-in, Anything shows you what happened: invalid credentials, a bad verification code, or an issue with your Apple account. Follow the on-screen message to fix it and try again.

    <Frame caption="Apple authentication code prompt">
      <img src="https://mintcdn.com/create/VE4G9m6I567_bcO7/images/mobileappstorecode.png?fit=max&auto=format&n=VE4G9m6I567_bcO7&q=85&s=8800d9bebfc3d59fc2af14e7a9db2013" alt="Apple authentication code prompt" width="1840" height="1173" data-path="images/mobileappstorecode.png" />
    </Frame>

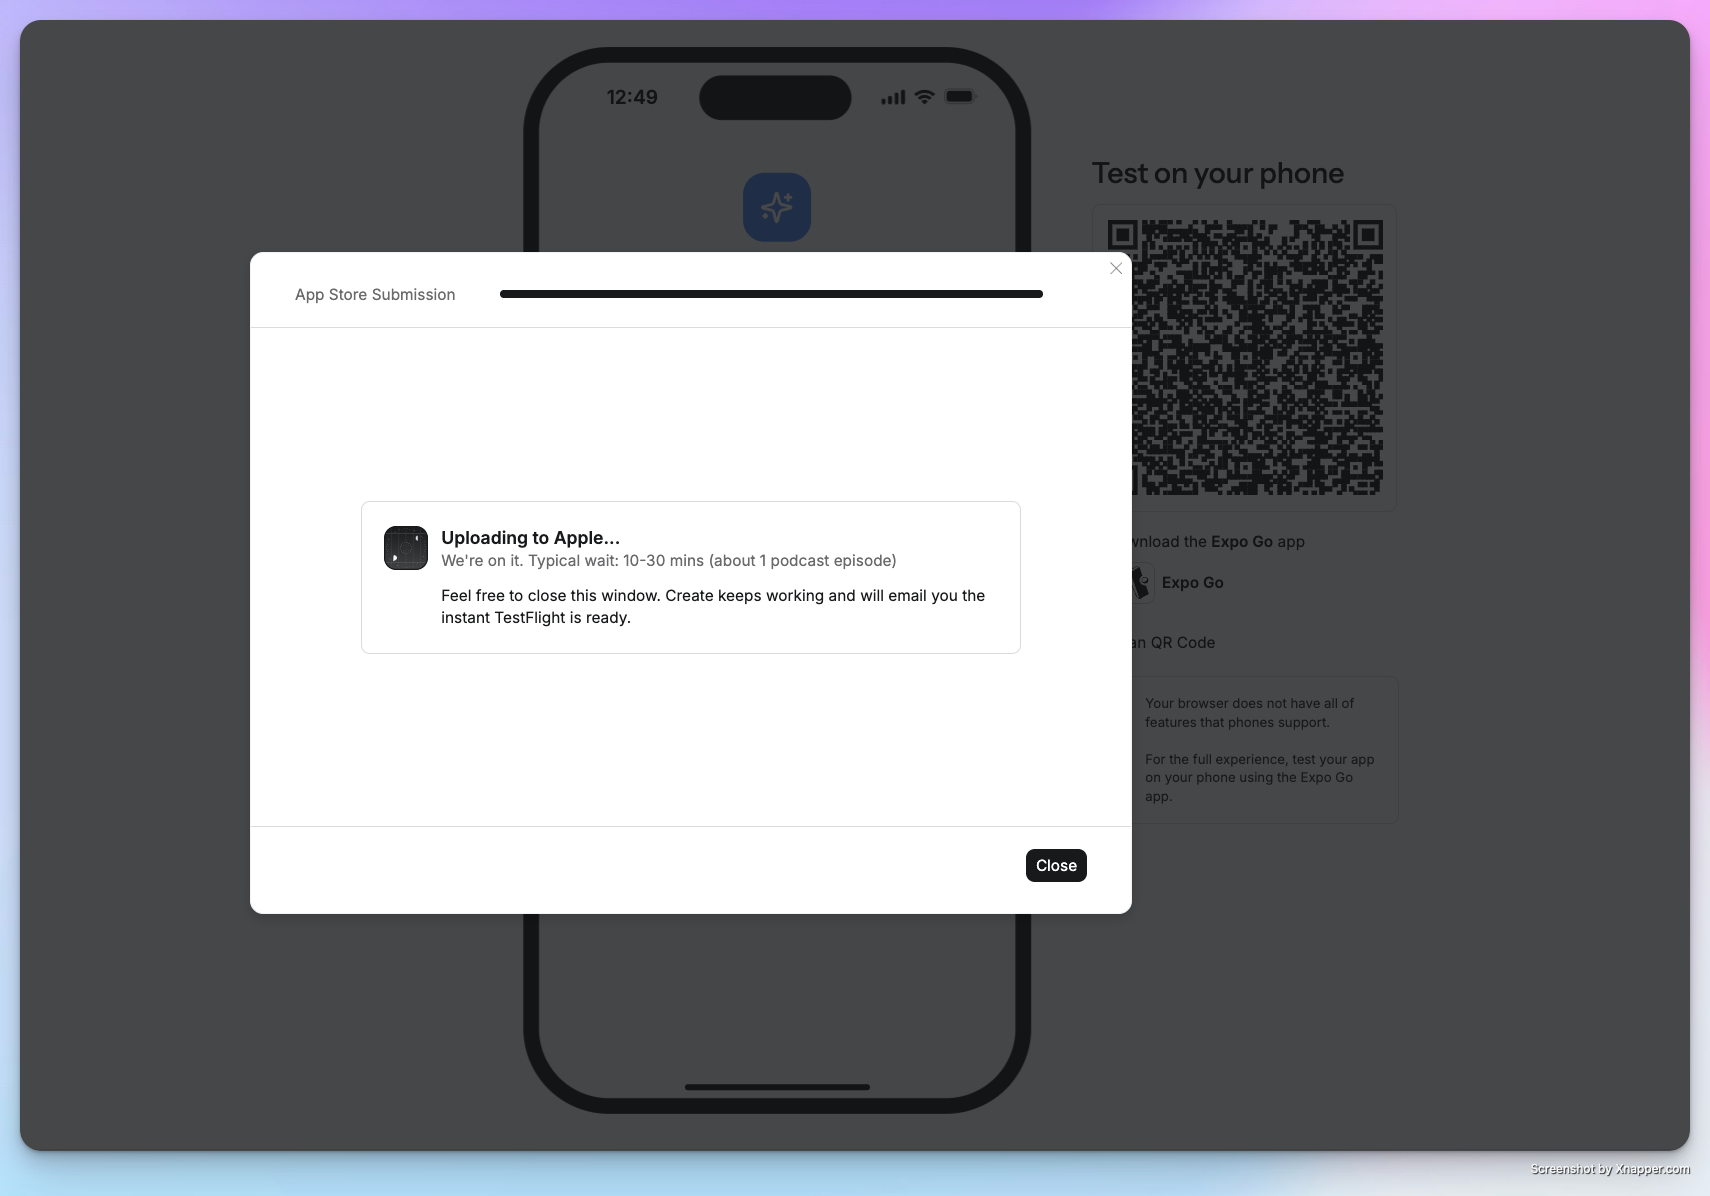
    Anything handles the build and uploads it to App Store Connect. This usually takes 30 minutes or less.

    <Frame caption="Upload in progress">
      <img src="https://mintcdn.com/create/VE4G9m6I567_bcO7/images/mobileuploadwaiting.png?fit=max&auto=format&n=VE4G9m6I567_bcO7&q=85&s=ba38cac2eac8cb815b644a249c9c2a91" alt="Build upload in progress" width="1710" height="1196" data-path="images/mobileuploadwaiting.png" />
    </Frame>
  </Step>

  <Step title="Install via TestFlight">
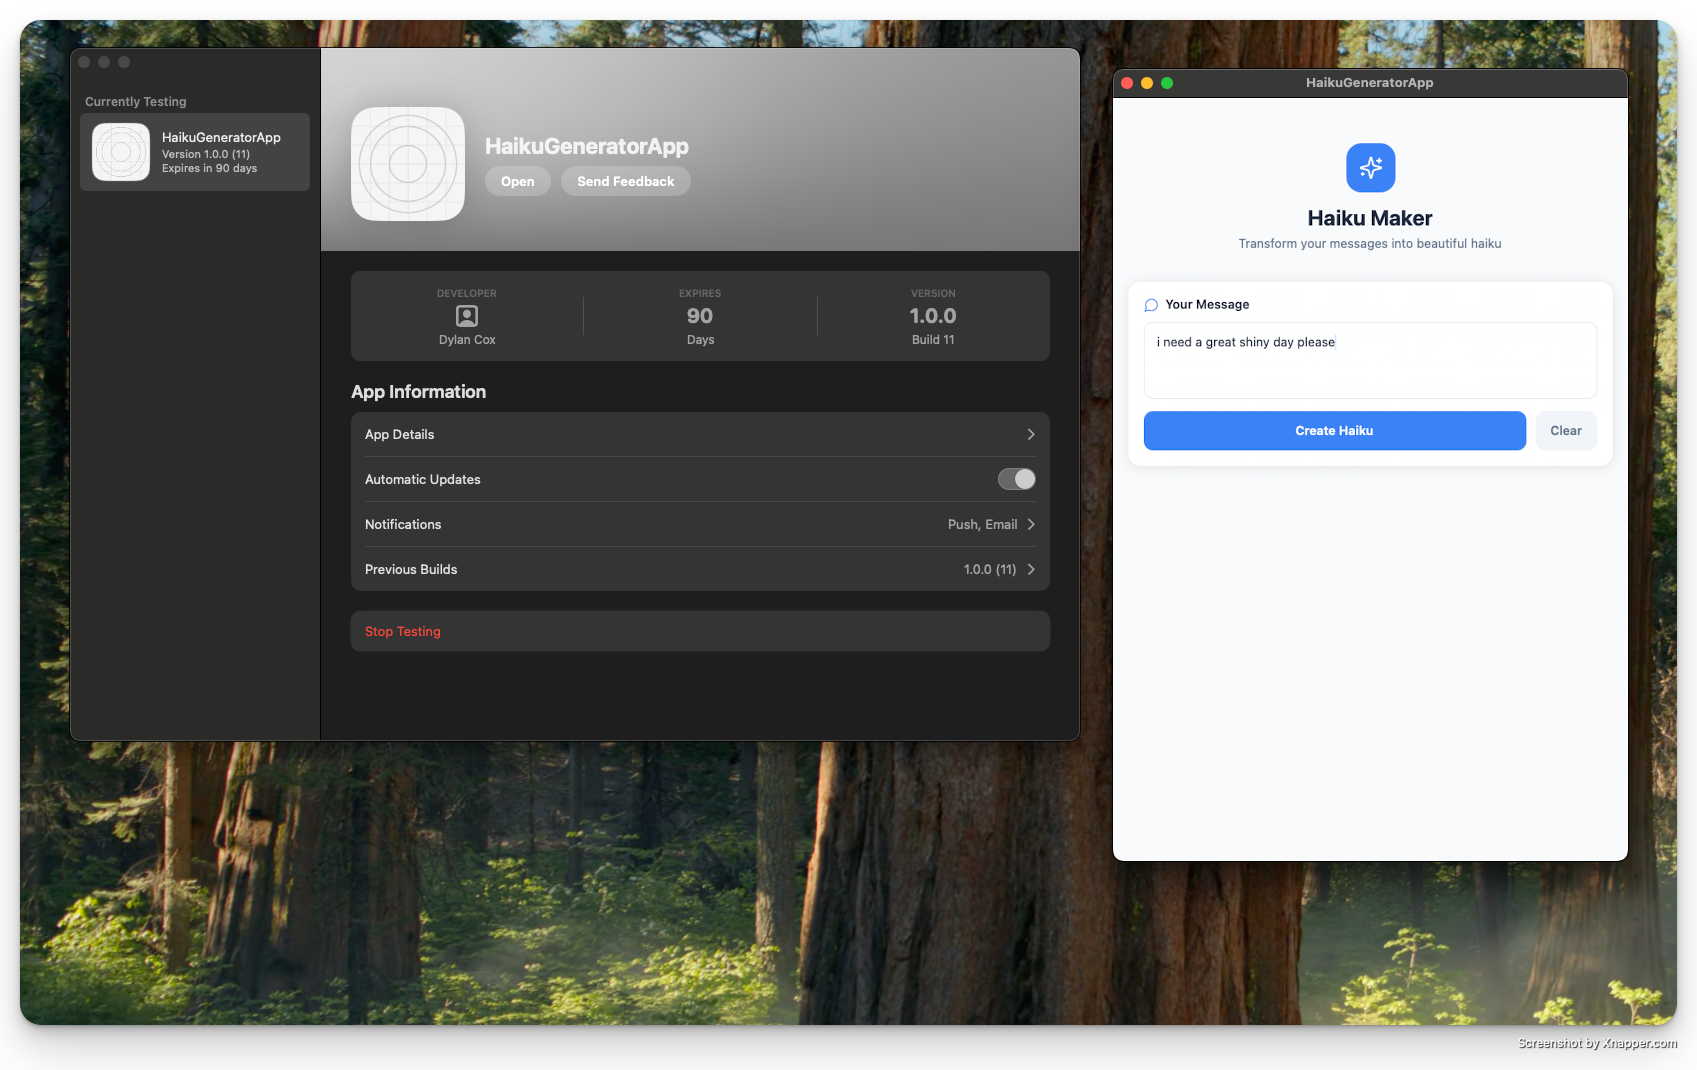
    Download [TestFlight](https://apps.apple.com/us/app/testflight/id899247664) from the App Store and log in with your developer account.

    <Note>
      No iPhone? TestFlight also works on recent Mac laptops.
    </Note>

    Check your email for an invitation from App Store Connect with an invite code. Redeem it in TestFlight. You only need to do this once per app.

    <Frame caption="App Store Connect invitation email">
      <img src="https://mintcdn.com/create/dPp8LRxEG75nRlMj/images/mobile/apple-email.png?fit=max&auto=format&n=dPp8LRxEG75nRlMj&q=85&s=17a0f0770a591e44b90ffb6ef5d85d6b" alt="App Store Connect invitation email" width="1525" height="712" data-path="images/mobile/apple-email.png" />
    </Frame>

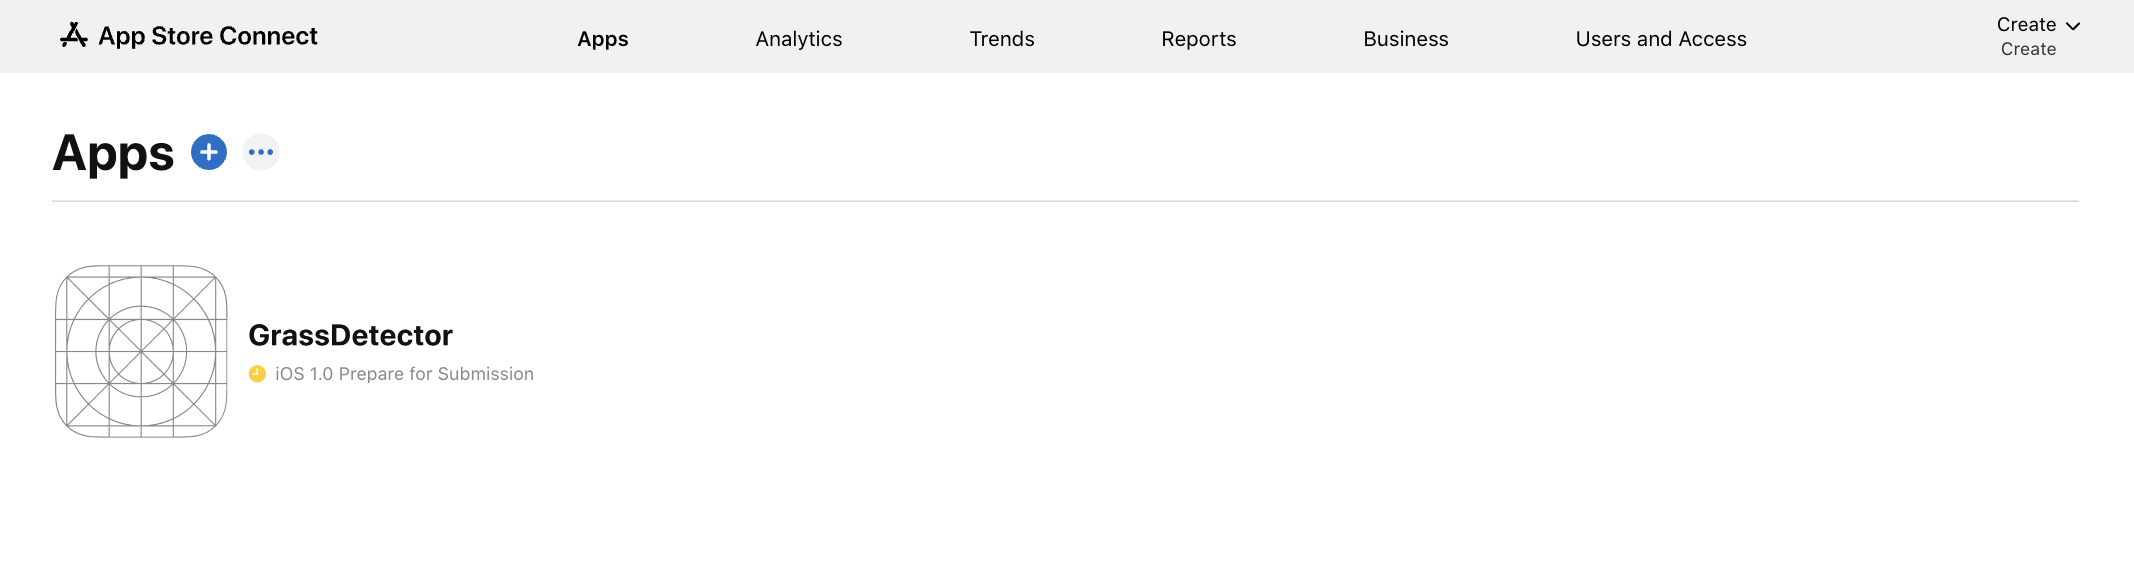
    Visit [App Store Connect](https://appstoreconnect.apple.com/login) to view and manage your app.

    <Frame caption="Viewing your app in App Store Connect">
      <img src="https://mintcdn.com/create/dPp8LRxEG75nRlMj/images/mobile/apple-view-app.png?fit=max&auto=format&n=dPp8LRxEG75nRlMj&q=85&s=03915bfd7a9d0252b8494b50db59a333" alt="App listing in App Store Connect" width="2134" height="578" data-path="images/mobile/apple-view-app.png" />
    </Frame>
  </Step>

  <Step title="Test your app">
    Open TestFlight and use your app as an end user for final testing.

    <Frame caption="Testing your app in TestFlight">
      <img src="https://mintcdn.com/create/gRjeYBLWcrADikTp/images/testflight.png?fit=max&auto=format&n=gRjeYBLWcrADikTp&q=85&s=c55fb0e721dae6bdb49e917f3c3090b2" alt="App running in TestFlight" width="1697" height="1070" data-path="images/testflight.png" />
    </Frame>

    <Frame caption="TestFlight testing walkthrough">
      <iframe width="100%" height="400" src="https://www.loom.com/embed/4c55ddabab6443138199531a574b4bf4?sid=5d491237-be79-4e44-8425-ec0274f9040d" title="TestFlight Testing Tutorial" frameBorder="0" allow="accelerometer; autoplay; clipboard-write; encrypted-media; gyroscope; picture-in-picture; fullscreen" allowFullScreen webkitallowfullscreen="true" mozallowfullscreen="true" />
    </Frame>
  </Step>
</Steps>

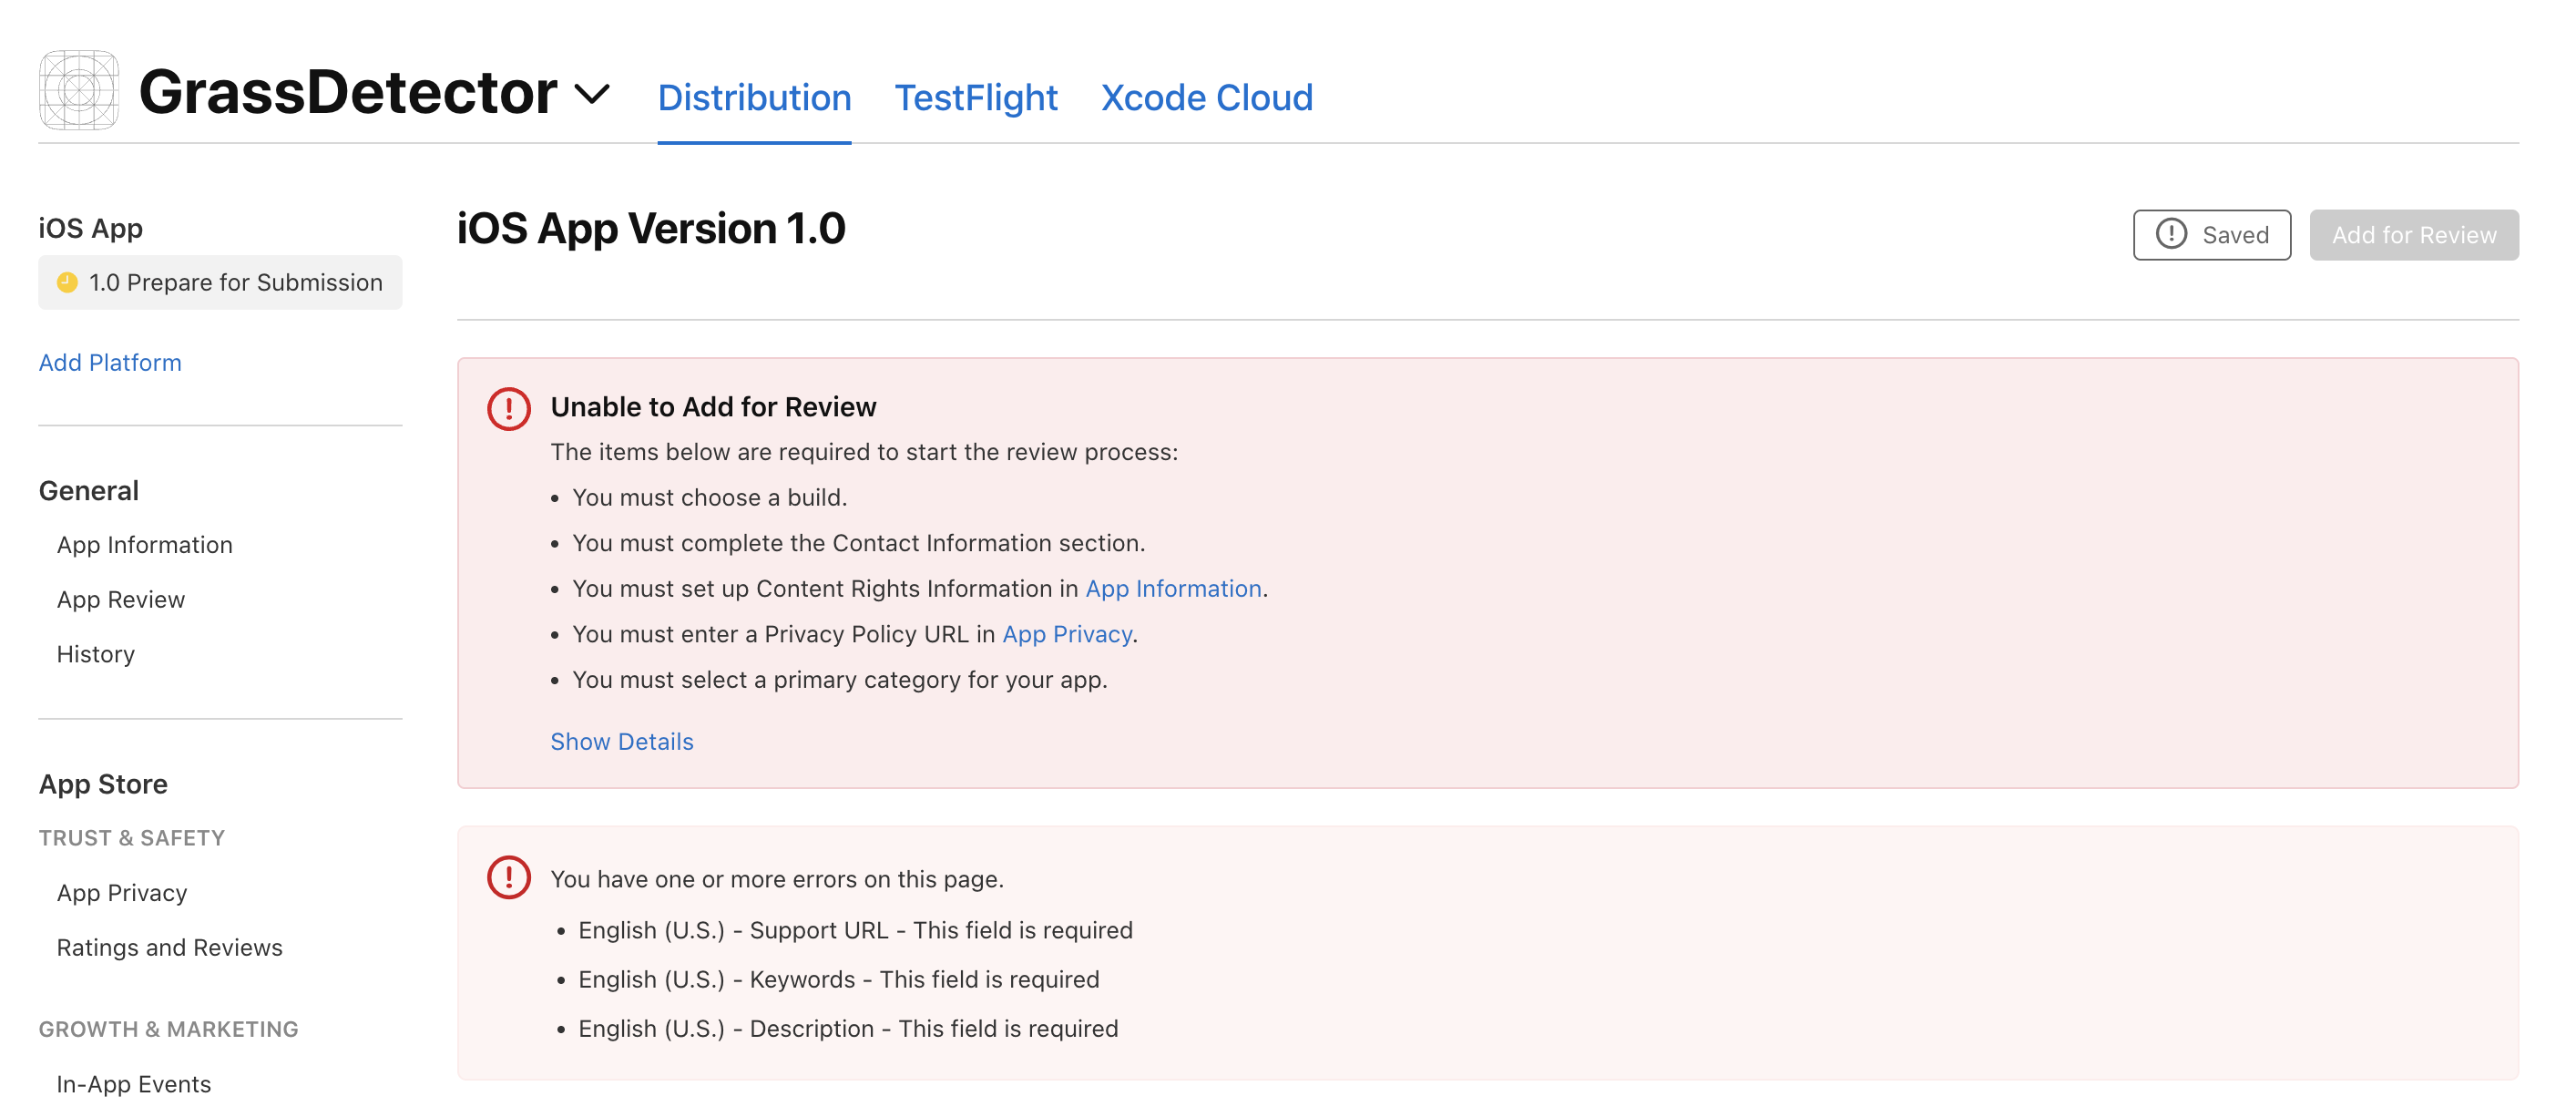
## Complete Apple requirements

Apple requires several items before your app can be reviewed. Work through each section in App Store Connect.

<Frame caption="Required items checklist in App Store Connect">
  <img src="https://mintcdn.com/create/dPp8LRxEG75nRlMj/images/mobile/apple-required-items.png?fit=max&auto=format&n=dPp8LRxEG75nRlMj&q=85&s=5c9274e1095c502c29a0356a36237dbf" alt="Required items checklist in App Store Connect" width="2828" height="1226" data-path="images/mobile/apple-required-items.png" />
</Frame>

<Steps>
  <Step title="Upload screenshots">
    You can [generate screenshots](#generate-screenshots) directly in Anything or upload your own.

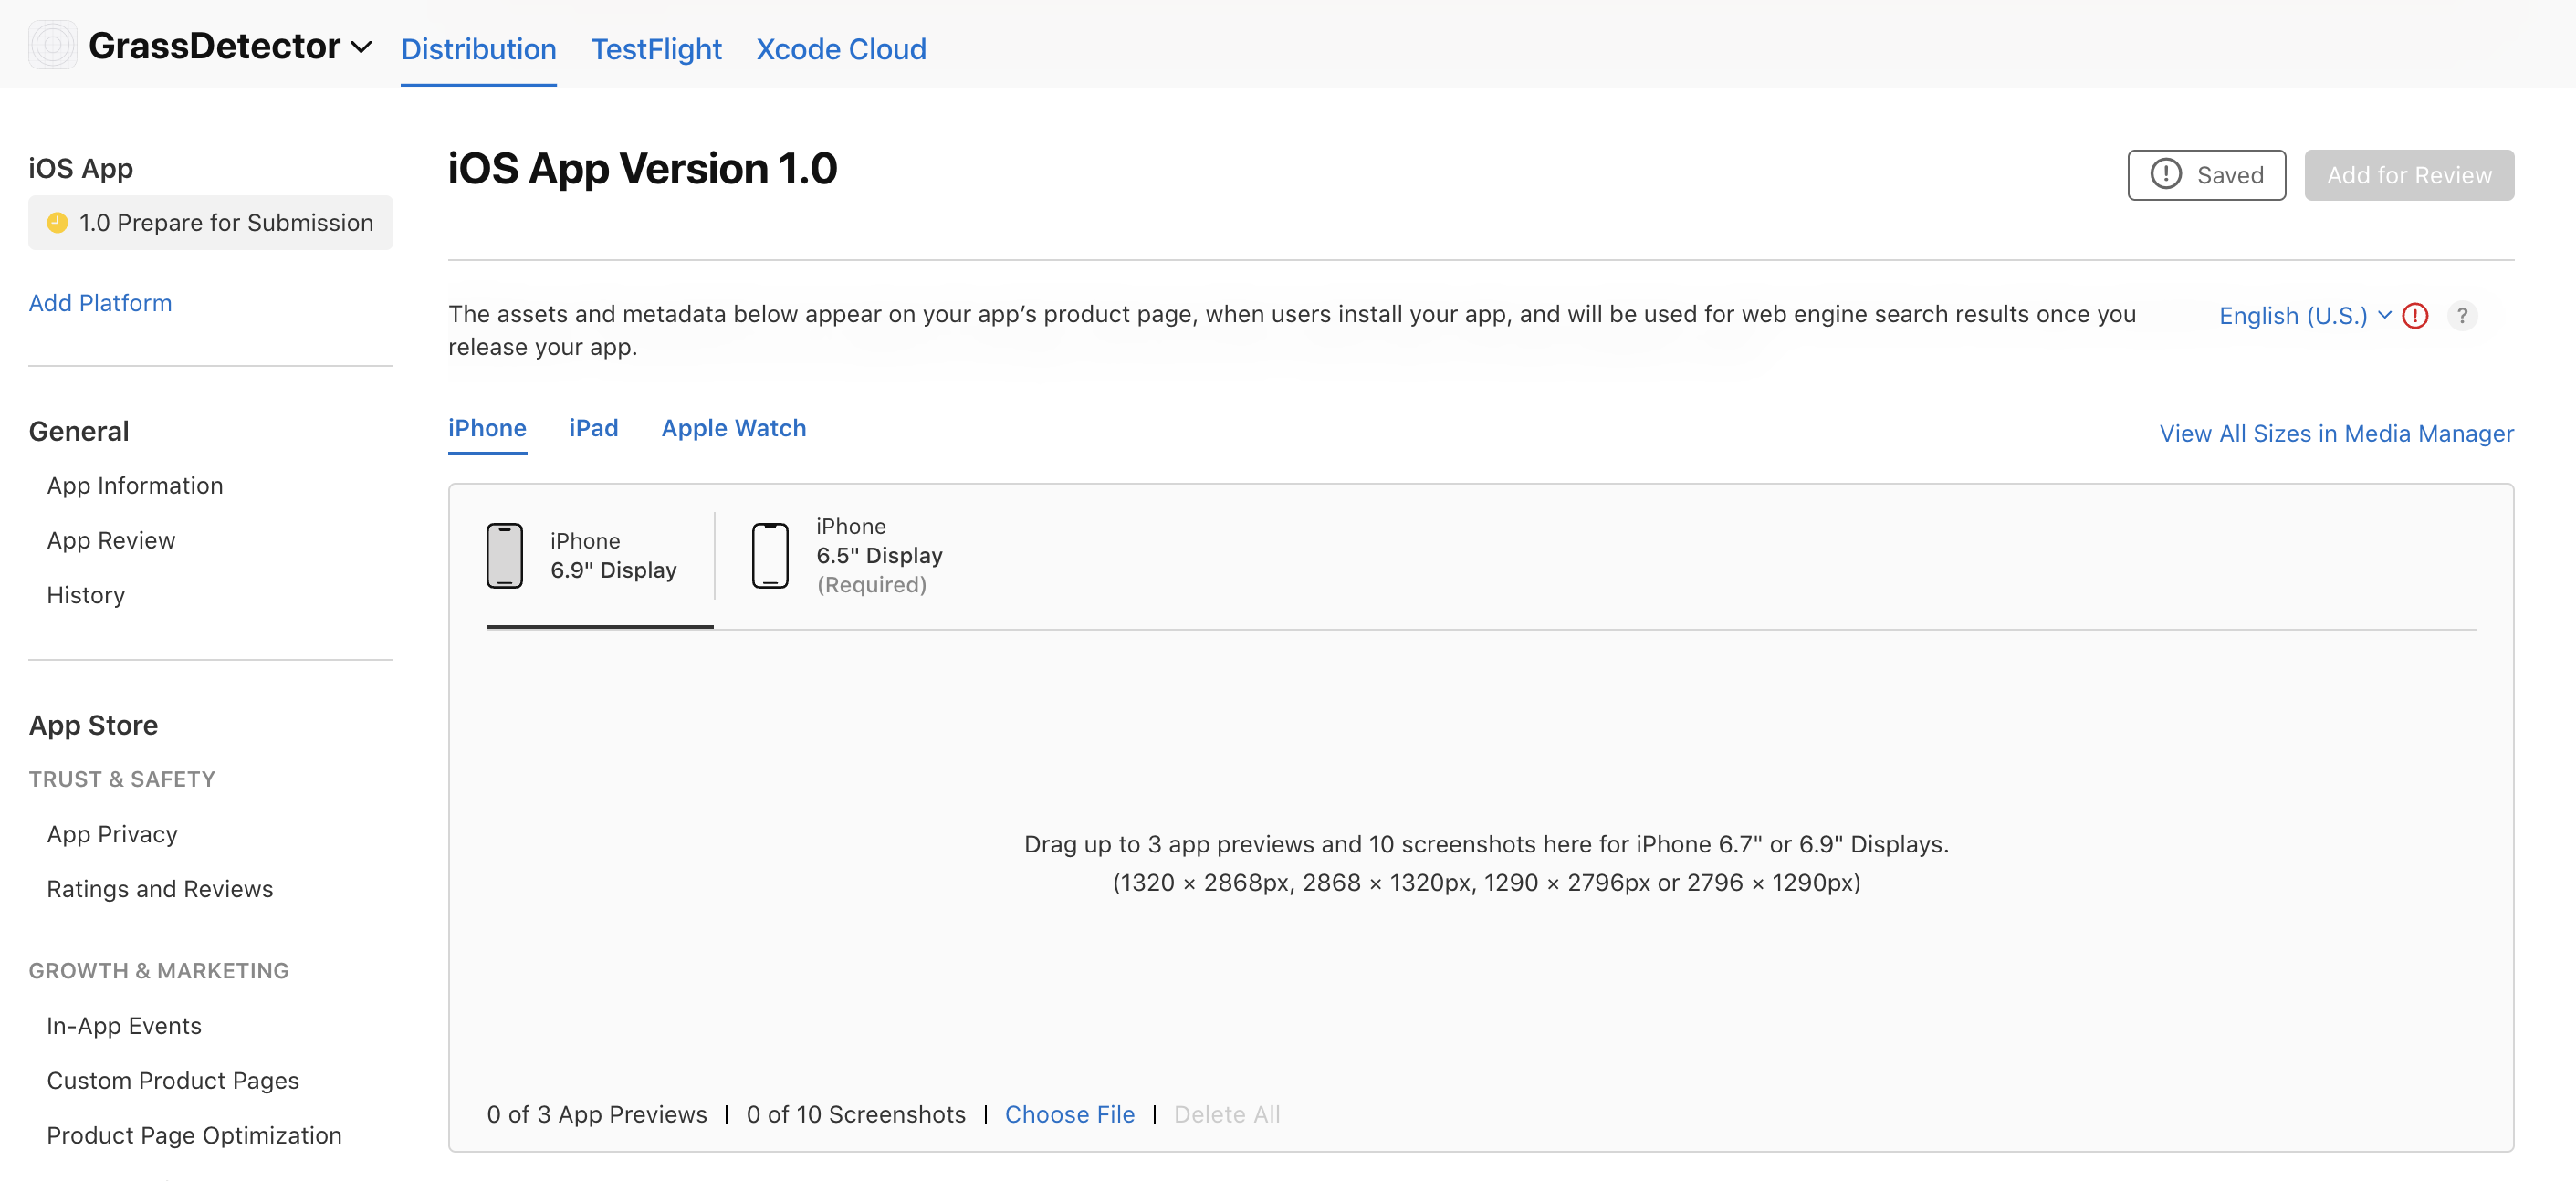
    In the **Prepare for Submission** tab, scroll to the screenshot section and upload:

    * iPhone screenshots (6.5" and 5.5" displays)
    * iPad screenshots (12.9" and 11" displays)
    * Screenshots showing key features, high quality and properly sized

    <Tip>
      Already published and need to swap screenshots? Ask the agent to update or remove your App Store screenshots and it handles it in App Store Connect for you.
    </Tip>

    <Frame caption="Screenshot upload section in App Store Connect">
      <img src="https://mintcdn.com/create/dPp8LRxEG75nRlMj/images/mobile/apple-screenshot.png?fit=max&auto=format&n=dPp8LRxEG75nRlMj&q=85&s=ba2c3830c9b578e8c123deedf595d790" alt="Screenshot upload section" width="2822" height="1294" data-path="images/mobile/apple-screenshot.png" />
    </Frame>
  </Step>

  <Step title="App information">
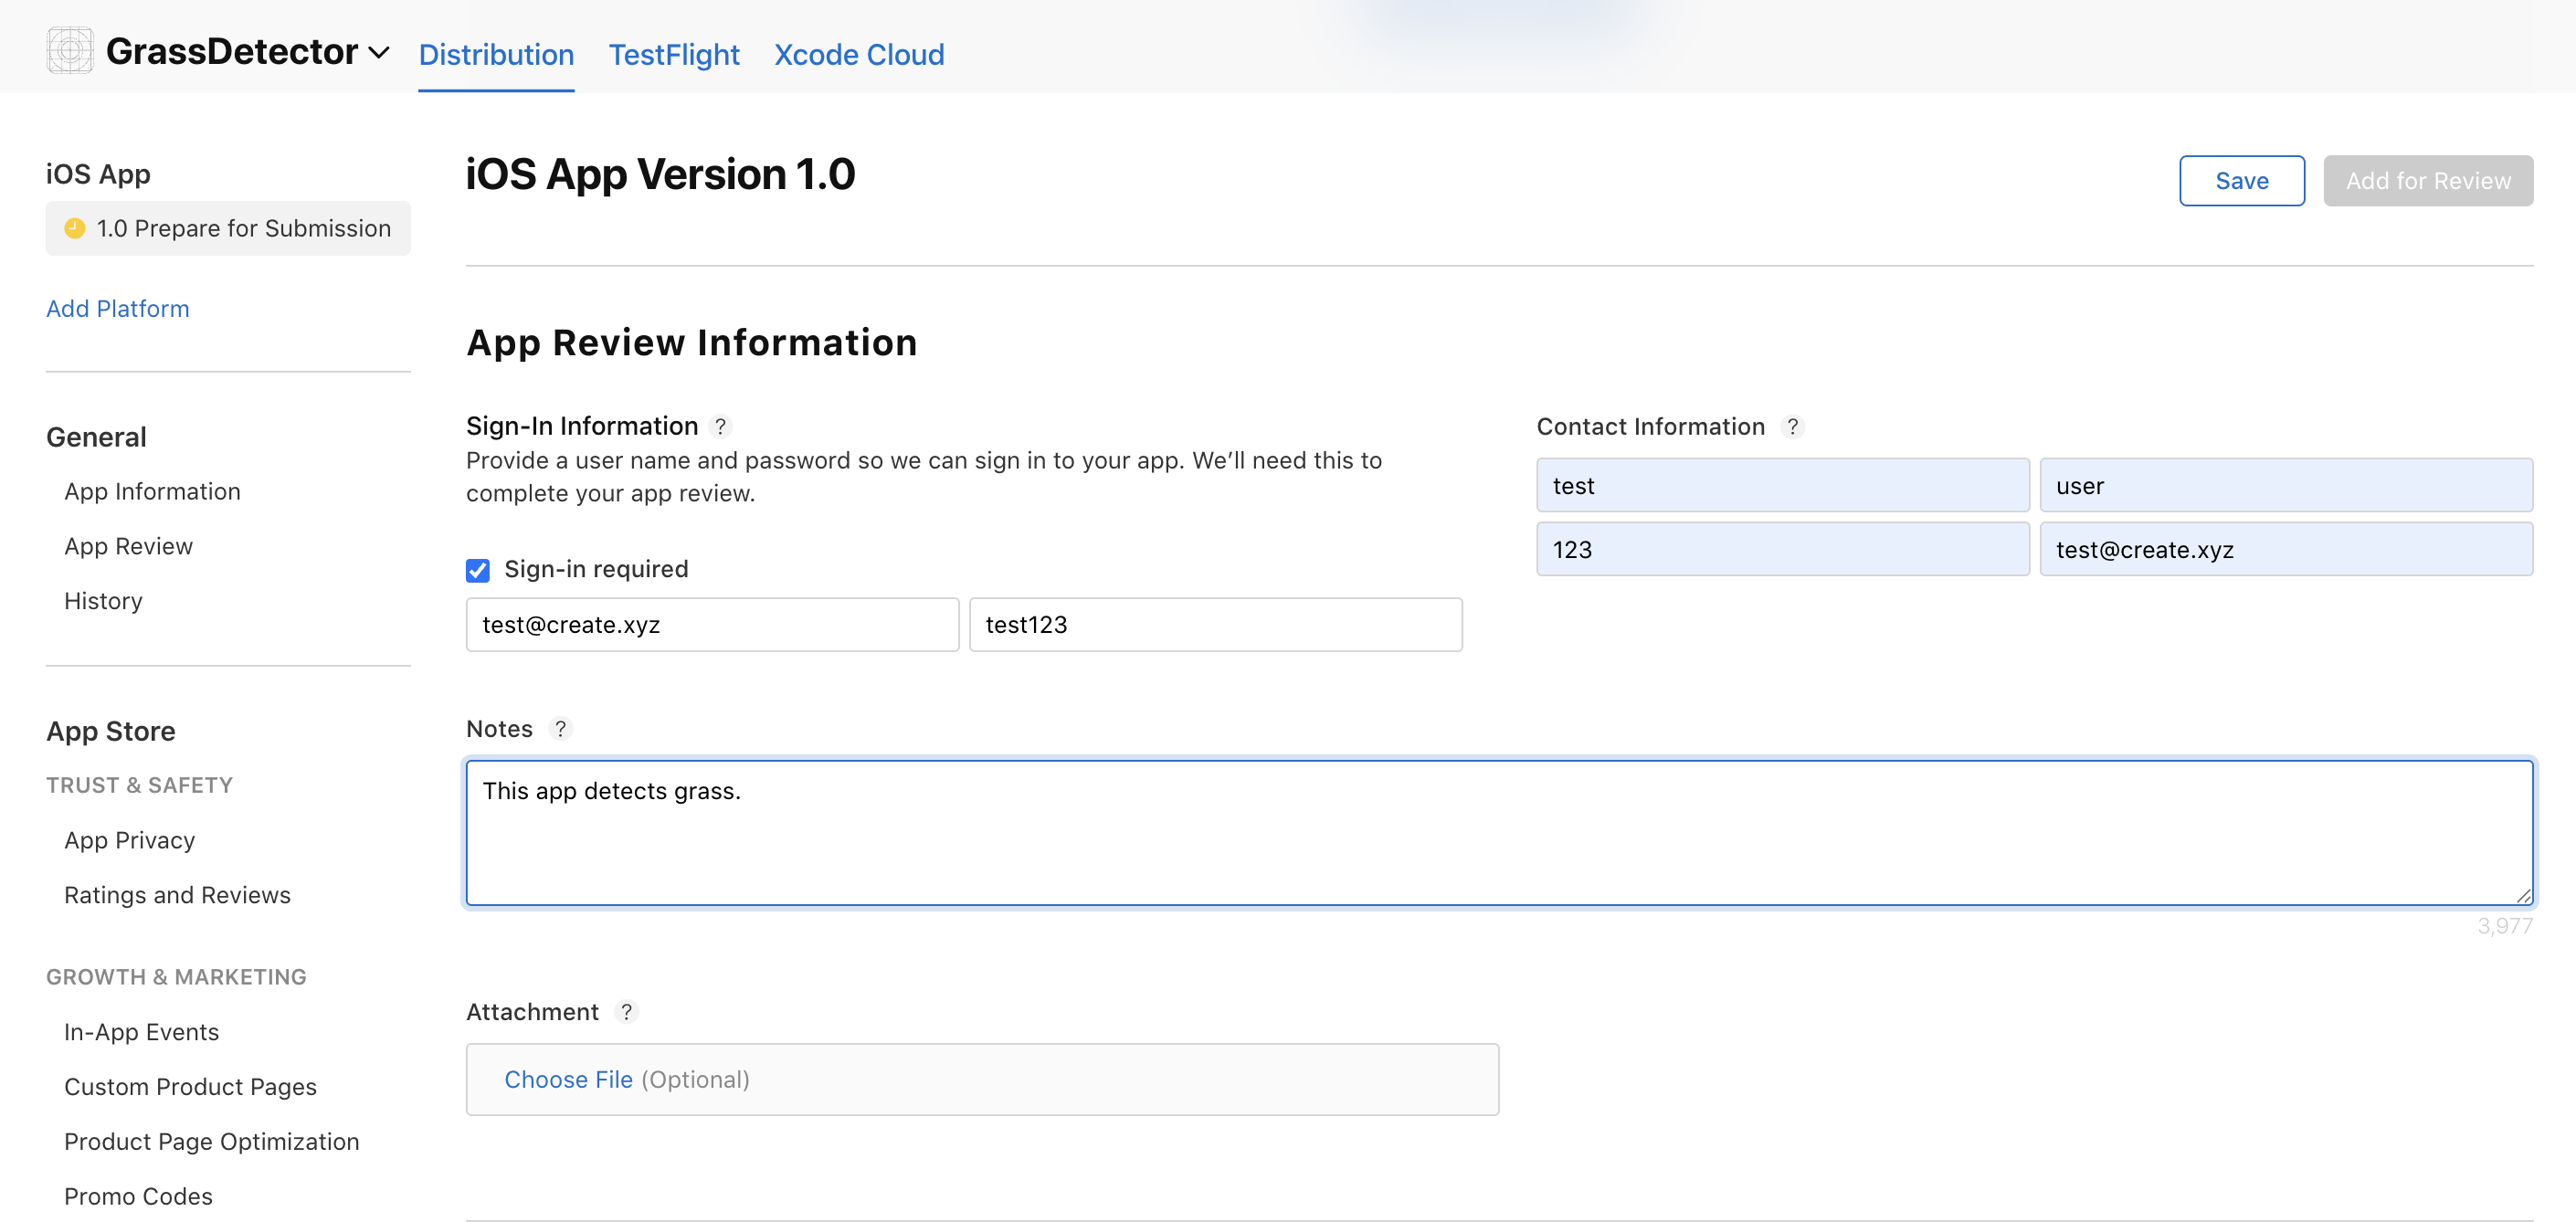
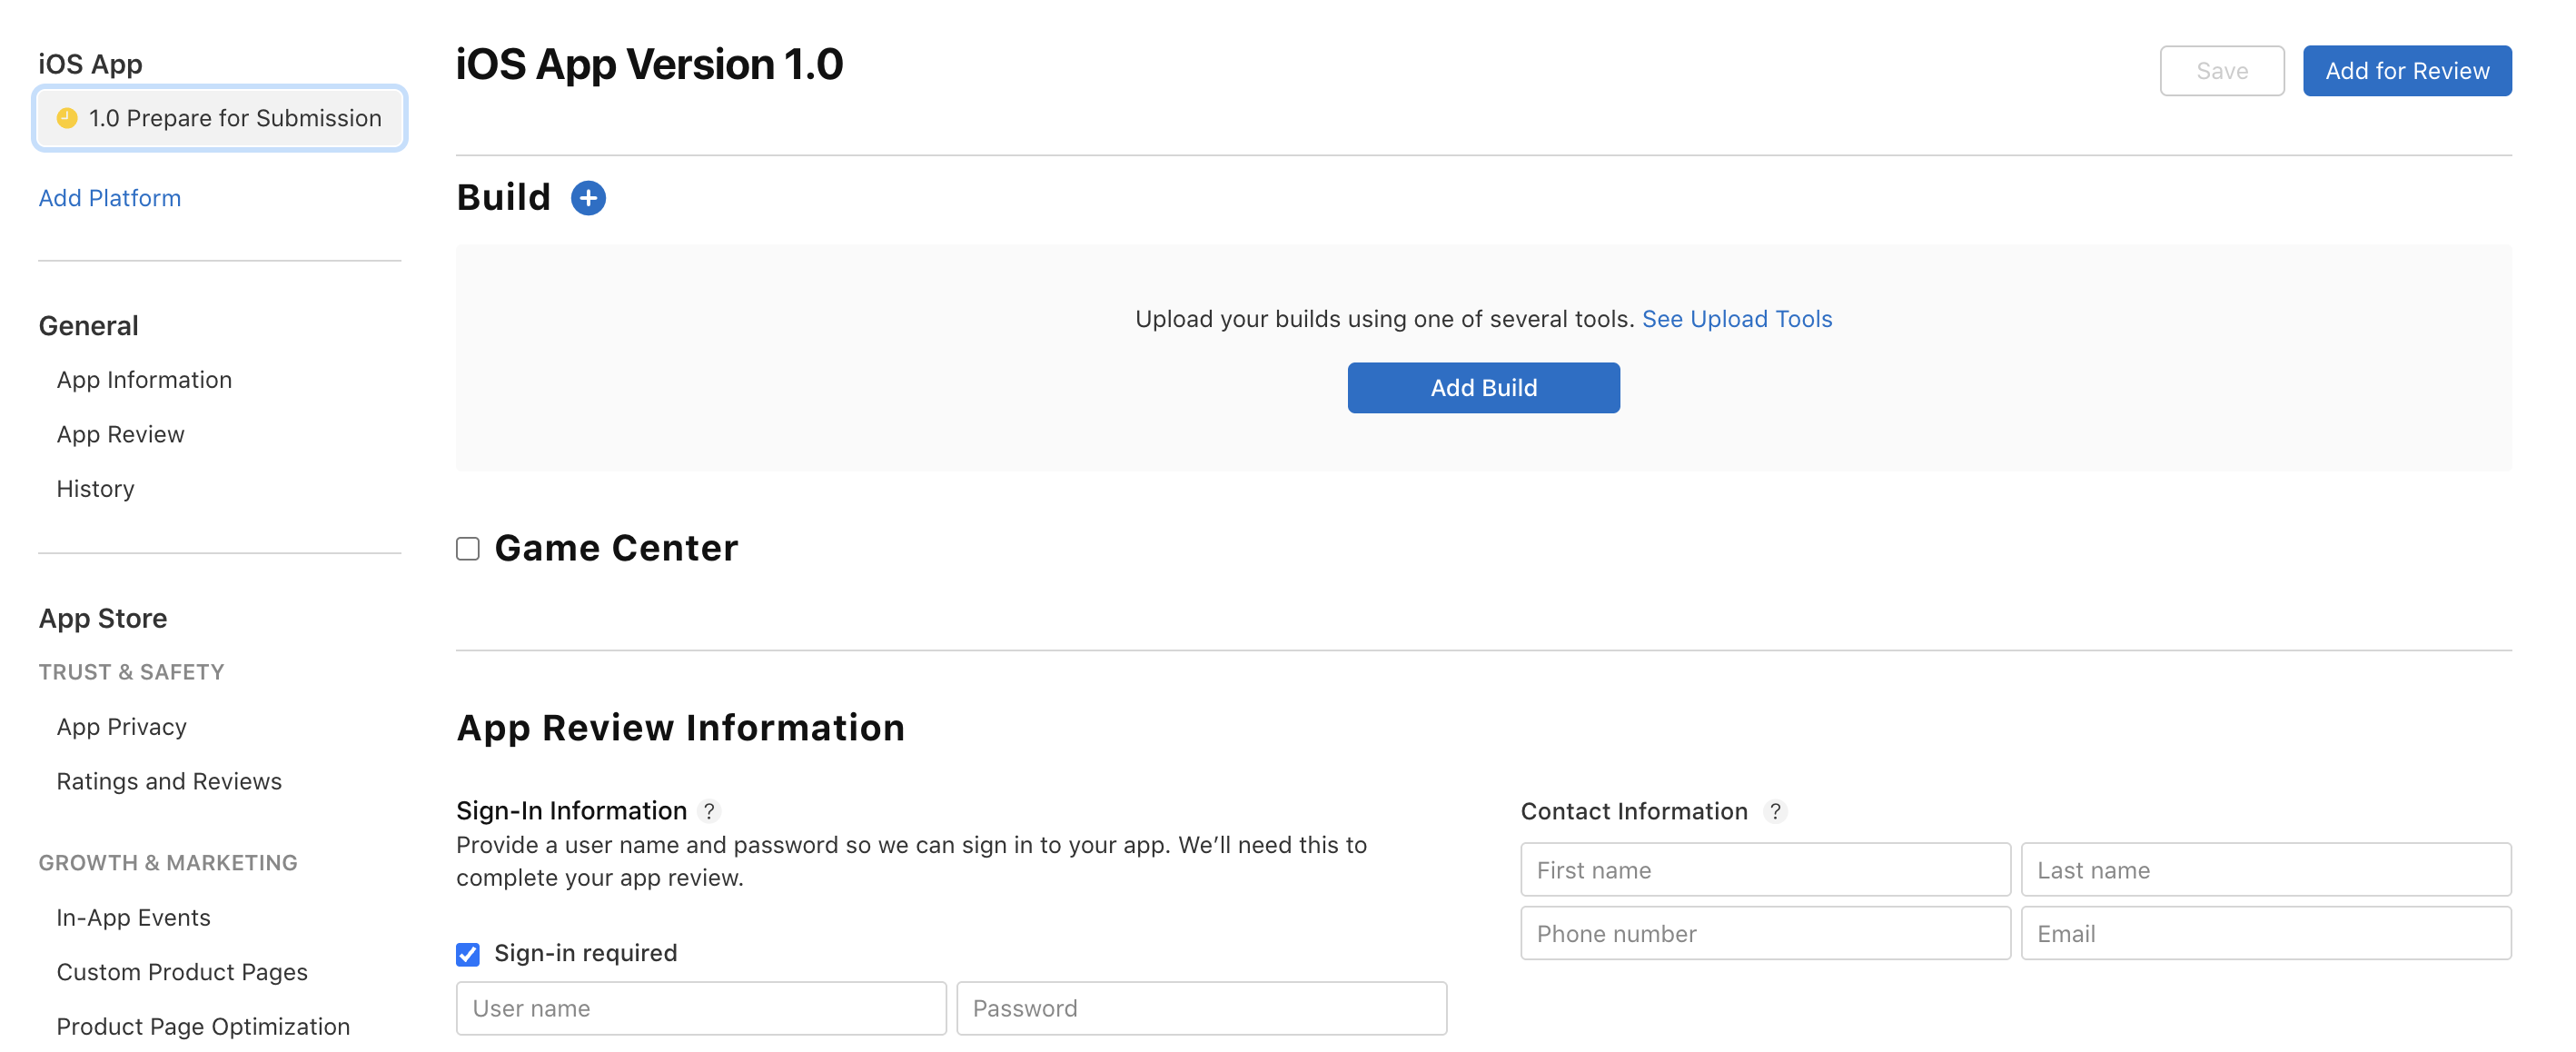
    Fill out the **Contact Information** section. If your app requires sign-in, provide a test account for Apple's review team.

    <Frame caption="Contact information form">
      <img src="https://mintcdn.com/create/dPp8LRxEG75nRlMj/images/mobile/apple-contact-info.png?fit=max&auto=format&n=dPp8LRxEG75nRlMj&q=85&s=fb9f47d8ac28639325c8b625d8994a4d" alt="Contact information form in App Store Connect" width="2820" height="1338" data-path="images/mobile/apple-contact-info.png" />
    </Frame>
  </Step>

  <Step title="General information">
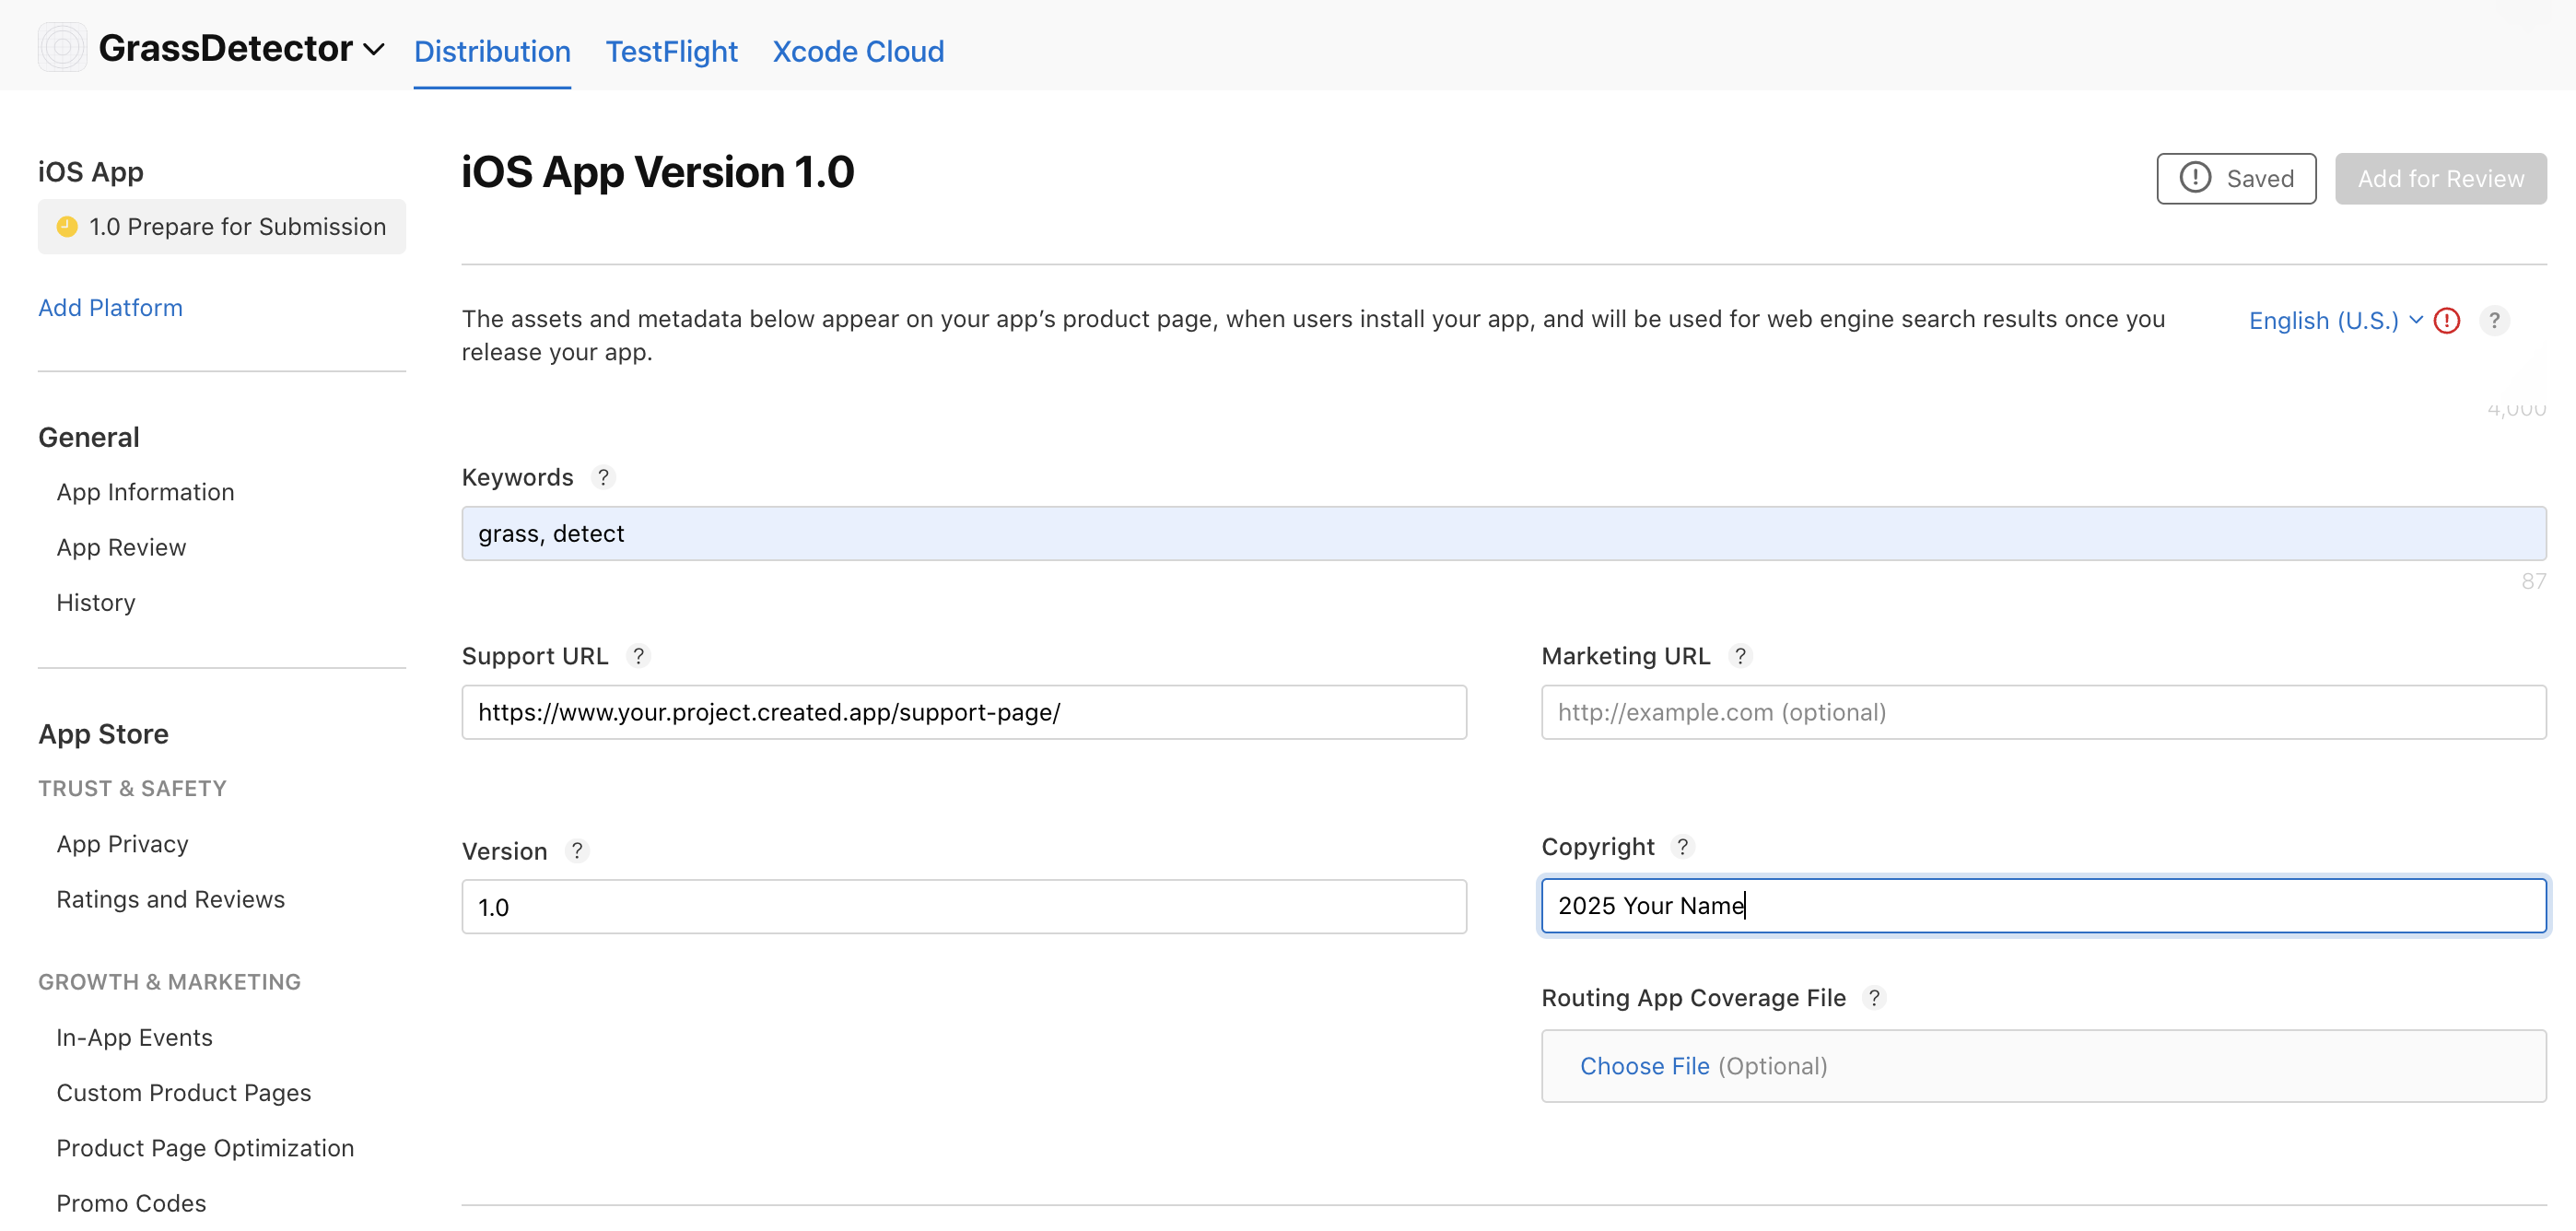
    * Add your support URL from your Anything project
    * Declare copyright information
    * Add relevant keywords
    * Select an appropriate category

    <Frame caption="General information section">
      <img src="https://mintcdn.com/create/dPp8LRxEG75nRlMj/images/mobile/apple-general-info.png?fit=max&auto=format&n=dPp8LRxEG75nRlMj&q=85&s=ae3429aecc2fb5a2a6224c9667aaa4db" alt="General information section in App Store Connect" width="2796" height="1336" data-path="images/mobile/apple-general-info.png" />
    </Frame>
  </Step>

  <Step title="Age rating">
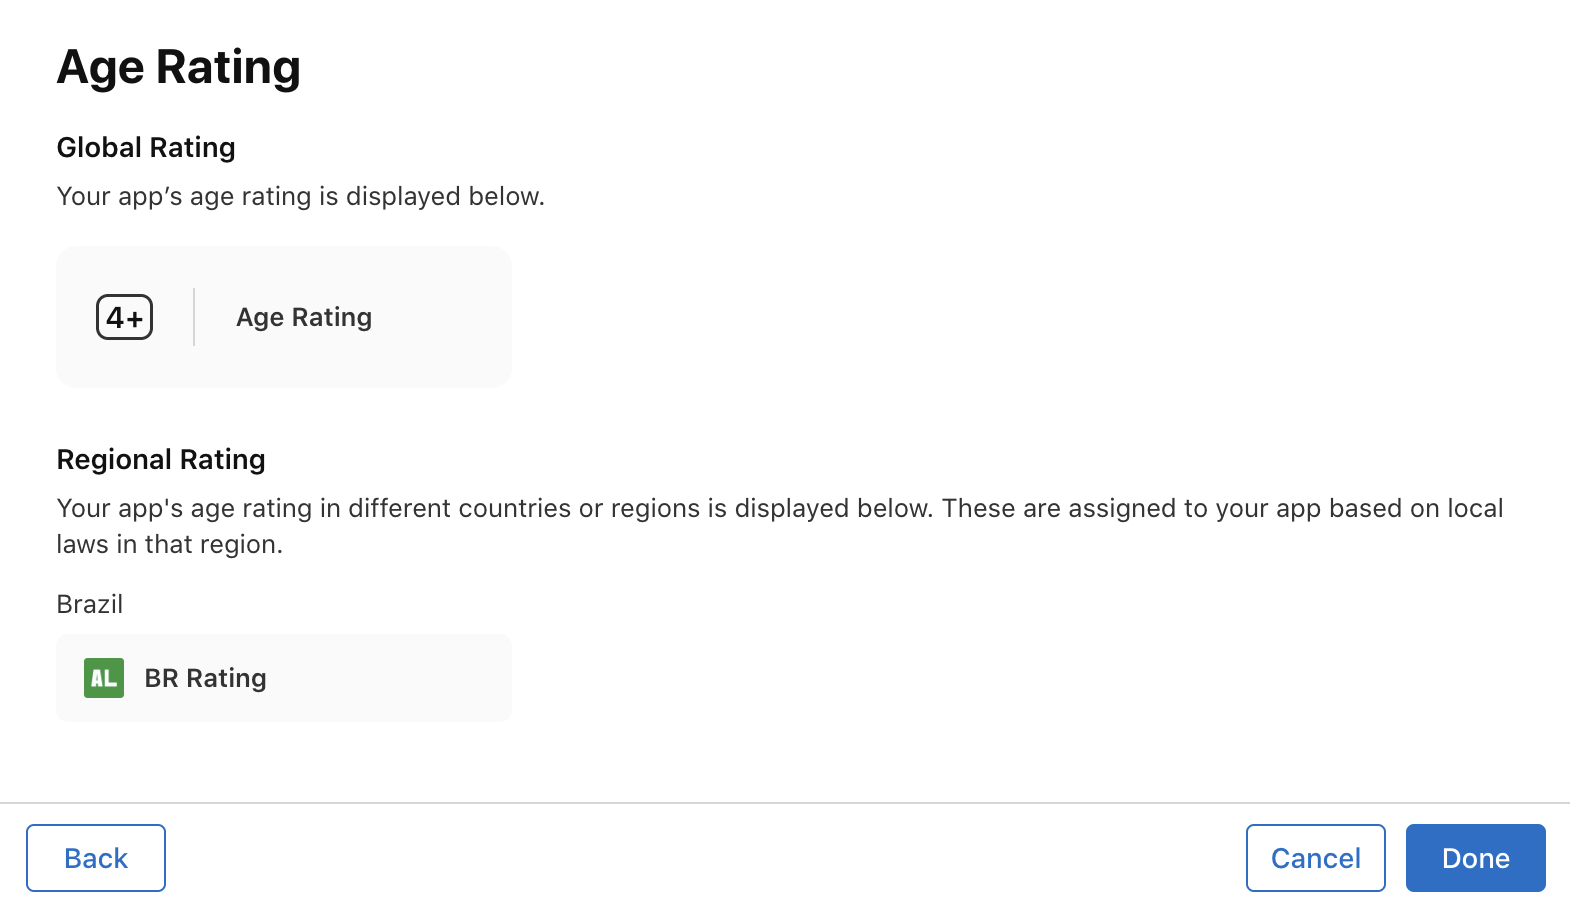
    Fill out the **Age Rating** section underneath General Information.

    <Frame caption="Age rating questionnaire">
      <img src="https://mintcdn.com/create/dPp8LRxEG75nRlMj/images/mobile/apple-age-rating.png?fit=max&auto=format&n=dPp8LRxEG75nRlMj&q=85&s=dd16d020e5ab24e72fdd54202e15394c" alt="Age rating questionnaire in App Store Connect" width="1570" height="904" data-path="images/mobile/apple-age-rating.png" />
    </Frame>
  </Step>

  <Step title="Choose a build">
    In the **Prepare for Submission** tab, scroll to the Build section and select the version you want to submit. The latest build appears at the top.

    <Frame caption="Build selection in App Store Connect">
      <img src="https://mintcdn.com/create/dPp8LRxEG75nRlMj/images/mobile/apple-build.png?fit=max&auto=format&n=dPp8LRxEG75nRlMj&q=85&s=6106cb5d97162dfc6ad209b1945ed64f" alt="Build selection in App Store Connect" width="2836" height="1158" data-path="images/mobile/apple-build.png" />
    </Frame>
  </Step>

  <Step title="Privacy policy and data">
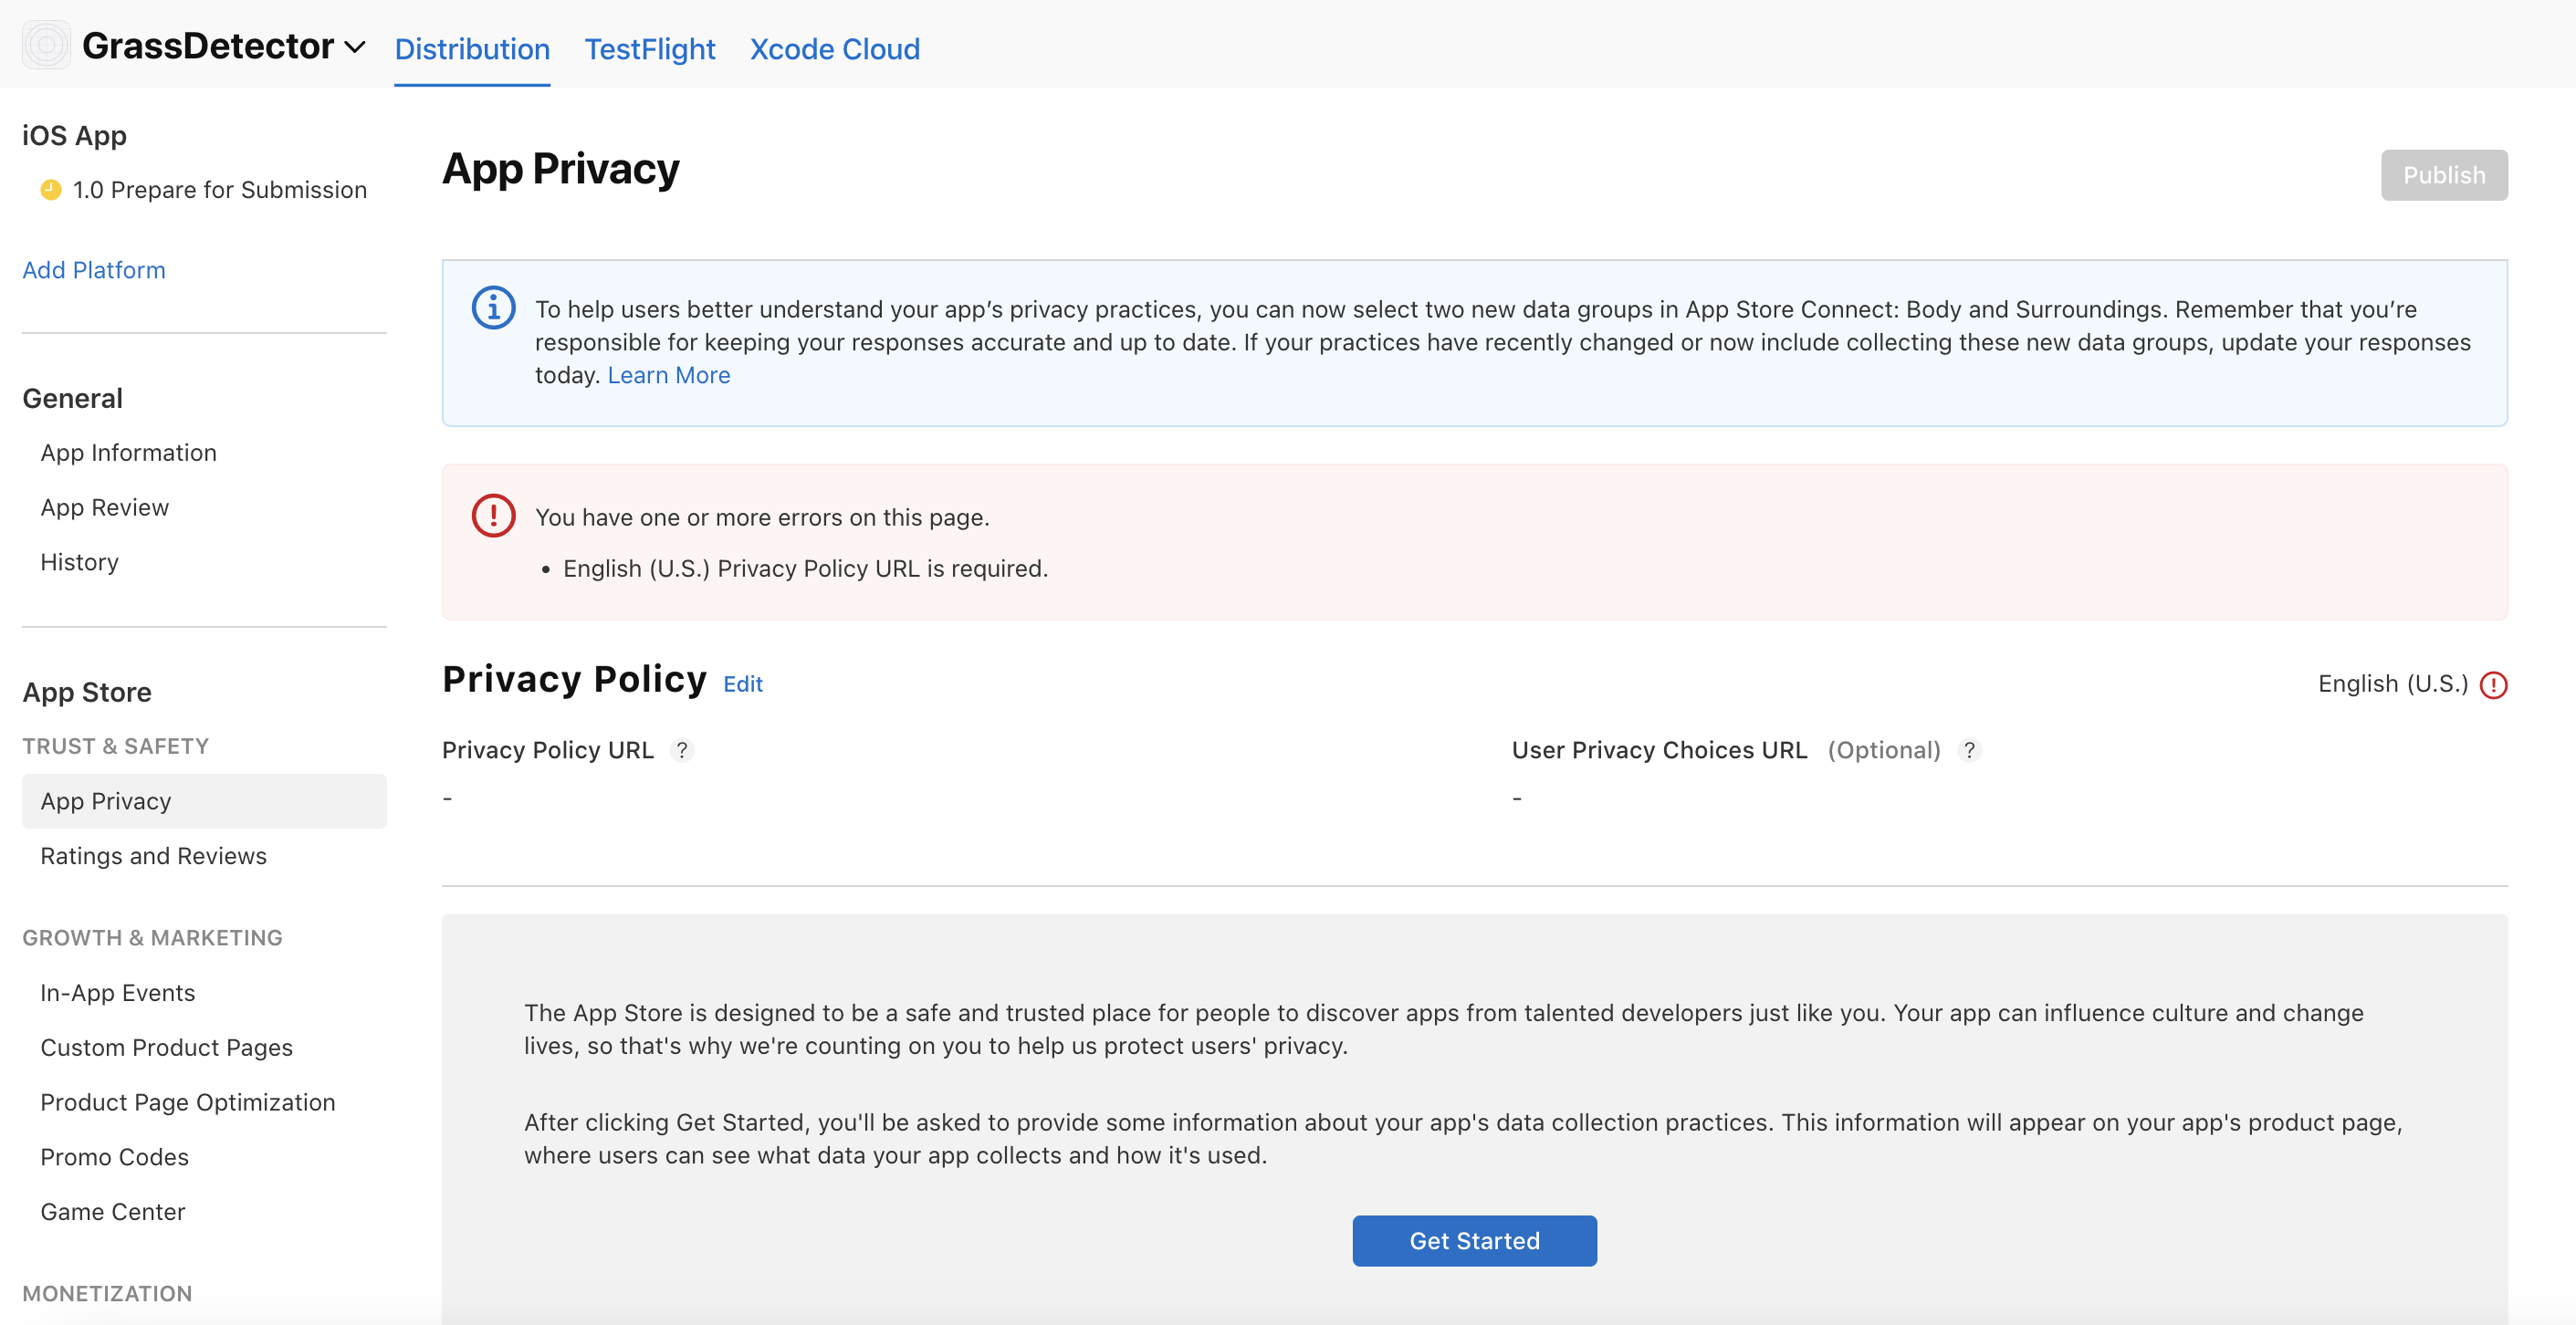
    * Create a privacy policy URL using [Termly](https://www.termly.io)
    * Complete the data collection review
    * Declare any third-party data collection
    * Specify data usage and storage

    <Frame caption="App privacy section">
      <img src="https://mintcdn.com/create/dPp8LRxEG75nRlMj/images/mobile/apple-app-privacy.png?fit=max&auto=format&n=dPp8LRxEG75nRlMj&q=85&s=c2f74949785b7f3383becf22074b6bff" alt="App privacy section in App Store Connect" width="2822" height="1452" data-path="images/mobile/apple-app-privacy.png" />
    </Frame>
  </Step>

  <Step title="Pricing and distribution">
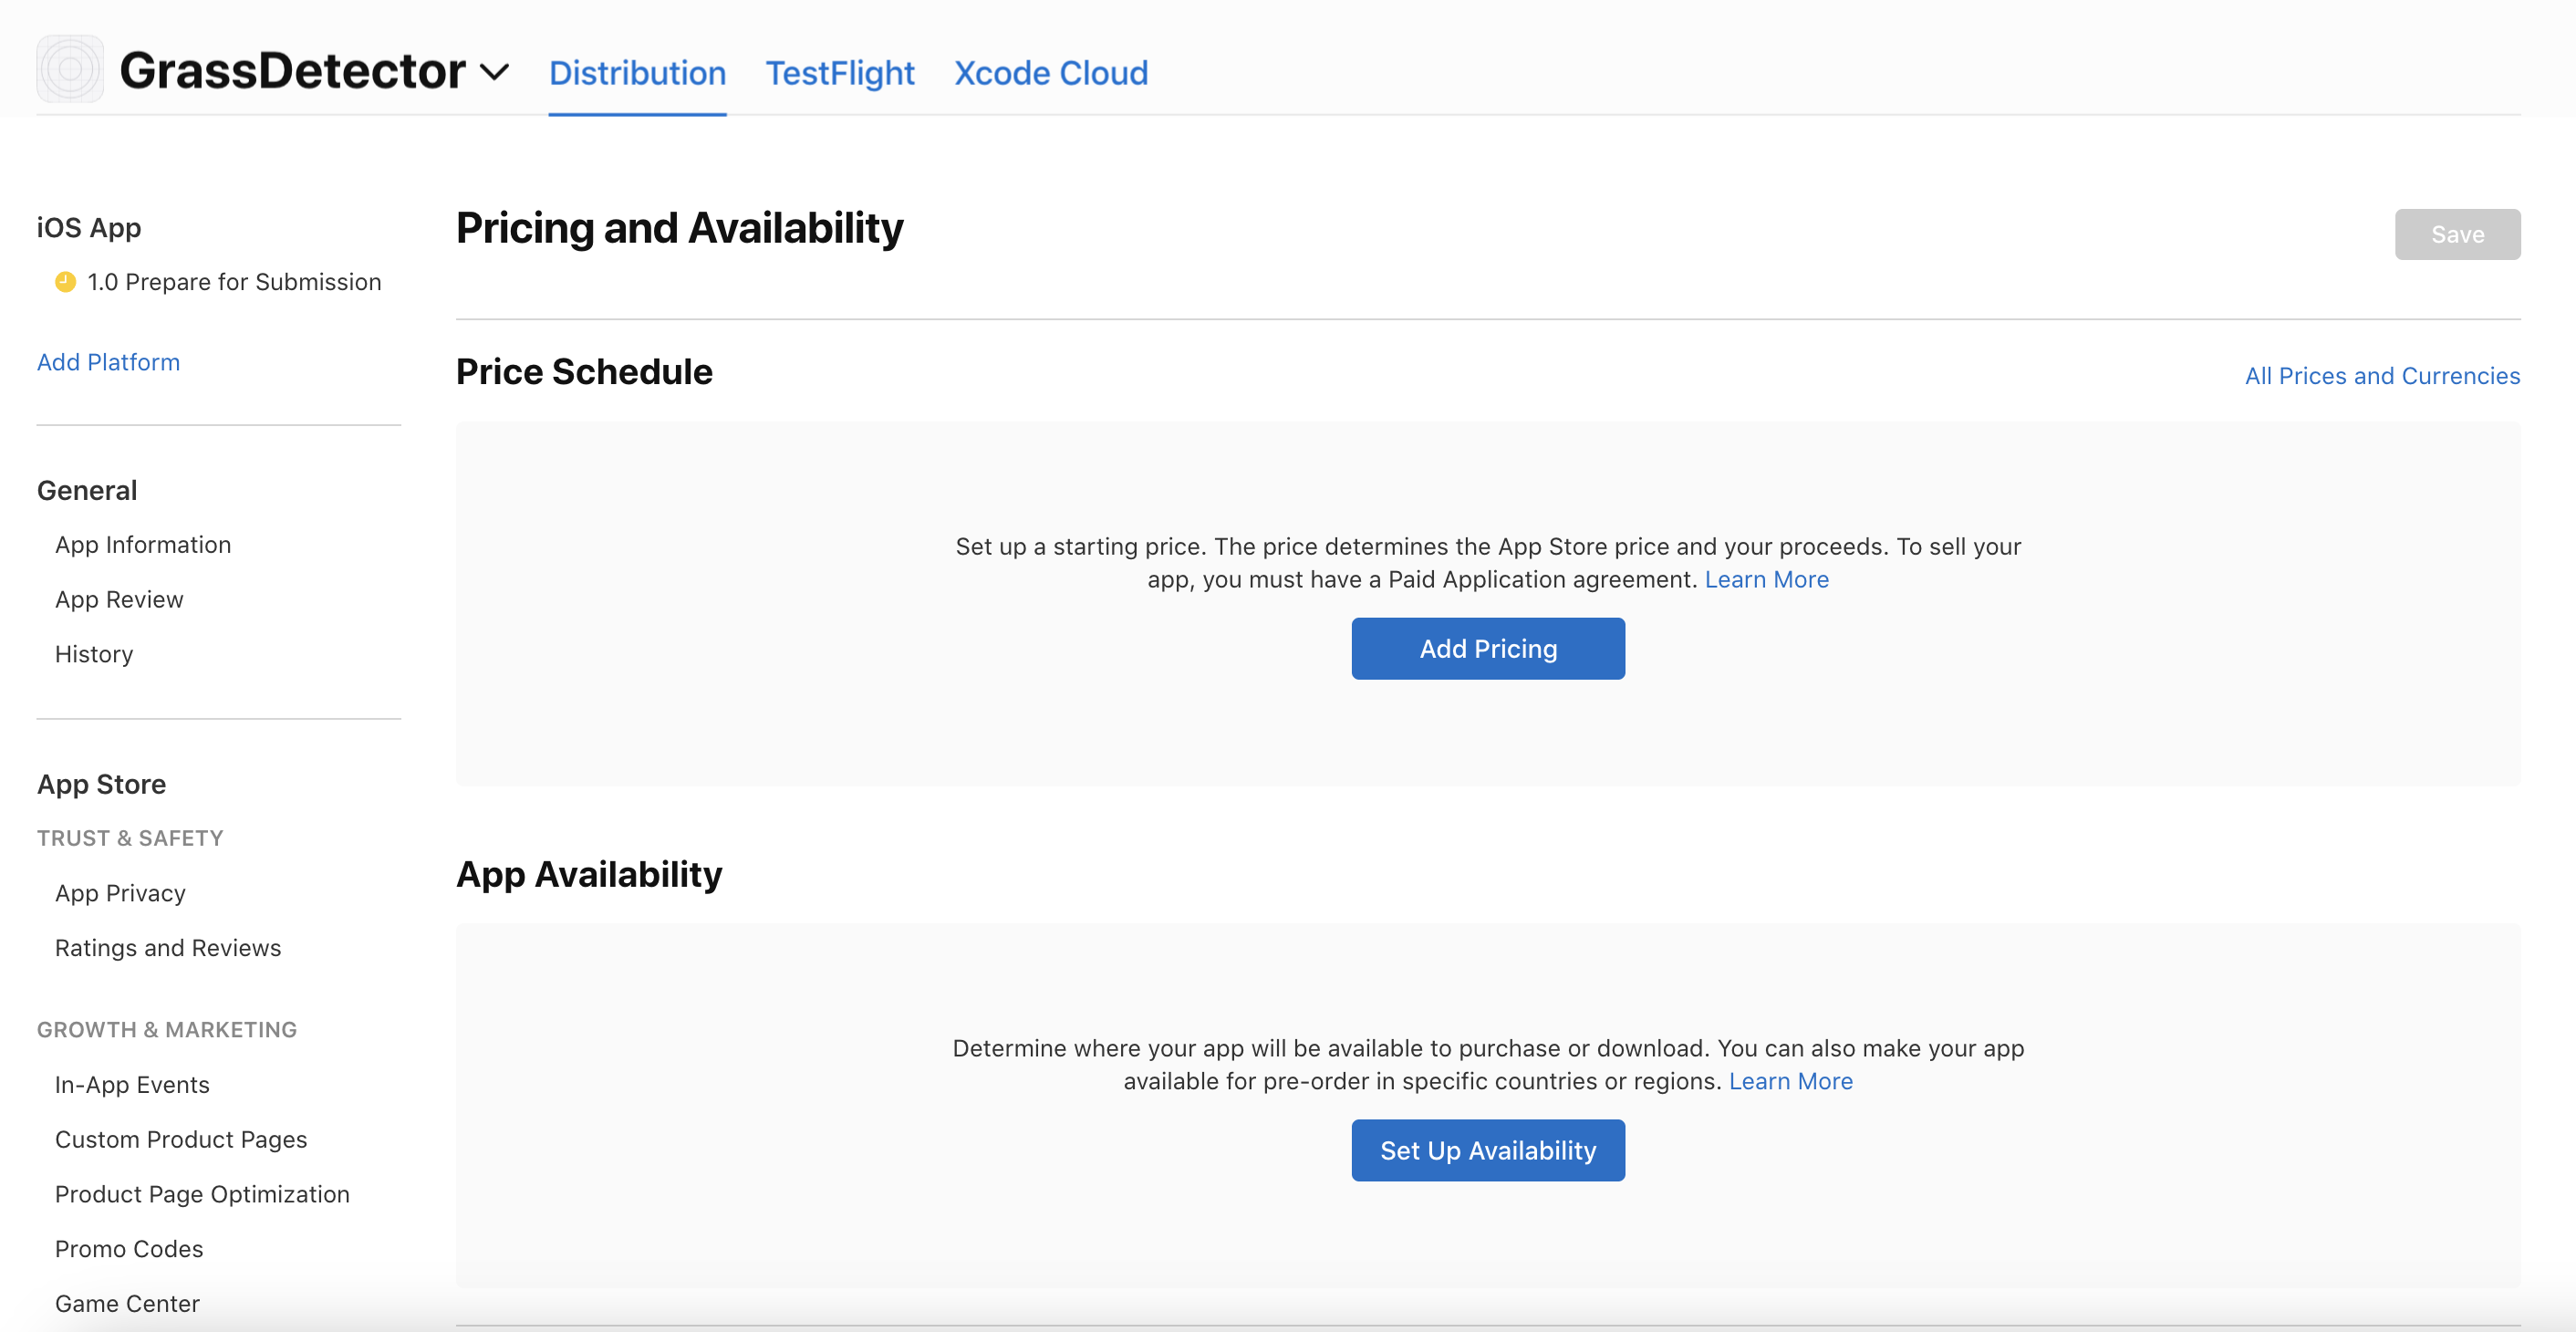
    * Set your app price (free or paid)
    * Configure in-app purchases if applicable
    * Set availability by region

    <Note>
      Apple requires you to submit your country's tax form to earn revenue. [Learn more here](https://developer.apple.com/help/app-store-connect/manage-tax-information/provide-tax-information/).
    </Note>

    <Frame caption="Pricing and availability settings">
      <img src="https://mintcdn.com/create/dPp8LRxEG75nRlMj/images/mobile/apple-app-pricing.png?fit=max&auto=format&n=dPp8LRxEG75nRlMj&q=85&s=fb2535a6bd2759eccc735535826f314e" alt="Pricing and availability settings in App Store Connect" width="2824" height="1460" data-path="images/mobile/apple-app-pricing.png" />
    </Frame>
  </Step>

  <Step title="Submit for review">
    Submit your app and monitor the review status in App Store Connect. Respond to Apple's review feedback quickly.

    <Tip>
      Initial reviews typically take 1-3 business days. Make sure all required fields are complete before submitting to avoid delays.
    </Tip>
  </Step>
</Steps>

## Generate screenshots

Anything includes a screenshot generator that creates App Store ready images for you.

<Frame>
  <video controls muted autoPlay loop playsInline width="100%" style={{ borderRadius: "8px" }}>
    <source src="https://mintcdn.com/create/zlINEqXRf4U2NqZC/images/app-store-screenshots-demo.mp4?fit=max&auto=format&n=zlINEqXRf4U2NqZC&q=85&s=34828b760e18a856850319f3ab15744f" type="video/mp4" data-path="images/app-store-screenshots-demo.mp4" />
  </video>
</Frame>

<Steps>
  <Step title="Open the screenshot wizard">
    Go to **Project Settings** and find the **App Store Screenshots** section. Click **Generate Screenshots** to open the wizard.
  </Step>

  <Step title="Choose devices">
    Select which device sizes you need: iPhone, iPad, or both. The generator creates properly sized images for each.
  </Step>

  <Step title="Pick your source">
    Choose a mobile page from your app to screenshot, or upload your own custom images.
  </Step>

  <Step title="Customize the layout">
    Pick a template layout: caption on top, caption on bottom, or no caption. Edit the caption text and set the style. Click the magic wand button to generate captions and styles with AI.
  </Step>

  <Step title="Choose from variations">
    Each generation creates 5 different variations. Browse through them and pick your favorites. Download images individually or grab all of them as a ZIP file. Delete any variations you do not need.
  </Step>

  <Step title="Remix to iterate">
    Click **Remix** on any screenshot to generate new variations with the same settings. iPhone and iPad sizes generate in parallel so you can keep iterating without waiting.
  </Step>
</Steps>

***

<CardGroup cols={2}>
  <Card title="Getting started" icon="rocket" href="/apps/mobile/getting-started">
    Build your first mobile app
  </Card>

  <Card title="Device capabilities" icon="mobile" href="/apps/mobile/device-capabilities">
    Available device features
  </Card>

  <Card title="Verify Apple account" icon="circle-check" href="/apps/mobile/verify-apple-developer-account">
    Check your account is active
  </Card>

  <Card title="Submit to Play Store" icon="google-play" href="/apps/mobile/publishing-android">
    Go live on Play Store
  </Card>

  <Card title="Testing" icon="bug" href="/apps/mobile/testing">
    Test and debug your app
  </Card>

  <Card title="Mobile overview" icon="grid-2" href="/apps/mobile">
    Back to mobile guide
  </Card>
</CardGroup>
